I am also sharing with you a photo step by step. This is more or less the same piece just in a different colour palette. They are not 100% identical but they are very similar. The spread created in my art journal was the concept art or test run if you will to the finished piece.
Materials used
- Acrylic Paint - Deco Art and Dylusions
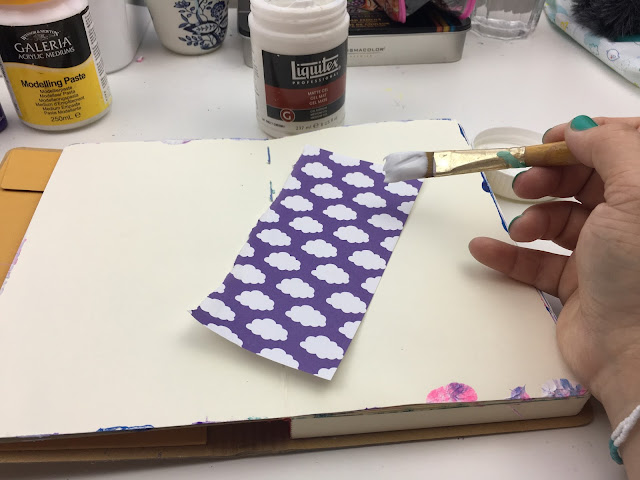
- Liquitex Gel Mat Medium
- Windsor & Newton Modelling Paste
- Origami Paper (I think from Flying Tiger 2016)
- Various Brushes and Palette Knife
- Posca Paint Pen in white
- Uniball black pen
- Stencil (unknown)
- Crayola Portfolio Oil Pastels
- Dylusions Journal
- Tim Holtz Distress Stain
The Process
Firstly I ripped up my sheet of origami paper and adhered it to the top of the page with matt medium
I then adhered a second piece to the bottom left to give the spread a bit of balance.
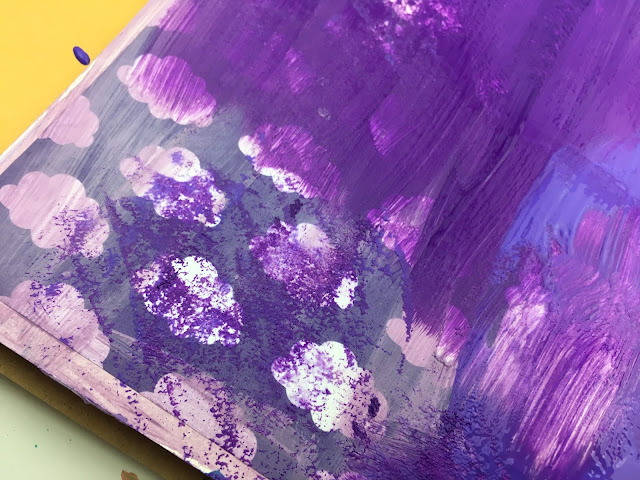
I used my lightest paint first and just randomly painted on to the page.
This particular paint is fairly translucent which was intentional. I wanted to add some colour to the page but I also still wanted to see the pattern on the paper poking through.
I then repeated this process of adding paint randomly with a couple of different colours.
I enjoyed the process, it is very therapeutic randomly adding paint to a page and letting yourself go. I was a bit too enthusiastic though and covered up the paper more than I wanted to. To rectify this I used a baby wipe and gently removed some of the paint.
With the wet paint still on my baby wipe I went over the page randomly removing paint from one section and then gently dabbing and scraping it onto another which gives some interesting textural results.
Then it was time to mix up my modelling paste. I used the palest colour that I first used on my page.
I applied it to the page using a palette knife over my stencil.
I always leave my stencil sitting in place for a small time, about a minute just to let it set a little before removing it. I just like to make sure it's all there.
Modelling paste, depending on it's thickness can take a little while to dry so you have to be patient. It's worth it though!
Once everything was dry I then used a black pen to go in add some little doodles. I like doing this as I think it gives the background more visual interest.
I then used a white Posca paint pen to add even more details.
I actually thought I was done for the background when I glance at my desk and saw my distress stains and the violet screamed out to be used. I dabbed it on (squeezed the bottle really hard) making it all juicy, then tipped my page up to allow the ink to run down all nicely.
Here is how my background looks before I paint my cat on! Lots of yummy goodness. I made sure to keep a photograph of it so that I can print it out and use later for collage!
Next it was time to actually start painting my cat. So on goes the white paint.
I actually used a couple of coats to make sure it was as opaque as I wanted.
I gave my cat two light coats. I didn't want him to be stark white, I wanted some of that beautiful purple to show through. Once it was dry I pencilled on my face.
I coloured the elements in with my Posca paint pens - super quick and easy and fast drying too.
Here he is ready for his last 'application' of artyness.
And there we have him, all finished! I am really happy with him. I really hope you enjoyed my little 'how to'. At some stage I may add a quote or some journalling to the right page but for now I am happy and calling him done. If you decide to give it a go yourself please do tag me in your photos on social media (I am everywhere as @mrsbrimbles) as I would genuinely love to see yours.
This blog post was created as my application for the Colour Arte design team (wish me luck 'eh!). Unfortunately I do not currently own any of the Colour Arte products
although I have heard impeccable things about them so I created this
with the products that I do have.
Please check out the Colour Arte website to see their range of art supplies and for more art tutorials and inspiration.


No comments:
Post a Comment