I have been guest blogging again and I thought you might like to go and check it out...
little panda crafts: guest post // mrs. brimbles and bunny sewing: *This is a guest post done by Mrs. Brimbles. You can visit her fabulous blog here ! :) * ~~~~~ Hi, I am Anna although most commonly kno...

Wednesday, 28 May 2014
Tuesday, 27 May 2014
Decorated Packages - Guest Blog Post from MJ of Little Panda Crafts
I am delighted to have a friend over to play, I mean blog for you today! I am having a little break at the beach {whooo hoooo!} so I thought today would be a great day to share with you, I absolutely love MJ's creation, so without further ado I will pass you over...

Package 1~Cat Decorated
This first package was for my friend, Nikki. (Originally, both packages were for friends' upcoming birthdays, but I decided to use them for hello happy mail instead.)


Thanks so much MJ, I loved this project / tutorial and hope you guys all did too. Head on over to her blog as she has some lovely tutorials and blog posts!
Hello! I'm MJ and I blog over at Little Panda Crafts. I am a girl crafter who loves stationary, pinning, blogging, and all things kawaii ^_^ Thanks so much to Mrs. Brimbles for having me over!
This post is a little tutorial--a share, really--of decorating your packages..with paper.
Have you ever seen those packages prettied up with washi tape and stickers on Pinterest or whatever, and you would really love to do the same, except you don't have the same supplies?
No fear! With a color ink printer, scissors, adhesive, packages, and creativity you can do it! :)
Package 1~Cat Decorated
This first package was for my friend, Nikki. (Originally, both packages were for friends' upcoming birthdays, but I decided to use them for hello happy mail instead.)
I used these adorable cat printables from Wild Olive. I simply cut them out, and stuck them onto the package.
Then I added red paper to the package side. Pictured is also the letter I had started. :)
Package 2~Molang Decorated
I found this super cute Molang graphic to use. I cut each one out, and stuck them to the package, along with two strips of its background paper to cover the top. Finally I added pink-and-white polka dotted paper.
The letter I started for my friend Lee Ann. :)
The adorable Molang bunnies! They look like stickers =D
Top of the box!
~~~~
So that's it! So simple, right? Extra tips:
~For more kawaii-ness, you can find tons of other images..like Rilakkuma or Mamegoma, which I didn't add, but may have to get started on! :)
~You may want to use double-sided tape or a glue stick
~If you don't have washi but still want it on your packages, you can search up "digital washi tape" and find all sorts to print out and use
I hope you enjoyed the little "tutorial" or share. You can visit me at www.littlepandacrafts.blogspot.com for more creative ideas. Thank you again for having me over, Mrs. Brimbles! ^_^
love love love! MJ
Thanks so much MJ, I loved this project / tutorial and hope you guys all did too. Head on over to her blog as she has some lovely tutorials and blog posts!
Sunday, 25 May 2014
My London themed filofax decoration
It has been a while since I have decorated my Filofax pages and shared them with you all. As you know some weeks I do and some weeks I don't, it all just depends on how I am feeling at the time and also how much I know will be going on in that week. The busier I know the week is going to be, the less I decorate as I find that the decoration just fuels chaos in my mind as well as on the page.
Well this week I know is going to be really very quiet as I don't have anything on at all. Yippeeee! OK well I lied, I do have one thing which I am really very excited about. I am off to London on Sunday for the Philofaxy London Meet up which looks great although I am a little nervous!
So how did I decorate? Well I had some traffic stickers (there may be some left in my Etsy shop but I cannot guarantee when you read this!) and some washi tape that rather looks like road and I remembered seeing a really cool decoration from the wonderful Coloursnme blog so I felt both moved and inspired to do something rather similar and London-y and I think the big red bus is just that lol!
I look forward to seeing you at the meet up if you are going :D
Friday, 23 May 2014
She's Eclectic: Guest post by Mrs Brimbles
She's Eclectic: Guest post by Mrs Brimbles: Let me introduce myself, my name is Anna but I am very often known in the Filofax and Journal world as Mrs Brimbles which is a nickname tha...
How to make a Plushie Bunny Paper Clip / Page Marker - Filofax Friday

I thought this week for Filofax Friday that I would share a little crafty tutorial with you. I follow a lady on Instagram called Itsfluffystuff and she posted a couple of pictures of plushie paperclips that she was selling and I fell in love with both the cloud and the fox and just had to have them. So I ordered them from her Etsy shop and they came all the way from Hawaii! They are so cute and so very well made and they are just perfect for using in my planner when I am going with that theme for the week. I do love them so much.
I also use them for book marks as well as for my Filofax. I love them because they stick out the top of your planner so you can easily identify what you are wanting to mark and when I use paperclips on my week, I can also attach extra to do notes or receipts in there.

Well you know how much I love my bunnies, I mean, I draw them everywhere and they are always appearing all over the place. Well it got me to thinking whether I could make plushie paperclips with my own bunny design. So I had a go, I made a few mistakes but I worked out how to make them and I thought I would share this with you in a tutorial so that you could make them too and if you didn't want to make them or you just like the ones from itsfluffystuff, then you could hop over to her shop to get some. (This is not sponsored or anything, I just like spreading the love when I find stuff I like!)
What you will need:
- Felt or fabric - only a small piece is needed but you will need to cut out two head shapes from it and they really don't need to be very big.
- Scissors
- Pencil or pen
- Eraser (if using pencil)
- Small scrap of card
- Masking Tape
- Paper Clip (large preferably)
- Needle
- Embroidery thread in black, pink and one to co-ordinate or contrast to your fabric
- Soft toy stuffing (very teeny amount)
- Cotton bud
- Pink ink pad or blusher
How to make your plushie:
A step by step video instruction is below but here are the written instructions for you to refer back to:
1. Draw your bunny head out onto your fabric. (You may want to refer to my 'how to draw a bunny' series). Cut your head shape out of your fabric and then trace around this and cut another out so you can two identically sized / shaped heads.
2. Erase any lines from your heads.
3. Put aside one of your head pieces. Cut out a small piece of card to fit inside the bottom of the head and place it on the bunny. Tear off some masking tape and adhere your card onto your bunny. Next adhere the top part of your paper clip onto the card, push down to really get into the nooks of the clip. Overlay another piece of masking tape in a different direction to make sure the clip is stuck to the card and the card is stuck to the fabric. Place to one side.
4. On the bunny head that doesn't have the paper clip attached, sew on your nose and eyes.
5. Place your face on top of your bunny head and using blanket stitch start sewing your two pieces together. Remember to leave a gap to stuff your head.
6. Using your pencil stuff the stuffing through the opening, you may want to do this little at a time.
7. Close the opening by finishing off your stitch and tie off when you have completed.
8. Use your cotton bud to apply your pink cheeks to your bunny with either blusher or your ink pad.
I really hope you enjoyed this little tutorial. I am very much a novice sewer but have really enjoyed making these even if they are a little bit wonky in places, I love them so that is all that matters! If you do make them I would love it if you could tag me in your photos on Twitter or Instagram as I would love to see the ones that you have made!
I am off to practice more sewing and to see what other characters I can come up with! If you would like to see more bunny sewing from me then head on over to http://www.littlepandacrafts.blogspot.co.uk/ next week where I am guest blogging with this little lady...

Thursday, 22 May 2014
Follow my blog with Bloglovin
Follow my blog with Bloglovin
Where have I been for like ever? I have just found this whole Bloglovin thing so now you can follow me!
Where have I been for like ever? I have just found this whole Bloglovin thing so now you can follow me!
Tuesday, 20 May 2014
Outdoor art journaling - what is a girl to take?
It was an absolutely gloriously hot and sunny day on Saturday and I made the most of it by spending time out in the garden. We had nothing that we needed to do, not a single thing so why not make the most of it is what I say! You never know when and how long the good weather lasts here in England so enjoy it each and everytime it is here!
So going outdoors and doing a bit of journalling, what is a girl to take? It is a hard choice sometimes, especially when you don't know what you are going to create. Limiting yourself to a few items is great because it forces you to get creative with only what you have but that can also be hard if your muse has decided to go and sunbathe and is not interested in helping you one bit! At least being only in the garden I could nip inside if I wanted to grab something so that is not a big deal but even so you have to limit yourself a bit because you can't take it all out there with you. Well you could but I would have to spend ages carting it back and forth. You get the picture!
I recorded an impromptu video on what I took out with me as I really enjoy watching those types of videos and thought you might like to see what I take with me. It was so bright out there so excuse the squinting me.
Did you like my shed? It is not quite finished yet, I want to chintz it up and put some girly touches on it (which Mr B is very happy for me to do I hasten to add). I want to change the scaggy perspex window for nice clean one but Mr B needs to tidy up his randomness in the shed first. Then I want to put bunting up and I want to also put a nice decal on the door and maybe some wooden scalloped edging to the window. I haven't quite decided yet but in my mind it looks lovely, just a bit of a long term work in progress kind of thing.
Would you like to see a couple of the pages that I created? I am going to show you two here which are collage type pages and then another page that I create you will find over on the Journal Gypsies blog on Wednesday!

If you would like to know where any of the products show came from please do ask and I will try my best to remember.
If you would like to see our vlog from that day you can watch that below. Or over on my Ginger Juice YouTube channel where I vlog about twice a week along with book reviews, vegetarian food, hauls and tag videos.
So going outdoors and doing a bit of journalling, what is a girl to take? It is a hard choice sometimes, especially when you don't know what you are going to create. Limiting yourself to a few items is great because it forces you to get creative with only what you have but that can also be hard if your muse has decided to go and sunbathe and is not interested in helping you one bit! At least being only in the garden I could nip inside if I wanted to grab something so that is not a big deal but even so you have to limit yourself a bit because you can't take it all out there with you. Well you could but I would have to spend ages carting it back and forth. You get the picture!
I recorded an impromptu video on what I took out with me as I really enjoy watching those types of videos and thought you might like to see what I take with me. It was so bright out there so excuse the squinting me.
Did you like my shed? It is not quite finished yet, I want to chintz it up and put some girly touches on it (which Mr B is very happy for me to do I hasten to add). I want to change the scaggy perspex window for nice clean one but Mr B needs to tidy up his randomness in the shed first. Then I want to put bunting up and I want to also put a nice decal on the door and maybe some wooden scalloped edging to the window. I haven't quite decided yet but in my mind it looks lovely, just a bit of a long term work in progress kind of thing.
Would you like to see a couple of the pages that I created? I am going to show you two here which are collage type pages and then another page that I create you will find over on the Journal Gypsies blog on Wednesday!
If you would like to know where any of the products show came from please do ask and I will try my best to remember.
If you would like to see our vlog from that day you can watch that below. Or over on my Ginger Juice YouTube channel where I vlog about twice a week along with book reviews, vegetarian food, hauls and tag videos.
Monday, 19 May 2014
Book Review - The Vampire of Highgate by Asa Bailey
I have a book review to share with you today, a book that I have thoroughly enjoyed despite any misconceptions I had before I started reading it!
Why did I have some concerns? Well, as you probably know if you have followed my YouTube channel or Blog for a while now you will know that I was given a load of vampire books from my friend and whilst I enjoyed most of them I was getting a little fed up of them and was thinking them to be rather samey, you know, girl meets vampire, wants to be vampire etc etc. I saw this book at the Works on a 2 for offer and as there weren't any other books that I wanted I decided to purchase this one in the offer. The book sat on my shelf for a while on my TBR pile and one day I had finished my book and just decided to pick this one up without giving it much thought at all, I didn't re-read the back cover, I just picked it up and read.
I seriously finished this book in about three days. I mean it did help that the weather was glorious and I spent a good chunk of time just sitting in the garden with the fluffies reading but even so, I would have finished it fairly quickly as I was so engrossed!
What I really liked about this book is that it is largely based around a legend that really does exist. It mentions it in the book that the author wrote this book based on a story he was told one night from a London cab driver, but part of me was like 'yeah right you are just saying that as it makes a good intro'. So like the inquisitive person that I am I went off on a little interest search of my own and well, there is a plethora of information out there! Wikipedia started me off and then I was off on a search for more information, I found it absolutely fascinating and for that experience my views of the book were greatly enhanced. As for the story, it was fast paced, and a quick and easy and enjoyable read one that I would thoroughly reccommend. Oh and there was none of the girls meets vampire, wants to be a vampire stuff! lol! Not that there is anything wrong with that, just that I need a bit of a break from it!
Friday, 16 May 2014
Filofax Essentials / Getting started with a planner - Filofax Friday - Week 19
Following on from last week's blog post on advice for getting started with a planner, this week I thought that I would share my experience with using a (or several!) Filofax, what I must have and what I can do without. I have also asked the lovely ladies who sponsored the giveaway if they would like to share their experiences with you and of course they all said yes.
In the video below you will find the answers to the questions posed from my point of view and then under that you will find the responses from our lovely sponsors. I find it really interesting how different people use planners in a different way and what each of our organising must haves are!
I would also like to open this out as a tag. If you would like to answer the questions posed in either a video or blog post that would be great, just leave a comment on the video so others (myself included) can come over and watch. I would really love to get a community spirit going and get more experienced planner users to help out those just starting out on their journey.
Also please don't forget to enter the giveaway if you haven't already done so. The giveaway widget for entering is at the very bottom of last weeks blog post.
I would like to introduce our giveaway sponsors to you. Please do take a moment to swing by their Etsy stores to see the lovely things that they sell for using in your Filofax or just because you like lovely stationery!
Claire runs Filomania and she makes lovely co-ordinating dash boards, page markers, washi on the go cards and dividers. Venetia runs Chaotic Stationery and sells washi tapes, stickers, sticky notes and other lovely items and then last but by no means least, we have the lovely Maria who makes and sells the most loveliest of planner charms (I have a few of hers myself) and her shop is Filolove. Wait hold on, I forgot me too lol! Well you know me by now, I sell printable inserts, stickers, sticky notes and washi tapes and my shop is called, guess what... Mrs Brimbles.
What did the ladies have to say?
4. What could you not live without (for planning)?
5. What at the start did you think you really needed but later found out that you didn't?
6. What advice would you give to people just starting out or people looking at starting out.
In the video below you will find the answers to the questions posed from my point of view and then under that you will find the responses from our lovely sponsors. I find it really interesting how different people use planners in a different way and what each of our organising must haves are!
I would also like to open this out as a tag. If you would like to answer the questions posed in either a video or blog post that would be great, just leave a comment on the video so others (myself included) can come over and watch. I would really love to get a community spirit going and get more experienced planner users to help out those just starting out on their journey.
Also please don't forget to enter the giveaway if you haven't already done so. The giveaway widget for entering is at the very bottom of last weeks blog post.
I would like to introduce our giveaway sponsors to you. Please do take a moment to swing by their Etsy stores to see the lovely things that they sell for using in your Filofax or just because you like lovely stationery!
Claire runs Filomania and she makes lovely co-ordinating dash boards, page markers, washi on the go cards and dividers. Venetia runs Chaotic Stationery and sells washi tapes, stickers, sticky notes and other lovely items and then last but by no means least, we have the lovely Maria who makes and sells the most loveliest of planner charms (I have a few of hers myself) and her shop is Filolove. Wait hold on, I forgot me too lol! Well you know me by now, I sell printable inserts, stickers, sticky notes and washi tapes and my shop is called, guess what... Mrs Brimbles.
What did the ladies have to say?
1. How / when did you get started with a paper
planner?
Claire: I
have always had a planner since I can ever remember. The
first one I remember was a bright pink breast cancer awareness one I got
from Avon for about £15. I have always preferred pen and paper
as I find it more fun to complete.
Venetia: I started a few years ago, when I first started my teaching job. I
wasn't very busy back then, but I had fallen in love with an a5 pink
Finsbury and I couldn't resist grabbing it! I didn't really use it until
last year though.
Maria: I started with paper planners since high school. I loved keeping track of my everyday life and homework assignments, etc.
Maria: I started with paper planners since high school. I loved keeping track of my everyday life and homework assignments, etc.
Anna:
I too have had one for as long as I can remember, when I was younger
there was no mobile phones and we have paper planners given to us at
school for logging homework etc and I think it has just stuck from
there. I did use an electronic diary for work use when I worked in an
office but still had a paper based diary for my personal life because I
just like the tangible thing in my hands!
2. What did you start out with and why?
Claire: I quickly upgraded my planner to something nicer, and I had
an Aston from TK Maxx. I saw the Maldens and this was the closest I could get
at the time until I could afford the sort after Malden
Venetia: I started with my a5 pink Finsbury, mainly because of its size.
I felt that it was big enough to give me enough space to scribble on.
Maria: I used to get the small planners that I could carry in my backpack. As time went on, I started to purchase bigger planners with rings, so that I could customize it.
Maria: I used to get the small planners that I could carry in my backpack. As time went on, I started to purchase bigger planners with rings, so that I could customize it.
Anna:
When I left University I wanted to move on from an academic diary but
the year was already in full swing and diaries were not out in the shops
to buy for the next year so I bought my first Filofax (pocket botanic)
so that I could be more flexible with my diary inserts.
3. How has your planning evolved?
Claire: At first I only used my Filofax for keeping track of my
shifts at work. Now I decorate it each week, and pop in lots of different
sections
Venetia: It has evolved a lot! I have tried several systems and layouts
throughout the years and I'm very happy to say that I've finally found
the layout that suits my lifestyle.
Maria: I'm an official planner addict now. I own over 20 planners of different brands. I use an A5 size for business. I use another A5 for my etsy business. And I use a personal size for my life.
Maria: I'm an official planner addict now. I own over 20 planners of different brands. I use an A5 size for business. I use another A5 for my etsy business. And I use a personal size for my life.
Anna:
I used to just plan appointments and that was all I used my filofax
for. Nowadays my filofax has my entire life in it! Literally everything
going on or I want to track goes in there.
4. What could you not live without (for planning)?
Claire: Washi – 100% love washi tapes of all kinds, I must have about
150 rolls now
Venetia:
Nothing fancy really. All I actually need is pen and paper. But
everything else just makes the process so much prettier!
Maria: I could not live without my pens. I love pens!
Maria: I could not live without my pens. I love pens!
Anna:
I am not just saying this because I sell them but for me it is my
inserts and actually the reason that I made them in the first place was
for me to help me with better organising my life and now I couldn't be
without them. I also really like sticky notes so that you can move them
around as needed.
5. What at the start did you think you really needed but later found out that you didn't?
Claire: Tonnes
of the Filofax note paper, I had packs of the stuff, but now I prefer to cut up
pretty notebooks and use them instead.
Venetia: At first I thought the A-Z telephone directory was desperately needed,
but turns out it really wasn't. I blame the smartphones for that!
Maria: I have so many stickers and I don't use them as much as I thought I would.
Maria: I have so many stickers and I don't use them as much as I thought I would.
Anna:
For me it was colour coding and highlighters. I saw all of these
different people saying that they colour code things and write in
different colours but it didn't work for me. I kept getting confused as
to which colours I was using for what and it was more time consuming to
keep referring back to the key code!
6. What advice would you give to people just starting out or people looking at starting out.
Claire: Always
get a cheap planner first, don’t just jump in and buy something expensive.
Also
always ask for advice before you buy. The amount of Filos I have brought and
then decided I didn’t like. Instagram
will become your best friend, you can use it for ideas and also tips. Youtube
is great too.
Venetia: My advice is to take small steps at a time. You should try new
things and test them in action, it's all trial and error. I also suggest
drawing inspiration from other Filofax users, give that a try and then
slowly adapt it to your own lifestyle and needs. The only way a planner
actually helps you, is when it's put into good use!
Maria: I would suggest to really do your research to find out what kind of planner you really need. Don't base your decision on what is popular but on what you need it to do for you.
Maria: I would suggest to really do your research to find out what kind of planner you really need. Don't base your decision on what is popular but on what you need it to do for you.
Anna:
I would say take advice and ideas from other people but don't feel like
that is how it has to be. I see so many people getting frustrated
because they don't seem to be doing it right! I would also say don't
rush out and buy loads of stuff. Just because other people are doesn't
mean you have to, evolve with the process and find your own way.
I think you will agree that is is really interesting to see other people points of view. What are your planner must haves?
I think you will agree that is is really interesting to see other people points of view. What are your planner must haves?
Tuesday, 13 May 2014
The Blank Page - The scariest thing in the art journal world!
I keep hearing comments about people being scared of the blank page in their journals, that the white of the paper is glaring at them and they are unable to get started as it just sits there looking at them, judging them, making them afraid to get started.
This is totally the opposite for me. I find that my mind is messy enough as it is and I come to my journal as a place of calm and tranquility. I need it to be clean and empty so that I can empty my mind of all the messy stuff and get it down on paper! I love watching YouTube videos where people start with the mop up from a stencil so that there are already marks on the page and then they add more and cover it up and then don't mind that they have covered bits up. I would love to be able to work like that but I just can't and that is OK. I know how my mind works and I just work with that.
I do controlled messy! I do layer things but in a controlled way. I can't be free and loose and just let go, I can't do that. I have to plan the next layer as I hate covering things up, to me it is such a waste of paint or pretty paper. Believe me I have tried on many occasions which has just led to me being more frustrated and as my journal is supposed to be a place for me that I can enjoy then I have just learned not to fret and fuss about it and just what comes naturally to me.
I just wanted to throw it out there that the blank page is nothing to be afraid of, it is there waiting for new possibilities and just waiting to be covered so embrace it and enjoy it rather than being scared of it!
How do you create? I would love to know. However you do journal it is about finding the way that works for you not for others and if starting with a page of stencil mop ups is right for you then good on you but let it be because that is what you enjoy and not because you are scared!
Happy journalling xx
Monday, 12 May 2014
Linkys Dream Stationery Subscription Box Unboxing - May 2014
I came across Linkys (Leah) on Instagram when I saw several people reposting photos of a giveaway that Linkys was running. Of course I am not one to find an instagram account full of lovely Stationery photos and not follow it am I now! I love instagram and love looking at all the photos that are posted on a daily basis.
One day I was perusing instagram to see that Leah had posted a picture of the packaging that she was sorting out for her new stationery subscription box. Wait. Stationery subscription box? As you know if you follow me on my Mrs Brimbles YouTube account that I had previously shared an unboxing of a stationery box, well that particular subscription service is no longer going ahead so you can imagine how thrilled I was to find another one just starting up. So I contacted Leah and said that I would be interested in signing up and we got chatting as you do and Leah very kindly offered to send me a box so that I could post an unboxing for you so you could see what you could expect from one of Linky's Stationery Subscription Boxes.
I can't tell you how excited I was, it was like Christmas and being a kid in a candy shop all in one go. My excitement in the video really is genuine as the box was delightful. I have an unboxing video for you below if you would like to see my reaction and the products that I received in scale etc
I also have photos of most of the items that I received below. I think I have included everything in the photos, I got too excited and started using the items and distributing them around my desk, silly Anna!
I have to say that I am really very impressed with this box and I will be subscribing, I really can't wait until the next ones arrive and of course I will do an unboxing of those too!
I love packaging I have to admit. I think the way something is packaged totally influences how you feel and what you think about the item within. To have something so beautifully wrapped with all the special little touches inside really made me feel so special. I loved all the cute sequins and confetti and the pom poms were a really cute and quirky idea. The sweeties I have eaten whilst writing this blog!Yummy! I think a lot of companies could learn a thing or two from Linky's on how to present their items. It made me feel very happy indeed.
Everything was beautifully, individually wrapped but here is what the box looked like althogether in its unwrapped state. I didn't photograph it all wrapped up as I busy too excited filming!
So what did I get? I was over the moon with the items I recieved. Please do watch the video if you can as you will see all the items in a much clearer and in depth way.

1. Two rolls (full rolls) of super cute washi tape
2. Pack of paper, hole punched and ready to go for an A5 Filofax / planner
3. Pack of cute stickers
3. A page marker and dash board for a personal size Filofax

5. Two cute notebooks
6. Two pens and two packs of sticky notes
7. Various ephemera
8. Other cute little bits and bobs like stickers, paper clips and deco tape.
I think you will agree that it is all pretty exciting and fabulous! If you are interested in finding out more about Linky's Dream stationery subscription box then please do get in touch with Leah on the following email: linkysdream{at}gmail.com You can also find Linkys here:
www.twitter.com/linkysdream
www.facebook.com/linkysshop
www.instagram.com/linkys
www.etsy.com/shop/linkys
My favourite item has to be the crown pen. I have had my eye on that in Linkys Etsy shop for a while now so I am over the moon that I received one in my box. Right, I am off to start using my items now....off she goes skipping!
One day I was perusing instagram to see that Leah had posted a picture of the packaging that she was sorting out for her new stationery subscription box. Wait. Stationery subscription box? As you know if you follow me on my Mrs Brimbles YouTube account that I had previously shared an unboxing of a stationery box, well that particular subscription service is no longer going ahead so you can imagine how thrilled I was to find another one just starting up. So I contacted Leah and said that I would be interested in signing up and we got chatting as you do and Leah very kindly offered to send me a box so that I could post an unboxing for you so you could see what you could expect from one of Linky's Stationery Subscription Boxes.
 |
| Linkys Stationery Subscription Box - the outside! |
I also have photos of most of the items that I received below. I think I have included everything in the photos, I got too excited and started using the items and distributing them around my desk, silly Anna!
I have to say that I am really very impressed with this box and I will be subscribing, I really can't wait until the next ones arrive and of course I will do an unboxing of those too!
I love packaging I have to admit. I think the way something is packaged totally influences how you feel and what you think about the item within. To have something so beautifully wrapped with all the special little touches inside really made me feel so special. I loved all the cute sequins and confetti and the pom poms were a really cute and quirky idea. The sweeties I have eaten whilst writing this blog!Yummy! I think a lot of companies could learn a thing or two from Linky's on how to present their items. It made me feel very happy indeed.
 |
| The packaging inside was super cute and I loved it! |
 |
| the goodies I received, all unwrapped. |
1. Two rolls (full rolls) of super cute washi tape
2. Pack of paper, hole punched and ready to go for an A5 Filofax / planner
3. Pack of cute stickers
3. A page marker and dash board for a personal size Filofax
5. Two cute notebooks
6. Two pens and two packs of sticky notes
7. Various ephemera
8. Other cute little bits and bobs like stickers, paper clips and deco tape.
I think you will agree that it is all pretty exciting and fabulous! If you are interested in finding out more about Linky's Dream stationery subscription box then please do get in touch with Leah on the following email: linkysdream{at}gmail.com You can also find Linkys here:
www.twitter.com/linkysdream
www.facebook.com/linkysshop
www.instagram.com/linkys
www.etsy.com/shop/linkys
My favourite item has to be the crown pen. I have had my eye on that in Linkys Etsy shop for a while now so I am over the moon that I received one in my box. Right, I am off to start using my items now....off she goes skipping!
Friday, 9 May 2014
Getting started with Filofax - Filofax Friday - Week 18
I often get comments and questions from people who are looking at getting into the Filofax World or who have already purchased and now want to get rocking and rolling with it but not entirely sure how to do so. I am also on several social media groups (although I am having a little Facebook holiday at the moment) and I see lots of people asking questions around getting started.
 I know it can be somewhat overwhelming at first. You have your planner (maybe) and you decide to check out instagram, YouTube or Facebook groups and you suddenly see all these amazingly inspiring photos of people who have got multiple planners, bulging with organisational lovelies and you think well mine doesn't look like that, I must be doing something wrong. I want to stop you right there! Yes it is overwhelming, I find it overwhelming too sometimes but I just have to take it as inspiration or 'eye candy' and just think that I am going to do it my way.
 Before actually getting started, I think it is quite useful to ask yourself why you want to use a planner and how and for what. This will then dictate or help shape how you actually use it and will give you a much better idea for everything else that follows.
 If you don't already have a planner, you now need to look at getting one. Again the above questions help with this. If you are going to need or want to take your planner out and about with you then a smaller one may be required. If you are like me and rarely have a need to take your planner out, then an A5 works great as a home or family planner. Although at the moment I just have the Filofax brand, there are other planners out there that you may want to consider like: Kate Spade, Kikki K, Franklin Covey, Paperchase own brand etc. Now there is no better excuse for putting the kettle on, making a cup of tea and sitting down for some internet window shopping (just don't get too overwhelmed by it!). Oh and I wouldn't say you need to spend loads (unless you want to) for your first planner so don't worry about that. Just get something that suits your purpose and budget and that you like the look of.
 You may want to start looking at inserts to go in your planner. If you have bought your planner new then it should already come with diary pages and probably some other pages like to do sheets or lined paper. I would suggest that if you have never used a planner before that you just start using what you have just to get you used to using a planner initially. Once you have decided that you like it and know a bit more about what you want to plan and organise, then is the time to start looking. Where do you go? Well there are loads out there to suit most tastes and needs. Some you can buy ready printed and others you can buy as digital inserts and print yourself at home. Some are fairly plain, some like mine have some decoration on them and others are very colourful or patterned. You go with what best suits you. Have a look around. If you wanted to purchase inserts, of course there are the ones that I sell in my Etsy shop and of course just a general search on Etsy for Filofax inserts or Filofax printables will give you a lovely lot to choose from. Digital ones are inexpensive so if you don't like one you can always get a different set or just mix and match as and when you fancy. Philofaxy have some free ones and a Pinterest search will often serve you well too. I have a pinterest inspiration board just for Filofaxes just here and there are some free inserts on there too, hot the follow button and you can see as and when I add items.
 You will see a lot of people choose to decorate their planners and their pages. This may or may not be for you. I did a Filofax Friday about this in week 4 this year and I plan to cover this again sometime in the future. I decorate some weeks and not the others, it depends on how busy I am and what is going on. Some people, me included, find a lot of joy in decorating although it can equally be quite stressing for me and I explain that in week 4! I do it occassionally. Again this is something that you will find your feet with as time progresses and not something you need to rush into straight away, if in fact you choose to do so at all! Decoration is a matter of personal choice and preference.
 You may feel that you need or want to supplement your planning with other organisational add ons such as sticky notes, to do lists, page markers and tabs etc. All of these can be very useful but not all of them may suit. I am not a massive colour coded so don't like to use colour dots etc but other people find these invaluable. Agian my advice to you hear would be to try it and see how it goes, if you don't like it move on and try something that does work for you. You don't have to have these things if they are not going to work for you in any way!
If you are wondering where you can get such items from, please take a look at the giveaway sponsors below, they all have lovely shops where organisational add ons and decorative items can be purchased.
I hope that has helped to maybe get you on your organisational journey. More is in the video...
Giveaway!!!

Giveaway Sponsors
Please take a few moments to learn more about the sponsors who have collaborated with me to make this giveaway possible for you. I have really enjoyed reading their stories on how their businesses have grown and involved all due to their love of planning and Filofaxes. Very inspiring indeed for any ladies who are thinking of starting their own businesses whatever they may be. Please do go and check out all of the wonderful items available from their etsy shops!You will find a link to their shops under their bio below.


Chaotic Stationery started as an attempt to share my love for unique and cute washi tapes with people who had trouble finding them in their area. Then, thanks to everyone's amazing support, it evolved into an Etsy shop. It reflects my love for floral patterns and polka dots and it's a collection of my most beloved items to use in my Filofax and crafts.


I have had a filofax since 2002 when I left University and over time my planning and the way I used it evolved somewhat. I started designing my own inserts for two reasons, one because I couldn't find stickers readily where I live to decorate with so I thought I would make my own inserts with my little doodles on them (that and when I do get stickers I sometimes feel reluctant to use them - I like to hoard!). Secondly I made my own inserts that were custom for the things that I wanted to use them for, to suit my needs. I started my Etsy shop back in January 2013 when a friend gave me a little nudge! I had made my own inserts and it didn't even occur to me that someone else might like them too until a friend told me to stop being so scared and to just get on with it.
My Etsy shop has now evolved over time with more inserts being added all the time with little doodles on them. I have my ideas in my head than I actually get time for sometimes. Sometimes it is so hard to come accross cute organisational stationery, especially where I live in the UK so I sourced some lovely items such as sticky notes, washi tapes, to do list pasts etc to sell in my Etsy shop. I also, again thanks to a nudge from a friend, sell my reproduction prints of my art work as dashboards.
I have really enjoyed ther planner journey and community and the friends I have made along the way. My blog and YouTube has also evolved too to co-inside with the planner World. I mainly started just with my journals and art and now think of it as more of a lifestyle blog with other items I enjoy too such as tea and books. Well you know as you are reading this on my blog lol! Thank you to everyone who has helped and who continues to help me on my journey.
https://www.etsy.com/shop/mrsbrimbles
Don't forget to enter the giveaway...To enter please use the widget below. After you have added your email address and name make sure you click 'BEGIN' you will then be asked to follow the sponsors Etsy shops in order to enter. It is literally just a case of following the shops, that is all! The 'begin' is just under the 'remember me' and the 'open to' section underneath the email box (it isn't that obvious!)
Now I am no guru, no organising expert. I am just a small village lass who uses her Filofaxes on a several times a day basis so I feel like I can impart my experiences and what I know on to others. So this is what I know..
If you are wondering where you can get such items from, please take a look at the giveaway sponsors below, they all have lovely shops where organisational add ons and decorative items can be purchased.
I hope that has helped to maybe get you on your organisational journey. More is in the video...
Giveaway!!!
In order to help get two people started on their Filofax journey, I have collaborated together with some lovely ladies who run their own Etsy stores (see below). We thought we would help get two people started on their Filofax journey by providing them with some goodies that we love / sell. The giveaway is also open to seasoned 'faxers too as we didn't want to leave you out with a chance of winning! There will be two winners, a first prize and a second prize. To enter please use the giveaway widget at the end of this blog post.
What could you win?
1st Prize: Personal size Filofax in ultra violet, set of coloured pens, set of highlighters, single hole punch, set of Mrs Brimbles printable inserts (not shown), to do list pad, set of two washi tapes & set of sticky notes all from Mrs Brimbles. Set of dividers, matching dashboard, matching page marker and matching washi on the go cards from Filomania. Set of Paris sticky notes and washi samples from Chaotic Stationery and a beautiful planner charm and a lovely T-shirt (not shown) from Filolove.
2nd Prize: Personal size compact Filofax - purple saffiano & a set of printable inserts (not shown) from Mrs Brimbles, Two dashboards from Cazzadashboards. Set of washi samples and sticky notes from Chaotic Stationery and a 10% discount from Filolove.
Please take a few moments to learn more about the sponsors who have collaborated with me to make this giveaway possible for you. I have really enjoyed reading their stories on how their businesses have grown and involved all due to their love of planning and Filofaxes. Very inspiring indeed for any ladies who are thinking of starting their own businesses whatever they may be. Please do go and check out all of the wonderful items available from their etsy shops!You will find a link to their shops under their bio below.
My name
is Claire Richardson, and I am the owner of an Etsy store called Filomania. I
also run a joint Instagram account called Its_madewith_love.
I started
Etsy around December time in 2013. I have been a lover of Filofax since I can
remember as I have always loved keeping a diary. My first official Filofax was
a pocket Breast Cancer one several years ago, and then I found the love for
Maldens.
Chaotic Stationery started as an attempt to share my love for unique and cute washi tapes with people who had trouble finding them in their area. Then, thanks to everyone's amazing support, it evolved into an Etsy shop. It reflects my love for floral patterns and polka dots and it's a collection of my most beloved items to use in my Filofax and crafts.
There's a coupon code for 10% off of every order of $20 and above. It's CHAOTIC1020 and it has no expiration date.
Lover of all things sparkly...
I've been a planner lover for years. In fact, one of my most treasured items is a beautiful leather planner my Dad gave me during college. I've always loved crafting and often did it to help me relieve stress. Last year, when my ulcer was really giving me a lot of trouble due to stress, my doctor suggested I take up a hobby. I've always enjoyed crafting and decided to make a planner charm for my first Filofax. I posted it on a Facebook page and orders started coming in. Someone suggested I open up an etsy shop. And I've enjoyed making planner charms ever since. I've shipped charms all over the world and it's such a great feeling to be a small part of someone's planner.
My husband and I own a printing company that we run together. My love of paper and his paper sources ensures that I always have an unlimited supply of pretty paper. I have two doggies, Peetie and Sophie. I live in beautiful Pasadena, CA.
I've made so many great friends on Facebook and Instagram through my love of planners. It's a wonderful community and I learn so much from all the wonderful people I've met. Please visit my shop and let me create something wonderful for your planner.
Discount Code for etsy mrsbrimbles for 20% discount for the month of May 2014
Welcome to Cazzadashboards. I selll handstamped dashboards for personal planners which you can colour in yourself. I supply them on 2 type of cardstock - 1 is suitable for colouring with watercolours & pencils and the other is suitable for using with alcohol markers such as Promarkers, Copics, Spectrum Noir or Graph'it pens. They are not laminated but the holes are there to make it easier for you to see where to punch the holes when / if you laminate yourself. You will get 2 in a pack. If you have a specific subject in mind, let me know.
I have had a filofax since 2002 when I left University and over time my planning and the way I used it evolved somewhat. I started designing my own inserts for two reasons, one because I couldn't find stickers readily where I live to decorate with so I thought I would make my own inserts with my little doodles on them (that and when I do get stickers I sometimes feel reluctant to use them - I like to hoard!). Secondly I made my own inserts that were custom for the things that I wanted to use them for, to suit my needs. I started my Etsy shop back in January 2013 when a friend gave me a little nudge! I had made my own inserts and it didn't even occur to me that someone else might like them too until a friend told me to stop being so scared and to just get on with it.
My Etsy shop has now evolved over time with more inserts being added all the time with little doodles on them. I have my ideas in my head than I actually get time for sometimes. Sometimes it is so hard to come accross cute organisational stationery, especially where I live in the UK so I sourced some lovely items such as sticky notes, washi tapes, to do list pasts etc to sell in my Etsy shop. I also, again thanks to a nudge from a friend, sell my reproduction prints of my art work as dashboards.
I have really enjoyed ther planner journey and community and the friends I have made along the way. My blog and YouTube has also evolved too to co-inside with the planner World. I mainly started just with my journals and art and now think of it as more of a lifestyle blog with other items I enjoy too such as tea and books. Well you know as you are reading this on my blog lol! Thank you to everyone who has helped and who continues to help me on my journey.
https://www.etsy.com/shop/mrsbrimbles
Don't forget to enter the giveaway...To enter please use the widget below. After you have added your email address and name make sure you click 'BEGIN' you will then be asked to follow the sponsors Etsy shops in order to enter. It is literally just a case of following the shops, that is all! The 'begin' is just under the 'remember me' and the 'open to' section underneath the email box (it isn't that obvious!)
Entry-Form
Next Week
Next week I will be continuing the theme of getting started in Filofaxing with interviews from the lovely ladies mentioned above. They will be telling us how they got started in Filofaxing and will be sharing their tips and lessons they have learned along the way so I hope you will come back and join us again next week. Don't forget to enter the giveaway and also why not subscribe to the blog over on the right hand side so you won't miss next week and any future giveaways!
See you soon, have a great weekend xx
Tuesday, 6 May 2014
Painting a Watercolour Blue Tit (Tutorial / How to)
We have been inundated with blue tits in our garden. Well not just blue tits but also great tits and robins. It is lovely. I love to just sit in our back room whilst having my breakfast or my elevenses and watch them feeding on our bird feeder. There is something quite relaxing about watching the little birdies flitting around and I have found it to be really inspiring. In fact I took my art journal and sat and painted a blue tit whilst watching them go about their business.

I rather liked how he turned out but more over I thought you might like to also paint a blue tit so I thought that would give me a great excuse to paint another one and film it as I go! The picture on the left was the original one that I painted and the one on the right was the one I did whilst filming. You can see that they are not identical which I like. No two birds are alike and these little guys each have their own personalities too, you can just see them shining through can't you.
They were painted on entirely different watercolour paper too. The one on the left, in my journal is on really cheap paper and the one on the right is on more expensive paper. You could really tell the difference with how the paint reacted. That being said I still like the paper in my journal so I am not complaining!
As you can see that are not 100% realistic. There are elements of realism to them but I didn't want them to be real life, I wanted them to be in a cute, quirky, stylised way because, well that is just my style.
So here you go, here is my tutorial or how to paint a watercolour Blue Tit. In the video I go through the materials needed as well as how to actually do it. You can either paint along with me or stop and start as you need to. The video will always be there for you to come back to or refer to later so make sure to bookmark it.
If you dopaint a blue tit and you wouldn't mind sharing, I would love to see it. Just tweet me, instagram, email or facebook me :D
Friday, 2 May 2014
Filofax Friday - Vlog Styleeeee!
Hi guys, it literally has been a crazy crazy week this week in fact the past couple of weeks, if you remember last weeks FF I said I was chunking my days down into smaller sections to help me get things done and I am pleased to say that is still working for me. I am also pleased to say that the next couple of weeks look set to be less busy. Phew! Although isn't that fatal last words? I am sure it is but whatever comes my way I will be ready! I think. Mr B has a week off work booked in too so we are not sure if we are staying here or going away but we will get out and about and have some fun, and of course we will most likely vlog whilst we do that.
So this week I have to confess it got to Thursday (yesterday) afternoon and I really wasn't sure what I was going to say / do for this week, if in fact that was anything at all. I know, I know, going a little bit against what I said in week 5 (Getting ahead / Planning for the future). It was working so well up until a couple of weeks ago. Ho hum! I am sure I will get back on track. For a starters I am working on a collaboration with a couple of lovely ladies who run Etsy shops to bring you a big 'ol jumbo giveaway, the biggest that I have ever done. It is taking a little co-coordinating but it will be so worth it once it is done and I hope you will love it as much as I do!
This week therefore I decided to just chat to you about Filofax related things, vlog style.
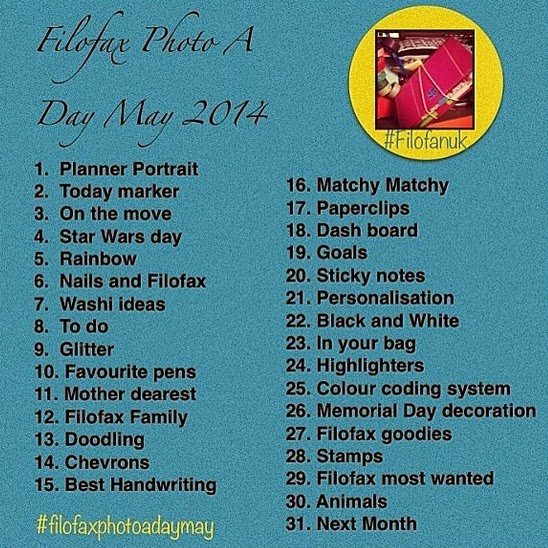
There are many instagram photo challenges taking place and this month I have decided to do the one run by filofanuk which you can search for on instagram using the #filofaxphotoadaymay
I had totally forgotten but I actually did hers back in March. Totally forgot about it until I went to post my first photo and the # was already saved lol! Why not join in the fun too? It is never too late really, you can just catch up or miss the days, it is only for fun after all. I have posted the challenge below if you would like to take part.
I have been jazzing up my filofaxes this month with some super cute new page markers from a lovely lady on instagram called Peppermintdoxiedesigns they are so cute. I am really inspired a lot by clouds, I love them, throw in rainbows and stars and wow, I am in love! They are really fitting at the moment as we have just started to get our April showers.

Talking of instagram which I am totally hooked on by the way, I came across a company called Linkys. Linkys is starting a fabulous new stationery subscription box scheme kind of like the ones you get for beauty products but this time for stationery. Eeeep! How excited am I? errrr muchly you could say lol! I can't wait to get my first box and of course I will do an unboxing video so you can see all the yummy goodness. This is what the exterior of the boxes look like and now I can't wait to see what is inside. I will keep you all posted. In the meantime, if you are interested just drop Leah an email:
Linkysdream@gmail.com and tell her I sent you ; )

And last but by no means least I am super excited to share with you all that I have found a really fabulous stationery supplier and am now stocking some of their super super doooooper cute items perfect for all you planner peeps! It is so hard to find cute stationery here in the UK sometimes which is why I go looking for cute products to bring you. I hope you will agree that they are gorgeous. Head on over to my etsy shop to have a nosey for yourself.


That's all from me this week folks, hopefully see you next week. Have a fantastic Bank Holiday whatever it is you are up to, typically the weather doesn't look like it is going to be all that fantastic huh!
So this week I have to confess it got to Thursday (yesterday) afternoon and I really wasn't sure what I was going to say / do for this week, if in fact that was anything at all. I know, I know, going a little bit against what I said in week 5 (Getting ahead / Planning for the future). It was working so well up until a couple of weeks ago. Ho hum! I am sure I will get back on track. For a starters I am working on a collaboration with a couple of lovely ladies who run Etsy shops to bring you a big 'ol jumbo giveaway, the biggest that I have ever done. It is taking a little co-coordinating but it will be so worth it once it is done and I hope you will love it as much as I do!
This week therefore I decided to just chat to you about Filofax related things, vlog style.
There are many instagram photo challenges taking place and this month I have decided to do the one run by filofanuk which you can search for on instagram using the #filofaxphotoadaymay
I had totally forgotten but I actually did hers back in March. Totally forgot about it until I went to post my first photo and the # was already saved lol! Why not join in the fun too? It is never too late really, you can just catch up or miss the days, it is only for fun after all. I have posted the challenge below if you would like to take part.
I have been jazzing up my filofaxes this month with some super cute new page markers from a lovely lady on instagram called Peppermintdoxiedesigns they are so cute. I am really inspired a lot by clouds, I love them, throw in rainbows and stars and wow, I am in love! They are really fitting at the moment as we have just started to get our April showers.
Talking of instagram which I am totally hooked on by the way, I came across a company called Linkys. Linkys is starting a fabulous new stationery subscription box scheme kind of like the ones you get for beauty products but this time for stationery. Eeeep! How excited am I? errrr muchly you could say lol! I can't wait to get my first box and of course I will do an unboxing video so you can see all the yummy goodness. This is what the exterior of the boxes look like and now I can't wait to see what is inside. I will keep you all posted. In the meantime, if you are interested just drop Leah an email:
Linkysdream@gmail.com and tell her I sent you ; )
And last but by no means least I am super excited to share with you all that I have found a really fabulous stationery supplier and am now stocking some of their super super doooooper cute items perfect for all you planner peeps! It is so hard to find cute stationery here in the UK sometimes which is why I go looking for cute products to bring you. I hope you will agree that they are gorgeous. Head on over to my etsy shop to have a nosey for yourself.
That's all from me this week folks, hopefully see you next week. Have a fantastic Bank Holiday whatever it is you are up to, typically the weather doesn't look like it is going to be all that fantastic huh!
Subscribe to:
Posts (Atom)