I thought I would share with you today how I plan.
I get asked quite a lot about my decorated pages too, whether I do decorate (from YouTube subscribers) and also a lot of you wonder because when I do show my decorated pages they are blank with no information on them. Some of you thought that I just do this for blog purposes and that they are mock up pages. Nope. I can assure you that I do use them I just transfer the information on to them once they are decorated.
So todays post is pretty much video only because it is much easier to 'talk' you through the process!
As you know I have been decorating lots of late. I never used to be a massive decorator. I have added the video I did a year or so ago which talks more about decorating from my point of view back then. Some of you may be new to the blog and may not have seen this. It is actually really interesting I think to go back in time and see how you have changed and developed!

Showing posts with label YouTube Videos. Show all posts
Showing posts with label YouTube Videos. Show all posts
Friday, 13 March 2015
Friday, 20 February 2015
Websters Pages Color Crush Planner / Folio / Accessories Unboxing
As you know (because I may have mentioned it one or two times!) I was lucky enough to be chosen to be one of the design team member for the Websters Pages Color Crush Planner. I received my box of goodies today and I thought I would film an unboxing of the planners and associated goodies that I received. This is just a quick over view and I will do individual videos on each planner to give you a more in depth look.
To find out more about Websters Pages please visit: http://websterspages.com/
If you are in the UK you can purchase from Create and Craft and also from: http://www.craftie-charlie.co.uk
Why not come and join in the discussions in the Facebook group: https://www.facebook.com/groups/ColorCrushPlannerLove/?fref=ts
Please do follow me on social media as I will be sharing my adventures with these planners!
Places you can find me:
Instagram: http://instagram.com/mrsbrimbles#
Facebook: https://www.facebook.com/MrsBrimble
Twitter: https://twitter.com/MrsBrimbles
Tumblr: http://mrsbrimbles.tumblr.com/
Pinterest: http://www.pinterest.com/mrsbrimbles/
Friday, 16 January 2015
Thinking of starting a blog? Blog Post & Video Planning & Scheduling

I often get emails from people who are looking to start up their own blog or YouTube cannel but haven't got a clue where to start. I try and help the best that I can but I am not a blogging guru, I just plod along and adapt as I go and just hope that I am doing the right thing. I just decided to start blogging one day, I picked a platfrom (blogger) and just started writing blog posts and my YouTube channel came some time after that (I did delete some of my first blog posts as they were just too cringey!). For me the blog and YouTube channel never was and still isn't about how many subscribers or readers I have. I started it from a place of passion about what I love and just wanted to share that. Basically what I am saying is that I have no idea whether what I am doing is right or wrong but it seems right for me. I can tell you about my experiences, what works for me and how I plan for posts but ultimately you need to find a way / system that works for you! There is lots of information out there and I find Pinterest particuarly good if you search for information on how to blog. There is a board I follow here which might help.
So today I am sharing with you how I plan for and schedule in my Blog posts and YouTube videos...
I also did a video on this last year but the way that I do this has now changed. I have a much better idea of how and why I do things now which is something that comes with experience and something that you will develop along your own blogging journey. I am also using a personal size planner as my daily go to rather than my A5 so that has also impacted on how I schedule. I no longer want that information in my daily diary section. Anyways check out my previous video if you have not already seen it as that will give you another way to plan and this way might work better for you than my new way. But ultimately as I said before you need to find the way that best works for you.
I have a download again for you this week that might help you get started, if nothing else it will help you whilst you establish how you want to plan things in.
Download
This week's download contains the pages as show in the video. The inserts are available to download as both personal size and A5. You will need software that can 'unzip' the folder to release the files as both pdf and jpeg. To download the files please click here. Please note that the inserts that I am offering as freebies are different to the ones that I sell, so if you have already purchased a set of my inserts these are in addition for you. If you haven't purchased any of my inserts and would like to or just have a nose at them you can view them in my Etsy shop here. Please note: These inserts are entirely free and a gift from me and only the inserts provided are free, I say this because I know some people might prefer one of the other designs that I offer but it is only the ones in the freebie set on offer at this time. These inserts are for your own personal use only and are not for resale as either printables or hard copy. Thank you.
So was starting a blog or YouTube channel on your goal list for this year? I have thoroughly enjoyed my blogging journey and do reccommend it and I hope this has inspired you and given that little push for you to do so.
Tuesday, 18 November 2014
My Fauxdori Set Up

A few of you have been asking to see more of my Fauxdori and how I have set it up. It is not that I didn't want to show you or share it with you it is just that there is nothing that spectacular about it. The cover is beautiful and well made but I don't do anything different with mine or out of the ordinary that you haven't already seen from other peoples. Still I love to look at other people's set ups so it is only fair that I share mine now isn't it!
A lot of you were worried when I put my fauxdori up for sale on instagram thinking that I had abandoned it. I can assure you that is not the case. I sold my first fauxdori because I saw one that had come up for sale that I really really wanted and to make room for it and to raise the funds to buy it, I sold mine original one. I was sad to see it go as we had become good friends but I wanted this one for a couple of reasons. Firstly it was wider so I wouldn't have so much over hang with the notebooks, the leather was sturdier, it was chunkier to hold more and lastly I knew it would be really well made. And it is. This was a fantastic buy and I really do love it!

On the outside I have a charm that I purchased from Etsy. It wasn't very expensive at all but I love it. It has a cute Bambi and thumper along with the skunk that I can never remember the name of. It doesn't sit quite right due to the way the loop is but I don't really care, I like the way it looks on there anyway!

Then inside I have a folder which houses little pieces of ephemera to use in my journal and a couple of notebooks.

It is quite hard to do a set up post just in photos especially as I don't really have that much inside my faauxdori but I really hope you have enjoyed a little peek and some more upclose shots! It is much easier to see the full workings and the insides in my video...
Friday, 14 November 2014
The Planner Addict Tag!
I was tagged by the lovely Vienna, aka My Planner on YouTube to take part in "The Planner Addicts Tag!". I love taking part in fun tags like this so here are my responses...
1. What planner are
you currently using?
I am not sure who has and hasn't done this tag, so if you haven't done it I tag you!!
If you would like to watch the original video of this tag you can do so below...
I am currently using the personal size Ochre Malden.
2. What planner(s)
have given you planner peace?
Definitely the Malden, it is everything I thought it would be and more. I also found peace with the nude original, again in personal size.
3. Filofax, Midori or
Erin Condren?
Filofax. Always. I down own a fauxdori but I am using that as a journal and notebook rather than a planner. I like the look of the EC's mainly due to the large 'boxes' and all of the beautifully decorated pages I have seen than for the planner itself.
4. Pocket, personal,
A5, or binder?
Ha ha all of them! I have them all but....personal is my current favourite. I will do a video soon on why I have or do use the sizes that I do.
5. Where do you get
inspired the most? YouTube, Instagram or Pinterest?
Instagram without a doubt. I always check instagram first thing in the morning with my breakfast and periodically throughout the day too!
6. What's your go to
pen?
Errrmmmm lots! I have many on my desk but the one in my FF is currently a Paperchase one.
7. What are your
favorite inserts?
The ones that I designed for myself and now sell in my Etsy shop of course :D
8. Stickers,
post-it's, or page flags?
I love stickers but I do have a tendancy to hoard them quite a bit. I do love my sticky notes for jotting down the odd note or two as well.
9. Keep it simple or
deck it out?
Somewhere in between the two. I like to keep it fairly simple and uncluttered to help me stay more organised but I do like to decorate and personalise too.
10. How many sections
do you have in your planner?
I currently have four but I do have sub sections within those too. I will do a seperate video / blog with a set up tour probably in a fortnight.
11. Do you use a
planner for school?
Gosh, I left school in 1999 at the age of 18 so no, too old for school. I bought my first FF when I grauated from University in 2002.
12. Rings, spiral
bound, discbound or other? Why?
Rings, I just love to be able to change and move my pages around which a spiral bound doesn't offer. I may be silly but I worry about pages staying in with a disc bound system!
13. Do you use a
dashboard? How?
I am the dashboard queen lol! I have a lot of them because I make them to sell in my Etsy shop. I use them as a bit of eye candy when you open your planner, for attaching sticky note reminders too and also to protect the pages etc underneath.
I am not sure who has and hasn't done this tag, so if you haven't done it I tag you!!
If you would like to watch the original video of this tag you can do so below...
Tuesday, 11 November 2014
Using watercolour in my Fauxbonichi

Last Tuesday I shared with you my new Fauxbonichi and I was met with some lovely lovely comments from you guys both here on the blog and also on YouTube not only welcoming me to the Hobonichi / Fauxbonichi community but also about my style of journalling in said book. I have joined the fauxbonichi group on Facebook (although I don't use facebook all that often) and have been looking on Pinterest and watching flips on YouTube. I am really loving how so many people are embracing this style of journalling far more than people have with other journals and I hope everyone keeps it up as I love looking at what everyone is creating!
Some may argue that this style of journalling is not new and has been around for years which is true but I am all for anything that gets people to journal more and get creative so bring it on I say! I for one am thoroughly enjoying my journal time of an evening.
Some of the comments that I received were also about using watercolours in my fauxbonichi. To recap the book that I am using is the leather look grid notebook by Paperchase which I actually purchased on Amazon but I believe Barnes & Noble stock one that is very similar. Now I have been using watercolours for years and years, the ones I use are by Winsor & Newton. People were both concerned and interested about using watercolours in the journals on non watercolour paper. In my experience you can use watercolour on any paper. Any. The key thing is to practise, practise with your watercolurs, learn how they work and how much water you need to acivate them.
Unless you are doing lots of wet in wet techniques then you can use any paper. The key is to keep the paint / paper fairly dry. The only paper that I have had difficulty with (although not impossible) is cartridge paper as the fibres come apart a lot more easily. As long as you keep the paint and paper fairly dry you will be absolutely fine I can assure you and don't go agressively at it either.
The type of watercolours you use will also affect this but again it all comes down to practise and learning how your media works. Cheaper paints will typically need more water to activate them and will be less pigmented, this means that you will be applying lots of watery colour to your page to get the colour intensity you want. If you can stretch to a better quality set this would be best.
In the video I talk more about this and also show you how I have coloured my page in with watercolour and how it works...
Friday, 7 November 2014
Catch Up - Filofax Friday - VLOG
It has been a while since I sat down and did a chatty catch up Vlog with you all so here it is...
Tuesday, 21 October 2014
How to be a talented artist - The secrets of mixed media!
"I can't draw."
"I would love to....but I am not artistic."
"I wish I was as talented as you."

These are all things I hear all the time and I have had enough of it, you hear me enough! I think it is very lovely and I am always very humbled and chuffed to bits when someone likes something that I have created because I struggle all the time with my inner critic, I really do. There are many pieces of art that I have created over the years that I love, many that I hate and many that are just 'meh'. None of us are exempt from the inner critic but you know, ya just gotta get on with it and create.
Now all those comments listed above are rubbish. Total and utter tripe. Yes that is right TRIPE!

You wanna know what the answer is to those statements...I will tell you..
Firstly it is practice. That is the secret. Practice, practice, PRACTICE and when you have practiced do it again. Honestly and truly, the only way to get good at something is to keep doing it. This is why you didn't just hop in a car, drive to the test centre and pass your driving test straight away, you had to practice at it. The same is true for art, keep practising until you get it where you want it and once you are there, keep on improving it. I truly mean it, the only way I can draw what I draw is because I keep on doing it a bit at a time, learning and trying to do new things.
The second trick is to learn and experiment with your materials. You need to take one medium at a time and learn it. Learn how to blend with it, how it reacts with paper, how it reacts with water etc. I see so many people with stacks and stacks of supplies and they become a jack of all trades rather than a master of one. Don't get me wrong I do love mixed media and experimenting but I see so many people who think that buying all the latest products will make them an artist when I am afraid it does not.
OK there you go I am off my soap box now and you have no excuse but to go forth and create art!

"I would love to....but I am not artistic."
"I wish I was as talented as you."
These are all things I hear all the time and I have had enough of it, you hear me enough! I think it is very lovely and I am always very humbled and chuffed to bits when someone likes something that I have created because I struggle all the time with my inner critic, I really do. There are many pieces of art that I have created over the years that I love, many that I hate and many that are just 'meh'. None of us are exempt from the inner critic but you know, ya just gotta get on with it and create.
Now all those comments listed above are rubbish. Total and utter tripe. Yes that is right TRIPE!
You wanna know what the answer is to those statements...I will tell you..
Firstly it is practice. That is the secret. Practice, practice, PRACTICE and when you have practiced do it again. Honestly and truly, the only way to get good at something is to keep doing it. This is why you didn't just hop in a car, drive to the test centre and pass your driving test straight away, you had to practice at it. The same is true for art, keep practising until you get it where you want it and once you are there, keep on improving it. I truly mean it, the only way I can draw what I draw is because I keep on doing it a bit at a time, learning and trying to do new things.
The second trick is to learn and experiment with your materials. You need to take one medium at a time and learn it. Learn how to blend with it, how it reacts with paper, how it reacts with water etc. I see so many people with stacks and stacks of supplies and they become a jack of all trades rather than a master of one. Don't get me wrong I do love mixed media and experimenting but I see so many people who think that buying all the latest products will make them an artist when I am afraid it does not.
OK there you go I am off my soap box now and you have no excuse but to go forth and create art!
Friday, 10 October 2014
Christmas Planning - Part 2 - Christmas Cards - Filofax Friday

Welcome back to part two in my 2014 series on Planning for Christmas. I really hope you enjoyed last week and that it has not only given you some food for thought with regards to your own planning but that it has inspired you to get started too.
This week I wanted to look at planning for Christmas cards. Every year we like to send out a more personal card to our friends and family, particularly as some of them are accross the miles. Sending out a personal card means we get to have fun and share a bit of our humour with our family that we don't get to see all that often and then they get a lovely personalised card from us. It is hard work but we do enjoy it. I am not afraid of hard work it just takes a little time to put it all together and that is what planning is for!

Before the shoot takes place (we do shoot it ourselves) we like to have a think and jot down any ideas that we have, maybe even do a sketch of how we want it to look. We do need to bear in mind that whatever we do, we need to be able to photoshop the girls in and that is a huge cobsideration. I use the above 'shoot ideas' sheet to jot these all down on and this is a free download below.

Once we have finalised / agreed on an idea it is all just a matter of bringing it together and I do that using the above insert, again this is a free download for you below. We are leaning towards something like the image shown on the insert which I found on Pinterest, just with a little tweaking. I use this insert to work out all the props and outfits needed and all of that razzamatazz! Believe me it really helps to have it all planned in advance.
We usually shoot the card in October to allow for any re-shoot, editing and to get it off to the printers, some take longer than others to come back. As I said we have family and friends all over the place and the last posting date to Australia is 4th December - it will soon come around!
Of course buying cards is totally good too so please don't think that I am dissing that at all because I am not. There is still planning to be done for that though, they are available to buy in the shops now so why not buy them and hey, let's go really crazy and start writing them out! Everyone you do now is one you don't have to do later and just think how smug you will feel when on 1st December you can tip them all into the post box, hey why not on the last day of November so people get them on the first!

I also like to take stock of my Christmas card tracker. I like to track who I have sent cards to so that I can make sure no one has been duplicated or worse, missed! Having time to do this means that you are less likely to forget anyone as you can add them to the list but you also need to know who you are going to send to so you order the right amount of cards.
Download
This week's download contains the pages as show in the video as both personal size and A5. You will need software that can 'unzip' the folder to release the files as both pdf and jpeg. To download the files for week 2 please click here. Please note that the inserts that I am offering as freebies as part of this series are different to the ones that I sell, so if you have already purchased a set of my inserts these are in addition for you. If you haven't purchased any of my inserts and would like to or just have a nose at them you can view them in my Etsy shop here. Please note: These inserts are entirely free and a gift from me and only the inserts provided are free, I say this because I know some people might prefer one of the other designs that I offer but it is only the ones in the freebie set on offer at this time.
Next Week
So there we are folks, I hope that has been intersting for you and has inspired you to get started with your cards. I will be back next week for more Christmas planning and this time looking at budget planning!
Giveaway
I am so pleased to have what I think is an awesome giveaway to go along with this series and I hope you will agree. The giveaway is brought to you by myself and the lovey Charlotte. Please do thank Charlotte for her kind generosity by visiting her:

Etsy: https://www.etsy.com/shop/CharlottesWeb86
Blog: http://therobinsnest86.weebly.com/
Instagram: http://instagram.com/handmadebycharlottevictoria
Charlotte has only recently started her blog but you will not be dissapointed, she has some lovely images and planner lovliness so please do go and have a look.
So what can you win....some lovely things that is what my dears! I have three prizes for you... the first prize is everything that you see in the photo below which is.... from me: a brand spanking new red original Filofax which retails for £60.00 on the Filofax website, Christmas sticker sheet, candy cane planner charm, washi sample card and your choice of Christmas printable inserts from my shop. From Charlotte: a Christmas fly leaf, dashboard, set of dividers and pen. Everything that you need to plan your Christmas this year and every year after!

The second prize is everything you see below...from me: a Christmas dashboard, washi sample card, sticker sheet, Christmas tree planner charm and your choice of Christmas printable inserts from my shop. From Charlotte: a set of beautiful Christmas dividers.

And last but not least the third prize is your choice of Christmas printable inserts from my shop.
You want to enter?
If you would like to enter the giveaway to win the Filofax shown above please rafflecopter below. To enter you will be asked to follow both mine and Charlotte's Etsy shop which is mandatory to receive your entry (this is just as a thank you for hosting the giveaway but you are not expected to make a purchase!). All other 'follow' options are optional so don't worry if you don't have those accounts, it just gives you extra chances to win.
a Rafflecopter giveaway
By submitting an entry to this giveaway you agree to the following Terms & Conditions:
- Open internationally
- You must be over eighteen years of age or have parental / guardian permission.
- I will package the item(s) and will send in good faith but I cannot be held responsible for any loss or damage to the item in transit.
- The prizes stated above are the only prizes - no alternative colours, no cash alternative.
- The inserts are digital for you to print at home and will not be supplied printed.
- Three winners will be chosen at random and notified by email. Winners will be announced on this page after the closing date.
- If the winner(s) do not respond to my email within 48 hours a new winner(s) will be chosen.
Tuesday, 7 October 2014
What's in my pencil case?

I often see 'what's in my bag' type posts and I really enjoy those as I am nosey and I like to see what everyone else is using so I thought it would be fun to share a 'what's in my pencil case' for all us arty / journal / planner peeps!
So would you like to see what is in my pencil case...
1. What pencil case are you using / do you use?
As my everyday pencil case I am currently using the pretty floral case that you see in the above photo although I do have several pencil cases that I often use for different reasons.
2. Why do you use it?
I am using this one mainly because I adore the pattern, I love the retro flower print, I just think it is so cute and I also love the shape. I also love that it is really roomy and you can fit a lot in it as well as being a nice shape to hold.
3. Where was it from?
I bought this from an Etsy shop: PrettyPaperFilo
4. Do you carry it out and about or does it stay at home?
I don't really have the need to carry a pencil case around that much. Occassionally I do in which case I will take a much slimmer one with me. If I do need to take a few things with me it is usually because we are going away in which case I would then take this away packed with my favourte items.
5. Show us what was inside?
Well... please watch the video as I showed everything in there or for a brief glance you can see the items in the top photo.
6. What was in there that you had forgotten about?
In my main pencil case, nothing but in my other pencil cases there were a few forgotten items!
7. What is your most used / favourite item?
I have a few favourite items that I couldn't just pick one! I really like coloured pens and at the moment I am using a sonix gel in teal from Staples, the Soda Fizz pen and also a papermate inkjoy in purple. I am also loving my penguin pencil sharpener, a fox rubber that I got in a recent Linys box and my all time favourite glue: Pritt Stick.

I am also really loving the Pilot disposable fountain pen that came in a recent Linkys box and my all time favourite permanent black pen for doodling etc is the Uniball eye. I also can't live without my Posca paint pens in both black and white.

8. Now you have gone through you case what will you leave out? if anything!
Nope! lol! I am really happy with everything I have in there at the moment but if I had to take something out then it would probably be my blending stumps.
9. How often do you go through your case and change things?
I am always changing pencil cases and go in and out of love with products so I change my pencil case around loads!
10. What are your future plans for your case? New case? New contents? What is on your wish list?
I have asked Father Christmas for a Lamy Safari fountain pen so I hope I am a good girl to get it!
I would love to know what you have in your pencil case so if you care to share either with a video, blog post or just a comment please do let me know so I can have a nose in your pencil case too - I tag all of you who would like to do it to please do this tag!
Tuesday, 30 September 2014
Coping with this crazy life - Journal your socks off!
All in all I have a fantastic life if I do say so myself but I suffer like most from this condition of being human. I bet dear reader you have this too from time to time sometimes, no doubt, for what seems like longer than most. It is a subject that many people talk about even scientists, it is the one thing that unites us all as human beings, we are just that, human. Good stuff happens, bad stuff happens and in my personal opinion it is how we deal with those situations that ultimately reflects how happy we are in general.

I am not coming at you all 'chirpy chirpy isn't life wonderful' in an annoying way, goodness gracious I have seen one heck of a lot of rubbish in my life, some of which I have gone over before in videos and blog posts, but I have gotten through it, I am still here to tell those tales. It is one of the reasons why I journal, to get me through the rubbish, to cope and process what is going on around me so that I can learn from it, develop, grow as a person and move forward with my life. Everything we go through makes us who we are and from time to time we need to develop a way in which to cope with those situations. Journalling is my method of coping.
Please do watch the video as I can express it so much better verbally!
So my journal is my coping mechanism and during this traumatic stage in my life I have ditched all my journals and started a new one just for this particular coping strategy.
This journal is a Moleskine sketchbook and I used one pen, the Papermate Flair. All other journals got pushed to the wayside because I wanted a journal just to deal with this situation and only this situation, it is just what I wanted to do and how I was going to cope and it has helped.

In this journal I wrote reams and reams, just writing about how I was feeling. I poured my heart out and I shed some tears but it was all for the purpose of healing and gaining some perspective. There are people dealing with much bigger problems than I am and this is just a small part of my life, I need to remember that so I can heal and move forward and get my life back.

It is not my best work artistically but it has meaning to me. The little sketches and the little affirmations and words of encouragement I gave myself are what gave me the push that I needed. Sometimes I just wrote to say that I was sad. Sometimes I wrote long stretches of writing, other times it was really short. It all helped get me through.

I also documented my journey through my appointments at the doctors and physio; when I went, the advice given, all of that helped me to see how I was improving and how far I have come because I have come a long way. I even took photos as my hand looked bad and I thought it was never going to get better, even one week after that photo I can visually see the progress. I all helped me cope, get through and continue to climb upwards.

It is going to be a long journey and no one said it would be easy. I see the physio again in three weeks time, the consultant in four weeks but at the time of injury they told me I was looking at a 12 week (at least)recovery period. I need to stay positive so I can get to that point. I have come this far, why give up now?
Hopefully you can see now why I journal and what a difference it makes. I didn't write this post or record the video for sympathy, I just wanted to share another reason why I journal and how it is a good coping mechanism.
I hope dear friends that this has been useful to you in some way and I hope that if you are struggling with a situation at the moment that you can find a way to cope as I have done for me. Much love to you x
I am not coming at you all 'chirpy chirpy isn't life wonderful' in an annoying way, goodness gracious I have seen one heck of a lot of rubbish in my life, some of which I have gone over before in videos and blog posts, but I have gotten through it, I am still here to tell those tales. It is one of the reasons why I journal, to get me through the rubbish, to cope and process what is going on around me so that I can learn from it, develop, grow as a person and move forward with my life. Everything we go through makes us who we are and from time to time we need to develop a way in which to cope with those situations. Journalling is my method of coping.
Please do watch the video as I can express it so much better verbally!
This journal is a Moleskine sketchbook and I used one pen, the Papermate Flair. All other journals got pushed to the wayside because I wanted a journal just to deal with this situation and only this situation, it is just what I wanted to do and how I was going to cope and it has helped.
In this journal I wrote reams and reams, just writing about how I was feeling. I poured my heart out and I shed some tears but it was all for the purpose of healing and gaining some perspective. There are people dealing with much bigger problems than I am and this is just a small part of my life, I need to remember that so I can heal and move forward and get my life back.
It is not my best work artistically but it has meaning to me. The little sketches and the little affirmations and words of encouragement I gave myself are what gave me the push that I needed. Sometimes I just wrote to say that I was sad. Sometimes I wrote long stretches of writing, other times it was really short. It all helped get me through.
I also documented my journey through my appointments at the doctors and physio; when I went, the advice given, all of that helped me to see how I was improving and how far I have come because I have come a long way. I even took photos as my hand looked bad and I thought it was never going to get better, even one week after that photo I can visually see the progress. I all helped me cope, get through and continue to climb upwards.
It is going to be a long journey and no one said it would be easy. I see the physio again in three weeks time, the consultant in four weeks but at the time of injury they told me I was looking at a 12 week (at least)recovery period. I need to stay positive so I can get to that point. I have come this far, why give up now?
Hopefully you can see now why I journal and what a difference it makes. I didn't write this post or record the video for sympathy, I just wanted to share another reason why I journal and how it is a good coping mechanism.
I hope dear friends that this has been useful to you in some way and I hope that if you are struggling with a situation at the moment that you can find a way to cope as I have done for me. Much love to you x
Tuesday, 23 September 2014
The Book Lovers Tag
Way back in May I recorded 'The Book Lovers Tag' with the intention of setting it live and doing a blog post on it at the same time. For one thing or another this never happened and the got lost but I just found it today so I thought why not post it anyway as you might like it! I haven't written much about it as the video says it all and the info about the last book I bought etc is different now still I thought why not show you all anyway as it seems a shame to let it go completely to waste!
It is just for fun and if you fancy doing this tag too either in video or blog post form, the questions are below for you and I would love to read your responses so let me know if you do do it:
QUESTIONS:
1) Do you remember how you developed a love for reading?
2) Where do you usually read?
3) Do you prefer to read one book at a time or several at once?
4) What is your favourite genre?
5) What genre will you not read?
6) Do you have a favourite book?
7) What is your least favourite book?
8) What is the biggest book you've ever read?
9) What was the last book you bought?
10) Which do you prefer: Library books or buying books?
11) What are you reading now?
Wednesday, 10 September 2014
Book Haul - September 2014
I have been reading loads lately and I needed to replinish my dwindling stash so I have accquired more books!
I thought I would share my book haul with you all in case you were interested in what I will be reading in the upcoming weeks / months or if you are looking for some new book ideas. I love watching book hauls, that is how I get reccommendations for books to read myself.
That little lot should keep me going for a while :D
Tuesday, 9 September 2014
Kawaii Box - September Reviewer of the month + GIVEAWAY!!
You know how YouTube works, that when you watch a video you get reccommended videos pop up on the right hand side of the screen, well I had been seeing Kawaii Box videos coming up over and over again. I decided one day to click on one and watch and I liked what I saw so I decided to head on over to the Kawaii Box website to find out more.

Whilst browsing the site I noticed a tab for bloggers which said that if you were a blogger you could apply to become a reviewer or unboxer of the month so I sent an email off to the to apply and I was delighted when they came back to me with a big fat yes. How exciting!
What is Kawaii Box?
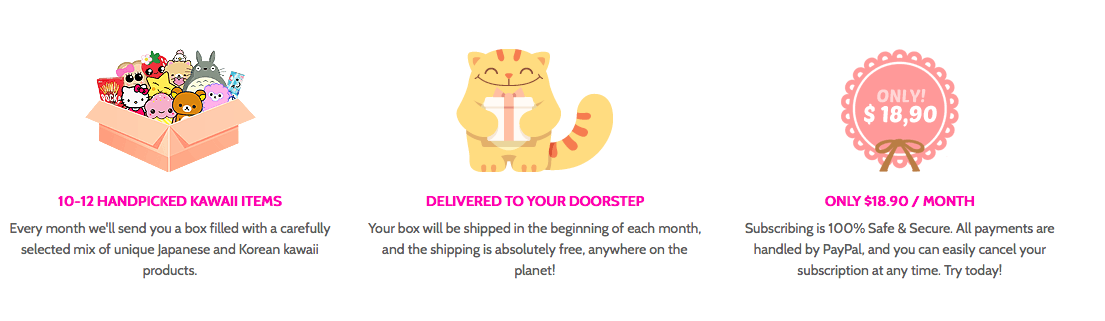 Kawaii Box is the cutest monthly subscription service. Subscribe Now and receive a box filled with hand-picked kawaii items from Japan and Korea directly to your home every month. Your box will be shipped in the beginning of each month and the shipping is absolutely free, anywhere on the planet! Each box includes 10-12 cute, original and licensed kawaii items.

Well the box arrived and it is now time to share with you my unboxing... Of course I video's the unboxing so please do watch the video if you would like to see more of the items and their scale etc.
So what was in the box?
In no particularly order, I liked all the things so I have just grouped the together for photographing purposes.
I received a key chain which has a double sided leather effect card wallet, this is really cute good quality and will come in really handy. Perfect for keeping your Oyster card in for the tube or other cards that you need on the go. Whilst Summer well and truly feels like it is over, this squishy, bright lollipop charm certainly made me feel summery. It is all squidgy and very fun indeed. And last on the charm side was this cute little doughnut with a sweet little face.

Next up was a box of sweet biscuit sticks. They are a lot like the Mikado that we get here in most supermarkets. They are thin, vanilla flavoured and truly scrummy! (I am eating them whilst I type this). I think alpaccas are so sweet so I am very fond of this cute little zip purse, perfect for keeping my sweetie money in! I have never used a phone plug before but now I have an adorable little kitty to use, or I might give it to my cat loving penpal as a surprise.

My most favourite thing in the box has to be these shoe laces with pink polka dot moustaches simply because I love to change out the laces in my converse ones for different ones when they get old and manky and these are super cute.

I also love the Alice band, do you think it suits me?

Loom bands are very popular at the moment and I have a few that I have made with friends children but never had any of my own, until now! The colours are fab. I also love the little fruit nail decals. They are miniture fruit slices, when my hand is better and I can do my nails again I can't wait to try these!

And lastly but by no means least, to satisfy the stationery lover in me there was this super cute bear notebook and the most adorable bear sticker flakes, I love them, I genuinely do.

Well that was everything that I received in my box which was the September box, some super cute items that I can't wait to play with. I think you will agree, good value for money if you were to tot the individual items up and I am not just saying that because they gave it to me. The box costs $18.90 (approx £12) a month with FREE international shipping so that makes each item just £1, pretty good when you look at it like that huh!

Kawaii Box are very kindly offering you on my readers the opportunity to win a free box all you need to do is enter via the rafflecopter giveaway below. Good Luck!
a Rafflecopter giveaway
Whilst browsing the site I noticed a tab for bloggers which said that if you were a blogger you could apply to become a reviewer or unboxer of the month so I sent an email off to the to apply and I was delighted when they came back to me with a big fat yes. How exciting!
What is Kawaii Box?
Well the box arrived and it is now time to share with you my unboxing... Of course I video's the unboxing so please do watch the video if you would like to see more of the items and their scale etc.
So what was in the box?
In no particularly order, I liked all the things so I have just grouped the together for photographing purposes.
I received a key chain which has a double sided leather effect card wallet, this is really cute good quality and will come in really handy. Perfect for keeping your Oyster card in for the tube or other cards that you need on the go. Whilst Summer well and truly feels like it is over, this squishy, bright lollipop charm certainly made me feel summery. It is all squidgy and very fun indeed. And last on the charm side was this cute little doughnut with a sweet little face.
Next up was a box of sweet biscuit sticks. They are a lot like the Mikado that we get here in most supermarkets. They are thin, vanilla flavoured and truly scrummy! (I am eating them whilst I type this). I think alpaccas are so sweet so I am very fond of this cute little zip purse, perfect for keeping my sweetie money in! I have never used a phone plug before but now I have an adorable little kitty to use, or I might give it to my cat loving penpal as a surprise.
My most favourite thing in the box has to be these shoe laces with pink polka dot moustaches simply because I love to change out the laces in my converse ones for different ones when they get old and manky and these are super cute.
I also love the Alice band, do you think it suits me?
Loom bands are very popular at the moment and I have a few that I have made with friends children but never had any of my own, until now! The colours are fab. I also love the little fruit nail decals. They are miniture fruit slices, when my hand is better and I can do my nails again I can't wait to try these!
And lastly but by no means least, to satisfy the stationery lover in me there was this super cute bear notebook and the most adorable bear sticker flakes, I love them, I genuinely do.
Well that was everything that I received in my box which was the September box, some super cute items that I can't wait to play with. I think you will agree, good value for money if you were to tot the individual items up and I am not just saying that because they gave it to me. The box costs $18.90 (approx £12) a month with FREE international shipping so that makes each item just £1, pretty good when you look at it like that huh!
Kawaii Box are very kindly offering you on my readers the opportunity to win a free box all you need to do is enter via the rafflecopter giveaway below. Good Luck!
a Rafflecopter giveaway
Monday, 8 September 2014
Book Review - The Salem Witch Society

From the back cover:
Salem, New England, many dark nights ago.
It is a time of spells and shadows, of black magic and blood.
And the most famous witch hunt in history is about to begin...
Years later, a young woman is found savagely murdered, a pitchfork thrust through her neck, her body arranged in the shape of a star: the death pose of a witch. Someone - or something - is reviving the terror of the notorious Salem Witch hunts. And only one man - a brilliant, eccentric detective with a dazzling mind and a fascination with witchcraft - can keep the evils of the past at bay.
Rich in history, mystery, and witchcraft, The Salem Witch Society is a twisting, terrifying thriller - a dark fairy tale for readers who loved A Discovery of Witches and The Interpretation of Murder.
I love books about witches and about Salem, I find them fascinating I really do and I started this book with such excitement that I have to say I was a little bit disappointed and I really struggled to regain my enthusiasm, although I did tell my self to just keep on reading because the book may change and you might come to love it. My reason for this feeling of disappointed is not something that should neccessarily go against this book. I went into it thinking it was going to be full of witchcraft-ness but it wasn't, which is sad for me but for other people they may think this is a good thing.
The book starts out quite gory so if you don't like gory details the this one is not for you. There are some other gory aspects in the book but nothing particularly scary it is just that the author is quite graphic when it comes to detailing the murder scenes.
To be very honest I liken the whole book to Dan Brown's Da Vinci Code, as firstly the book starts out with a crime scene which is laid out with clues to unravel much the same way as Robert Langdon does in the Da Vinci Code. We then see the detectives in the rest of the book trying to solve the case and decipher the following murders. I am not really into crime / murder mystery books as a genre so I can only liken it to another book that I have read. the Da Vinci code, but if you like said book then you like like this book for sure.
I found the book a little heavy going at times and there were a lot of historical facts which for me also made it a little dry. I struggled to get my head around some of it at times, whilst very well written, I did find the volume of characters / suspects a little hard to follow, it doesn't help when I do most of my reading before bed I know.
It was an interesting read I will say that, it is not that I didn't like the book it is just that I started with misconceived ideas about what the book was about and I just don't like crime solving books that much. Go for it though if you do or if you fancy something a little bit different to your usual witch type book.
Let me know if you read this. I would love to know your thoughts.
Tuesday, 19 August 2014
When you have no inspiration but want to create and journal anyway!
I think they say it is a sign of getting older when you feel like the weeks are rushing by but seriously I really do think that they have. I have not had a chance to get to my journal all week due to various events and then when I have time I don't always have the energy.
I often say though that when I have had times away from my journal that it pulls me back eventually. There is never a very long period when we are absent from each other we just can't bear to be apart for too long, really we can't.
Today I wanted to create. I wanted to spend time in my journal. I had absolutely no idea what I wanted to do and I had no inspiration either. I mentioned at the very begining of this mini series that sometimes you just are not inspired but you want to create for the sake of it anyway and today for me is one of those days.
This is quite a complex page and the process of how it came to be but I explain it all in the video.
Where to start? Well for starters my desk was a right state, nothing was getting done unless that desk got tidied, I didn't physically have the room to work even if I wanted to. Tidying your desk is a good thing though as you sometimes uncover things that inspires you to create and this instance it did. Whooop whooop!
I found some pictures I had ripped out of a magazine that my mother in law had given me. I don't buy magazines my self but now and then I get passed an old one. There were several images that caught my eye so I decided to take them out and save them. I felt like using one of those images today and just collaging because I enjoy nothing more than spending time with a glue stick and scrap paper. I don't know what it is but I find it very therapeutic to sit and stick stuff down. I think it is a time when you can be creative and let go but not have to think too hard, it can be almost medatative.


I often say though that when I have had times away from my journal that it pulls me back eventually. There is never a very long period when we are absent from each other we just can't bear to be apart for too long, really we can't.
Today I wanted to create. I wanted to spend time in my journal. I had absolutely no idea what I wanted to do and I had no inspiration either. I mentioned at the very begining of this mini series that sometimes you just are not inspired but you want to create for the sake of it anyway and today for me is one of those days.
This is quite a complex page and the process of how it came to be but I explain it all in the video.
I found some pictures I had ripped out of a magazine that my mother in law had given me. I don't buy magazines my self but now and then I get passed an old one. There were several images that caught my eye so I decided to take them out and save them. I felt like using one of those images today and just collaging because I enjoy nothing more than spending time with a glue stick and scrap paper. I don't know what it is but I find it very therapeutic to sit and stick stuff down. I think it is a time when you can be creative and let go but not have to think too hard, it can be almost medatative.
Some times it can be hard to use papers as I have a tendency to hoard them so it is also good for me to just let go and stick them down. I like to also give the page some context or meaning with words but nothing was coming to me either but with the help of my faithful Pinterest I was able to find my way with some rather fitting and choice words. I am an over thinker, I am terrible for it which is another reason why journalling is good for me!
Friday, 15 August 2014
Doodling on your pages / Decorating with doodles - Filofax Friday
Last week I shared with you the pages that I had created as part of the Filofax Blogger Challenege to 'Pimp my Filofax'. Firstly before I go any further with this week I just wanted to say a massive massive massive (yes three massives') to everyone that voted for me. The competition was incredibly fierce with some amazingly fantastic entries and so I am very blessed, honoured and grateful that you voted for me and I am delighted to say that I came second. This is great news for me as this now means that I will be sent three brand spanking new Filofaxes from Filofax which I am able to give away to you guys! Whooop whooop! What I will probably do is give two away on the blog and one over on instagram so if you don't follow me there go and follow me so you will know when this goes live.

Also a big congratulations is due to DIYFish for coming first and also to my fellow runner up Letters in November, both of which will also have Filofaxes to give away so if you don't already follow their blogs you might want to. So watch this space for further details which I am sure will not be that far away!
So on to this week and following on from last week where I showed you the pages that I created, I had a large number of people asking for more help, ideas, share on how I created the pages and how I doodle on my pages. In fact I get asked very often about page decoration and how I decorate my pages in general. I am thinking of maybe doing a page decoration video every month or so what do you think? Let me know if this is something that you would like to see.
I am always happy to respond to requests for videos and blog posts wherever and whenever I can, you know me I just love sharing and interacting with you. Apart from the bunnies, your second favourite page layout I created was the clouds. I decided not to show how I created the bunnies as I have previously ran a 'how to draw a bunny' series and I thought this would be a bit repetitive. If you would like to see this tutorial then please click here. That being said if you do really really want to know then I would be happy to share.
So on to the clouds. In the video I share with you how I created my pages from start to finish and I also talk about doodling on your pages as you go / once your week is already in progress and you want to fill in the gaps with your doodles.
I have said a few times now that doodling on pages is how I first started with my Filofax decoration and also how I ended up selling my inserts on Etsy. It is the roots for me and is what I know. I never had a single roll of washi tape until my birthday in February of this year. I now have quite a few but that is by the by lol! I also rarely used stickers. I live in a very small village and my nearest town has no where to by stickers, even the supermarket has a poor selection and so other than buying online and paying a lot for postage stickers were not a readily available option for me. I am also a massive hoarder and can't bear to use / waste some of the stickers that I really love! I know there are other people out there with similar sticker hoarding tendancies lol!
So doodling for me is what decoration on my pages is all about and it is what I love to do. I love to doodle anyway and I regularly sit and doodle whilst on the phone or whilst working. If you do that too, you will start to see a pattern emerging. The shapes and pictures that you doodle whilst you are engaged in another activity are what your subconscious and the real true you enjoys. Save your doodles and go back to them, they will help you to formulate ideas on what you want to pull through into your Filofax decoration.
For me bunnies, clouds, stars and hearts always appear. Everywhere!

So clouds are a natural thing for me, I love looking at them and I love drawing them. I incorporate them into my art journal, they literally are everywhere around me so it makes perfect sense for me to bring this through into my Filofax decoration.
So I started off with a fresh pair of pages. These are the ones that came with the Filofax for the Pimp my Filofax challenge.

I do love to add a bit of washi tape in especially as I now have a few rolls. I know lots of you enjoy using washi tape too. I love it for adding a pop of colour or a pretty design. Washi tape in itself can help to spark inspiration for your overall decoration.
I also like the rain and find it very inspiring, the washi tape that I used hear is in a rain drop pattern and I purchased it from The Idea Owl. If you don't already know The Idea Owl also has an instagram account where she posts pictures of items for sale and you can add to your package and she sends you your paypal invoice once a month to get the items. I love the teal, yellow and purple combination - some of my favourite.
The only thing with wider washi tape is that it can infiltrate into your space that you may want to write on. You can write on washi tape but you may not want to. I do bear this in mind when I am decorating my pages.
I also like to use thinner washi tape as this doesn't take up so much of the paper. I used tape in co-ordinating colours that my penpal very kindly sent me recently and they match perfectly!

Next I add in some doodles.
I usually like to have a to do list section somewhere on my pages and I like to have this in keeping with the theme. In this case I drew a cloud shape so that I could seperate my to do's from my appointments. I also dew in rain drop shapes to use as my tick boxes.
And then come the clouds themselves.

I like to use pencil to colour in my doodles on my pages for two reasons. Firstly you don't have to worry about bleed through and secondly you can write over them really easily if you need to. I coloured them in blue as this was the first colour that came to hand whilst videoing but if I thought about it I would probably use a more co-ordinated colour and my doodles always have rosey cheeks, that is just a given! I just use fairly cheap children's pencils, not too cheap as they are scratchy and you really have to work at the colour but you don't need to spend a fortune. In fact using doodles and pencils are the cheapest way to decorate your pages over and over again!

Other items shown in the pictures in case you are interested:
Pen - Uniball Signo
Pencils - WHSmiths
Pencil Case - Taupe Polka Dot from my Etsy Shop
Fox Rubber / Eraser - Linkys Dream (in my July stationery subscription box)
I really hope you enjoyed my take and thoughts on how I decorate my pages with doodles. Please do let me know if you would like to see more videos and blog posts on this line and I will do my best.
Have a great week and see you soon!
Also a big congratulations is due to DIYFish for coming first and also to my fellow runner up Letters in November, both of which will also have Filofaxes to give away so if you don't already follow their blogs you might want to. So watch this space for further details which I am sure will not be that far away!
So on to this week and following on from last week where I showed you the pages that I created, I had a large number of people asking for more help, ideas, share on how I created the pages and how I doodle on my pages. In fact I get asked very often about page decoration and how I decorate my pages in general. I am thinking of maybe doing a page decoration video every month or so what do you think? Let me know if this is something that you would like to see.
I am always happy to respond to requests for videos and blog posts wherever and whenever I can, you know me I just love sharing and interacting with you. Apart from the bunnies, your second favourite page layout I created was the clouds. I decided not to show how I created the bunnies as I have previously ran a 'how to draw a bunny' series and I thought this would be a bit repetitive. If you would like to see this tutorial then please click here. That being said if you do really really want to know then I would be happy to share.
So on to the clouds. In the video I share with you how I created my pages from start to finish and I also talk about doodling on your pages as you go / once your week is already in progress and you want to fill in the gaps with your doodles.
I have said a few times now that doodling on pages is how I first started with my Filofax decoration and also how I ended up selling my inserts on Etsy. It is the roots for me and is what I know. I never had a single roll of washi tape until my birthday in February of this year. I now have quite a few but that is by the by lol! I also rarely used stickers. I live in a very small village and my nearest town has no where to by stickers, even the supermarket has a poor selection and so other than buying online and paying a lot for postage stickers were not a readily available option for me. I am also a massive hoarder and can't bear to use / waste some of the stickers that I really love! I know there are other people out there with similar sticker hoarding tendancies lol!
So doodling for me is what decoration on my pages is all about and it is what I love to do. I love to doodle anyway and I regularly sit and doodle whilst on the phone or whilst working. If you do that too, you will start to see a pattern emerging. The shapes and pictures that you doodle whilst you are engaged in another activity are what your subconscious and the real true you enjoys. Save your doodles and go back to them, they will help you to formulate ideas on what you want to pull through into your Filofax decoration.
For me bunnies, clouds, stars and hearts always appear. Everywhere!
So clouds are a natural thing for me, I love looking at them and I love drawing them. I incorporate them into my art journal, they literally are everywhere around me so it makes perfect sense for me to bring this through into my Filofax decoration.
So I started off with a fresh pair of pages. These are the ones that came with the Filofax for the Pimp my Filofax challenge.
I do love to add a bit of washi tape in especially as I now have a few rolls. I know lots of you enjoy using washi tape too. I love it for adding a pop of colour or a pretty design. Washi tape in itself can help to spark inspiration for your overall decoration.
I also like the rain and find it very inspiring, the washi tape that I used hear is in a rain drop pattern and I purchased it from The Idea Owl. If you don't already know The Idea Owl also has an instagram account where she posts pictures of items for sale and you can add to your package and she sends you your paypal invoice once a month to get the items. I love the teal, yellow and purple combination - some of my favourite.
The only thing with wider washi tape is that it can infiltrate into your space that you may want to write on. You can write on washi tape but you may not want to. I do bear this in mind when I am decorating my pages.
I also like to use thinner washi tape as this doesn't take up so much of the paper. I used tape in co-ordinating colours that my penpal very kindly sent me recently and they match perfectly!
Next I add in some doodles.
I usually like to have a to do list section somewhere on my pages and I like to have this in keeping with the theme. In this case I drew a cloud shape so that I could seperate my to do's from my appointments. I also dew in rain drop shapes to use as my tick boxes.
And then come the clouds themselves.
I like to use pencil to colour in my doodles on my pages for two reasons. Firstly you don't have to worry about bleed through and secondly you can write over them really easily if you need to. I coloured them in blue as this was the first colour that came to hand whilst videoing but if I thought about it I would probably use a more co-ordinated colour and my doodles always have rosey cheeks, that is just a given! I just use fairly cheap children's pencils, not too cheap as they are scratchy and you really have to work at the colour but you don't need to spend a fortune. In fact using doodles and pencils are the cheapest way to decorate your pages over and over again!
Other items shown in the pictures in case you are interested:
Pen - Uniball Signo
Pencils - WHSmiths
Pencil Case - Taupe Polka Dot from my Etsy Shop
Fox Rubber / Eraser - Linkys Dream (in my July stationery subscription box)
I really hope you enjoyed my take and thoughts on how I decorate my pages with doodles. Please do let me know if you would like to see more videos and blog posts on this line and I will do my best.
Have a great week and see you soon!
Tuesday, 12 August 2014
The good and bad side of journalling - Journalling your everyday life
Hi journal friends, I hope you have all had a fantastic week filled with lots of journalling opportunities. Are you finding it easier to find inspiration to journal about now?
I am back this week with two videos and two different areas to talk about, the good and bad side of journalling. No wait there is no bad side of journalling itself, what I mean is journalling about the bad things that happen or about the bad side of life. Bad things happen to good people all the time and it is how we deal with the bad stuff that defines how much of a happy life we in turn have. We can choose to dwell on bad things and let them fester away inside of us or we can choose to process it and move forward with our life. In a way we sort of need the bad stuff to appreciate the good and it is also the bad stuff that helps to shape who we are as a person, it influences who we are, our attitude and our morals.
We need the bad stuff but we do also need to do something with the bad stuff, we can't let it eat away at us. For me I journal about the bad stuff just as much, sometimes more than the good stuff. I seldom 'art' about the bad stuff, instead I prefer to write it all down. I like to document the event in case I ever need to refer to it and also process my thoughts and feelings relating to the event. Sometimes I need a bit of breathing space between the event taking place and my journalling about it, just so that my head can settle and I can mull things over but I don't like to leave it for too long as then I am starting to get in the danger zone of dwelling on it! Sometimes it can be just to raw and painful to journal about straight away but to me it is important to journal about it as I can get it out of my head so as not to worry and bother me there. I know that is is all sitting in the journal if I want to go back to it. I don't have to forget about it and in some cases you wouldn't want to, either way it is still there if I want to refer back to it at any time, it just means that it is not at the forefront of my thinking all the time. I explain all in the accompanying video:
Of course, in life there are plenty of wonderful things that happen to and I also want to talk about that this week so that it is not all negative! That being said, I think the 'negative' is certainly something worth mentioning, it is important to mental health and sanity, well it is with me anyway! So on to some good stuff and also I wanted to share with you a different way and a different style of journalling. Last week Mr B took the week off as annual leave and we had a lovely week pottering around and it was also his birthday and we went away for a couple of days to London. I saved up all the receipts and ephemera from our trip and I just wanted to show you what I do with them / how I use them in my journal. Some people refer to this method as smashbooking but I prefer not to give it a definition, I just call it journalling. So in today's second video I share with you how I put my pages together and another style of how I journal:
Here are the stills of my pages:


Have a great week and I will see you for more on how I draw inspiration from around me into my journal.
I am back this week with two videos and two different areas to talk about, the good and bad side of journalling. No wait there is no bad side of journalling itself, what I mean is journalling about the bad things that happen or about the bad side of life. Bad things happen to good people all the time and it is how we deal with the bad stuff that defines how much of a happy life we in turn have. We can choose to dwell on bad things and let them fester away inside of us or we can choose to process it and move forward with our life. In a way we sort of need the bad stuff to appreciate the good and it is also the bad stuff that helps to shape who we are as a person, it influences who we are, our attitude and our morals.
We need the bad stuff but we do also need to do something with the bad stuff, we can't let it eat away at us. For me I journal about the bad stuff just as much, sometimes more than the good stuff. I seldom 'art' about the bad stuff, instead I prefer to write it all down. I like to document the event in case I ever need to refer to it and also process my thoughts and feelings relating to the event. Sometimes I need a bit of breathing space between the event taking place and my journalling about it, just so that my head can settle and I can mull things over but I don't like to leave it for too long as then I am starting to get in the danger zone of dwelling on it! Sometimes it can be just to raw and painful to journal about straight away but to me it is important to journal about it as I can get it out of my head so as not to worry and bother me there. I know that is is all sitting in the journal if I want to go back to it. I don't have to forget about it and in some cases you wouldn't want to, either way it is still there if I want to refer back to it at any time, it just means that it is not at the forefront of my thinking all the time. I explain all in the accompanying video:
Of course, in life there are plenty of wonderful things that happen to and I also want to talk about that this week so that it is not all negative! That being said, I think the 'negative' is certainly something worth mentioning, it is important to mental health and sanity, well it is with me anyway! So on to some good stuff and also I wanted to share with you a different way and a different style of journalling. Last week Mr B took the week off as annual leave and we had a lovely week pottering around and it was also his birthday and we went away for a couple of days to London. I saved up all the receipts and ephemera from our trip and I just wanted to show you what I do with them / how I use them in my journal. Some people refer to this method as smashbooking but I prefer not to give it a definition, I just call it journalling. So in today's second video I share with you how I put my pages together and another style of how I journal:
Here are the stills of my pages:
Have a great week and I will see you for more on how I draw inspiration from around me into my journal.
Friday, 8 August 2014
We're now all pimped up! - Filofax Friday

Wow guys I am so excited to type this blog post up! If you remember a couple of weeks ago I let you all into the secret that I was to be taking part in the 'Pimp my Filofax' blogger challenge. Well I have been working away and I am now pleased, no ecstatic to be sharing with you my pimped up pages. As you can see above, the challenge was to take the Filofax they had given you with the pages inside and pimp them up, they gave a couple of pictures as examples of the sort of thing they were thinking which you can see in the above picture. If you would like to vote for me please click here.
Let me start by saying thank you to all of you lovely readers. Without you there would be no blog and without a blog I would not be able to participate in the challenge so thank you very much, please know that I do appreciate each and every one of you!
This challenge was not easy. It sounds easy but to me it wasn't. I started battling with my inner critic about not being good enough and worrying about all the other entries but I sat down with her, had a cup of tea and said "look, it doesn't matter it is just for fun there are nice people in the planner community, they won't laugh at you". Well she listened and I was able to start on the challenge.
Originally I had some really radical ideas. I tried a couple out and they were a complete and utter disaster, so much so that I am not even going to share them with you they were horrendous. What I can tell you is that involved items that you wouldn't normally expect to see associated with page decoration and there was even some sewing too! It was all a bit crazy. I felt like there was so much pressure because I really want to win so that I can give Filofaxes away to you and I started to create pages that I thought you guys would like and that is where it went wrong for me the most, I just couldn't do it.
OK so on to my pages then... lots of pictures to share with you. I really do hope you like them as you can see I did put a lot of effort, time and my sould into these lol! I am showing you all three pages that I submitted and it is up to Filofax to choose which ones that they want to use and you guys get to vote on your favourites! So here are my three you may see one of these available to vote on or you may see all three I really don't know.
So first up we have the cloud inspired one, you know how much I like my clouds and how they are always appearing on everything. With all three layouts I also created a page marker to match!


Inserts - By Filofax and decorated by me
Page Marker - Create by me
Puffy Cloud Paper clip - Etsy: ItsFluffyStuff
Cloud Pen and Paperclip - Linkys Dream
Pompoms and glitter - Linkys Stationery Box
Next up is my 'signature' Peeking bunnies... which is the one that Filofax chose for the competition. I submitted all of my pages and they chose my bunnies. To vote for my bunnies please click here.


Inserts - By Filofax and decorated by me
Page Marker - Create by me
Puffy Bunny Paper clip - made by me: tutorial
Bunny Pen - Linkys Dream
Bunny sticky notes - The Idea Owl
Ribbon Paper Clip - Lexi Lindley (Xile Creations on Etsy)
Stickers on pages - Maggie Holmes 683155
Washi Tape - Cath Kidston Tape Yellow Stars Set
Set
Pompoms and glitter - Linkys Stationery Box
And another sky inspired layout...Stars another all time favourite of mine!


Inserts - By Filofax and decorated by me
Page Marker - Create by me
Star paper clips - Staples
Washi Tape - Cath Kidston Tape Yellow Stars
Pompoms and glitter - Linkys Stationery Box
So there we have it, all three layouts. Do you have a favourite? Mine is the stars, I love the stars and it was also the last one I did and I think by then I had really gotten into my stride with it.
I did do some other pimping bits... I handpainted a dashboard to match the outer cover and I also pimped up the page marker and the flyleaf that came with it.

If you would like to see how I created these please watch the video as I recorded the actual making of these so that you could see. I also thought you might like to know how I created the page marker so that you could potentially jazz up the one that you have two. It is very easy to do, I just used Ranger Tim Holtz Adirondack Alcohol Ink, Red Pepper
Download
Of course being the lovely person that I am he he, it would be silly to go to all the effort of making the dashboard and then it just sitting doing nothing so I have made it available as a free download so that you can print this off yourself at home, laminate it and hole punch and off you go! It matches the cover story perfectly but of course you can use it in any planner. I have made it available in Pocket, Personal and A5 as well as a washi card. You will need software that can 'unzip' the folder to release the files as both pdf and jpeg. To download the files please click here. Please note that the downloads that I am offering as freebies as part of this series are different to the ones that I sell, so if you have already purchased anything from me these are in addition for you. If you haven't purchased any of my inserts and would like to or just have a nose at them you can view them in my Etsy shop here. Please note: These downloads are entirely free and a gift from me and only the downloads provided are free, I say this because I know some people might prefer one of the other designs that I offer but it is only the ones in the freebie set on offer at this time.
Giveaway
So the thing is, if I win I get six Filofaxes to give away to readers and if I come 2nd or 3rd I get three Filofaxes to giveaway which is really awesome. Filofax gave me this particular planner to use for pimping and I am able to keep this for myself for taking part if I so wish to do so. The thing is it is a really very nice Filofax, there is nothing wrong with it in my opnion it is just that I am not all that keen on the design of the cover and I know a lot of people do like it. So I was thinking that it would be really silly to keep it all to myself when I am not that keen on it and probably wouldn't use it so I have decided to give it away regardless whether I win the challenge or not. So if you would like to enter the giveaway to win this Filofax please enter your details into the widget below.

What you will win is the Cover Story Filofax as shown. I have literally only used this for pimping purposes and when not being photographed I kept the plastic covering on so it is basically like new. Most of the inserts are still in there however the first half of 2015 have been used so will not be available for use. I will leave my pimped pages in there so you can have those and do with them what you will, the only thing I will take out are the matching page markers as I want those lol! I will also leave in the matching dashboard, washi cards, pink page marker and flyleaf.
To enter after you have added your email address and name make sure you click 'BEGIN' and then follow the instructions! It isn't that obvious so you need to look out for it - it is under the bit that says 'open to...' :D
Well all that is left for me to say now is please vote for me! All you need to do is hop on over to the Filofax Facebook page and there you will be able to see all of the entrants. You don't have to vote for me obviously but it would be super duper cool if you did! Just vote for your favourites and the one with the most likes wins.
Here are all the blogger that have taken part so why not check out their blogs too:
DIY Fish: http://www.wondereland.com/diyfish/category/blog/
The University Project: http://theuniversityffproject.blogspot.co.uk/
Letters in November: http://lettersinnovember.blogspot.com.au
Life of Kitty: http://www.lifeofkitty.co.uk/
Helen's Wardrobe: http://helens-wardrobe.com/
Filomaniac: http://filomaniac.blogspot.de/
High Street Couture: http://www.highstreetcoutureblog.com/
The Pie Patch: http://thepiepatch.wordpress.com/
Randoms from Nat: http://www.randomsfromnat.com/
Sarah Hurley: http://www.sarahhurley.blogspot.co.uk/
Me Just Talking to You: http://mejusttalkingtoyou.wordpress.com/
YLE Creations: http://ylecreations.blogspot.co.uk/
Tracey Hearts: http://www.traceyhearts.blogspot.co.uk/
Blissful and Domestic: http://www.blissfulanddomestic.com/
I hope you all have a fantastic week and I will be back again next week with more Filofax lovliness. I really apologise for there being no content last week, things were just super duper hectic and I really just did not have the time to write or record anything, you know when life just really gets in the way sometimes but I will be back next week. Have a great one :D
Subscribe to:
Posts (Atom)