Showing posts with label Grace. Show all posts

Wednesday, 21 March 2018

Grace's Hop to It Planner Spreads:


Hello everyone! Happy March! It didn't exactly feel very spring like at the beginning of the month did it? (particularly for those of us in the UK). But Spring is starting to show itself now, which makes me very happy :D 

 For this month's stickers I decided to do two planner spreads, both are for this current week (12-18 March). The first is my usual in my personal size planner, with Mini Happy Planner inserts.


There is a Plan With Me video for this spread if you'd like to see it. I didn't do anything too fancy for this layout either, the stickers did the work for me. The pink washi up the inner sides of each page is from the Brimbles shop, and you can buy it/have a closer look by clicking here.

Here are some close ups of this personal size spread:


Then for my second planner spread I decorated inserts in my A5 planner. In this planner I have the 2018 Daphne's Diary planner punched in, and because each week is different and all pages have pretty pictures and patterns, I don't often bother to decorate, or if I do it's very minimal. However, I noticed the theme for this week would match the Hop to It Sticker Kit almost perfectly, as it's both Spring-y and also a bit reminiscent of a pretty pond filled with lily pads.

I don't have a video for this one, so I've taken a few pictures for you to get a good look. I've done the picture's 'before the pen', as I often put a lot of health related things in this planner.


These inserts/planner come with a mini tear out insert each week with a space for a shopping and a to-do list, so of course I decorated that too:


The little frog sat on a rock, pondering away, is my favourite sticker from this month's kit. He just looks so happy and lost in thought. I wonder what he's thinking about! 


As always, thank you so much for reading; I hope you enjoyed my Planner Pages for this month. 


Grace @ms.paperlover

Thursday, 22 February 2018

Grace's We Go Together Journal Pages


Hello everyone!

With this month's "We Go Together Like..." sticker club I was so happy that Anna made a kit that was suitable for those who like Valentine's... and also for those who do not (that would be me!).

With my stickers I decided to use the 'We Go Together' theme to do some creative journaling pages with pictures of my best friends and I. 

I have many creative journals, but as this is a super cute collection I went with my A6 size journal to do a smaller spread.

I started by painting on a thick layer of light pink acrylic paint. Nothing fancy, just a couple of swooshes with a wide brush:


The paper in this particular notebook is good quality, so I didn't bother priming the pages with gesso, which is what I would usually have started with. Once that paint was dry I added some of the washi and half box stickers:


Then backed my photos with some plain pink and blue paper to help them stand out, and started adding a few more stickers in clusters around the photos.


And some more stickers...


For the large 'XO' sticker in the centre I snipped it in half so it didn't bubble or buckle where it went over the two pages. I also used a 'We Go Together Like...' label from one of the sheets on the main photo to use as my title. Sometimes I think it's fun to use a 'small' title (if you're using one), rather than it taking up a lot of the page and drawing all the attention.
Lastly I added some doodles in a fine nib black gel pen, making a border around the whole spread and adding a few hearts. 


And there we go! I added in my journaling later on (in another fine nib gel pen) after I had taken the photos, some journaling you want to keep to yourself ;-)


And then, as ever, I decorated my planner pages. 


For my planner spread I decided to just stick with the Coffee and Doughnuts, and Tea and Biscuits stickers to have a 'Tea and Coffee' themed week. With Coffee for the Monday-Thursday half of the week (when you need it most!), and Tea and Biscuits for the weekend. 

There's a Plan With Me video for this spread on my YouTube channel, if you'd like to see the process. If you're not inclined to watching Plan With Me videos, then here are some close ups to get an idea of the process :) 


And there we have it! I had great fun with this super cute kit, and still have a few extra stickers that I think I'll use to decorate some happy mail - if I do, I'll share pictures on my instagram and on the Happy Place Facebook group, so keep an eye out! 

Thanks so much for reading :) 


Grace @ms.paperlover


Friday, 2 February 2018

Grace's Bundled Up Creative Journaling


January's warm and snuggly stickers were just perfect for the beginning of the year; when it's horrible outside (well, it is for most of Europe anyway!), and all you want to do is hide in a duvet. 

Unfortunately I spent more of January wrapped in my duvet than I'd like after getting the dreaded flu! But this sticker kit was exactly what I needed to journal the event. It's always important to journal the good and the not so good!


I started by spraying the pages with a light layer of water, then adding watercolour paints and letting them blend into one another. I also added some watercolour splatters by tapping my brush over the pages.


I then added washi, both from the kit and from my stash onto the pages.
I backed my two photos with some Brimbles papers, both are the B sides of this paper, and this paper. 


Apologies for having to see my make-up-less face! But my lovely cat kept me warm while I was poorly and I managed to get a selfie with him! The flowers are some beautiful pink and white roses (one of my favourites) that my Dad got me as get well soon flowers.


I layered the stickers and some of the phrases over and around the photos, and some more in the corners of the pages, before adding my title with both hand lettering and some alpha stickers from a previous Brimbles Box. 

If you'd like to watch the whole process, then I have a video of that on my YouTube channel which you can watch by clicking here.

After that I did my usual, which was to decorate a weekly planner spread:


 And likewise, you can watch a video of that on my YouTube channel. 

Thanks so much for reading - I hope you're all keeping warm!

Grace @ms.paperlover


Wednesday, 20 December 2017

New Year Planner

HAPPY NEW YEAR!

Well... almost!

I love this month's sparkly and wintery sticker kit. In the unlikely event that you haven't seen this month's Sticker Club, I have a video showing the sheets which you can watch here

With this month's stickers I decided to create a double page spread in my planner that was all about the New Year. Something I can fill in with goals for the year, and something I can refer back to throughout 2018. 


The pages are just plain A4 paper, cut in half and then punched into my planner. On the left page I've used some of the full box stickers, and the big gold sparkly 'This Year' sticker, as well as used the 'New Year, New Beginnings', 'Page 1 of 365', and 'Hello 2018' phrase stickers. Then I measured out twelve lines and wrote in the months. 


At the end of each month I'm going to go back to this page and write in something I achieved that month, or something new that I've tried. To encourage me to focus on positive things and keep track of achievements, no matter how small they seem. 

The page on the right is for my goals. I layered washi tape and the washi strips from the kit, and added the '2018' box sticker (which I trimmed down), and the large 'goals' sticker at the bottom. Then another box and a phrase sticker - I love to see positive quotes and sentiments all over the place!


I then put in all the gorgeous decorative woodland creatures, and around them doodled four different 'boxes'. In each of these I will write a goal for the year. I also added some arrows and circles from the functional sticker sheet. I may add some 'small' goals in the two large circle stickers too. 


The washi tape I used you can find in the Brimbles store, the black washi with gold triangles, and the gold glitter washi.

After creating that main project I had plenty of stickers left, so I decorated the first week of the year in my personal size planner.


I've changed my personal inserts for 2018, so it was the first time in over a year I've decorated Week on Two Pages inserts! I've decided I don't like Filofax's blue text for the days of the week, so I used the blank header stickers to cover those up and wrote the day and date underneath instead! Here's some close ups:


And there we have it! Thanks so much for reading, and I wish you all the best for the new year :) 

Grace @ms.paperlover


Wednesday, 1 November 2017

Grace's Gift Tags and Planner Pages


It's Christmaaaaaas!

Well... almost. As I write this it actually isn't even Halloween yet, but I'm trying to be super prepared this year. My birthday is in mid December and my goal is to get everything Christmas card and gift related completey sorted by then so I can really enjoy the season. And some Christmassy Brimbles stickers have helped me on my way to that goal!

I started out doing something a bit different, as I fancied trying something new with the stickers. And so I made some gift tags!


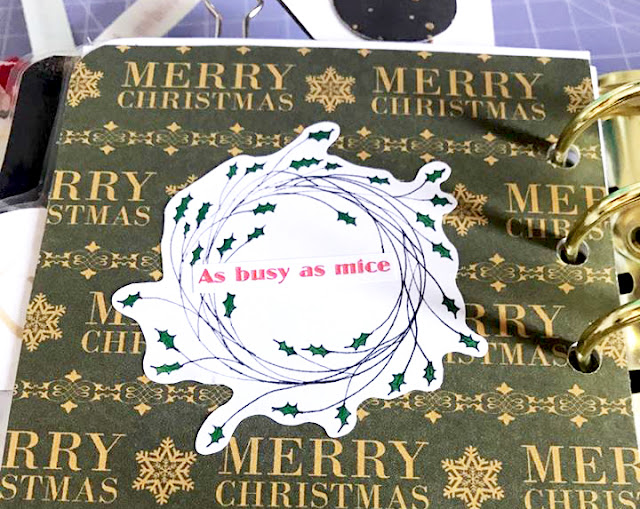
I made the tags on my silhouette machine with some standard Christmas cardstock, but they're very simple shapes it would be very easy to draw and cut them or use a die cut machine. The cardstock needed to be something simple so the pattern wouldn't take attention away from the stickers. I cut up the washi strips, as well as some red and green glittery washi I had in my stash, and layered them at the bottom or sides of the tags, then added the cute mice from the decorative sheet as the main elements. 

Then looped either some Christmas ribbon or washi through the top of the tag and they were done! A really simple craft but I think quite effective. The tags are super cute and will look great either on gifts or in the pockets of my Christmas planner. I could also use them in happy mail, as bookmarks, and even as decorations.


Next was my usual sticker project, which was to decorate a week in my personal size planner.


There was quite a lot of layering and sticker clustering involved in this spread - one of my favourite things to do! Here are some close ups:


With some of the remaining stickers I decorated some pages in my Christmas planner, just to add a bit of fun to some otherwise plain pages.


With the remaining checklist and other functional stickers, I'll be using them in my Christmas planner as and when needed to make to do lists, shopping lists, or highlight important things.


This month's kit has certainly made me feel way more Christmassy than I usually do two months before the event, I hope my projects have given you some ideas and inspiration. Thanks so much for reading!


Grace @ms.paperlover