Thursday 16 February 2017


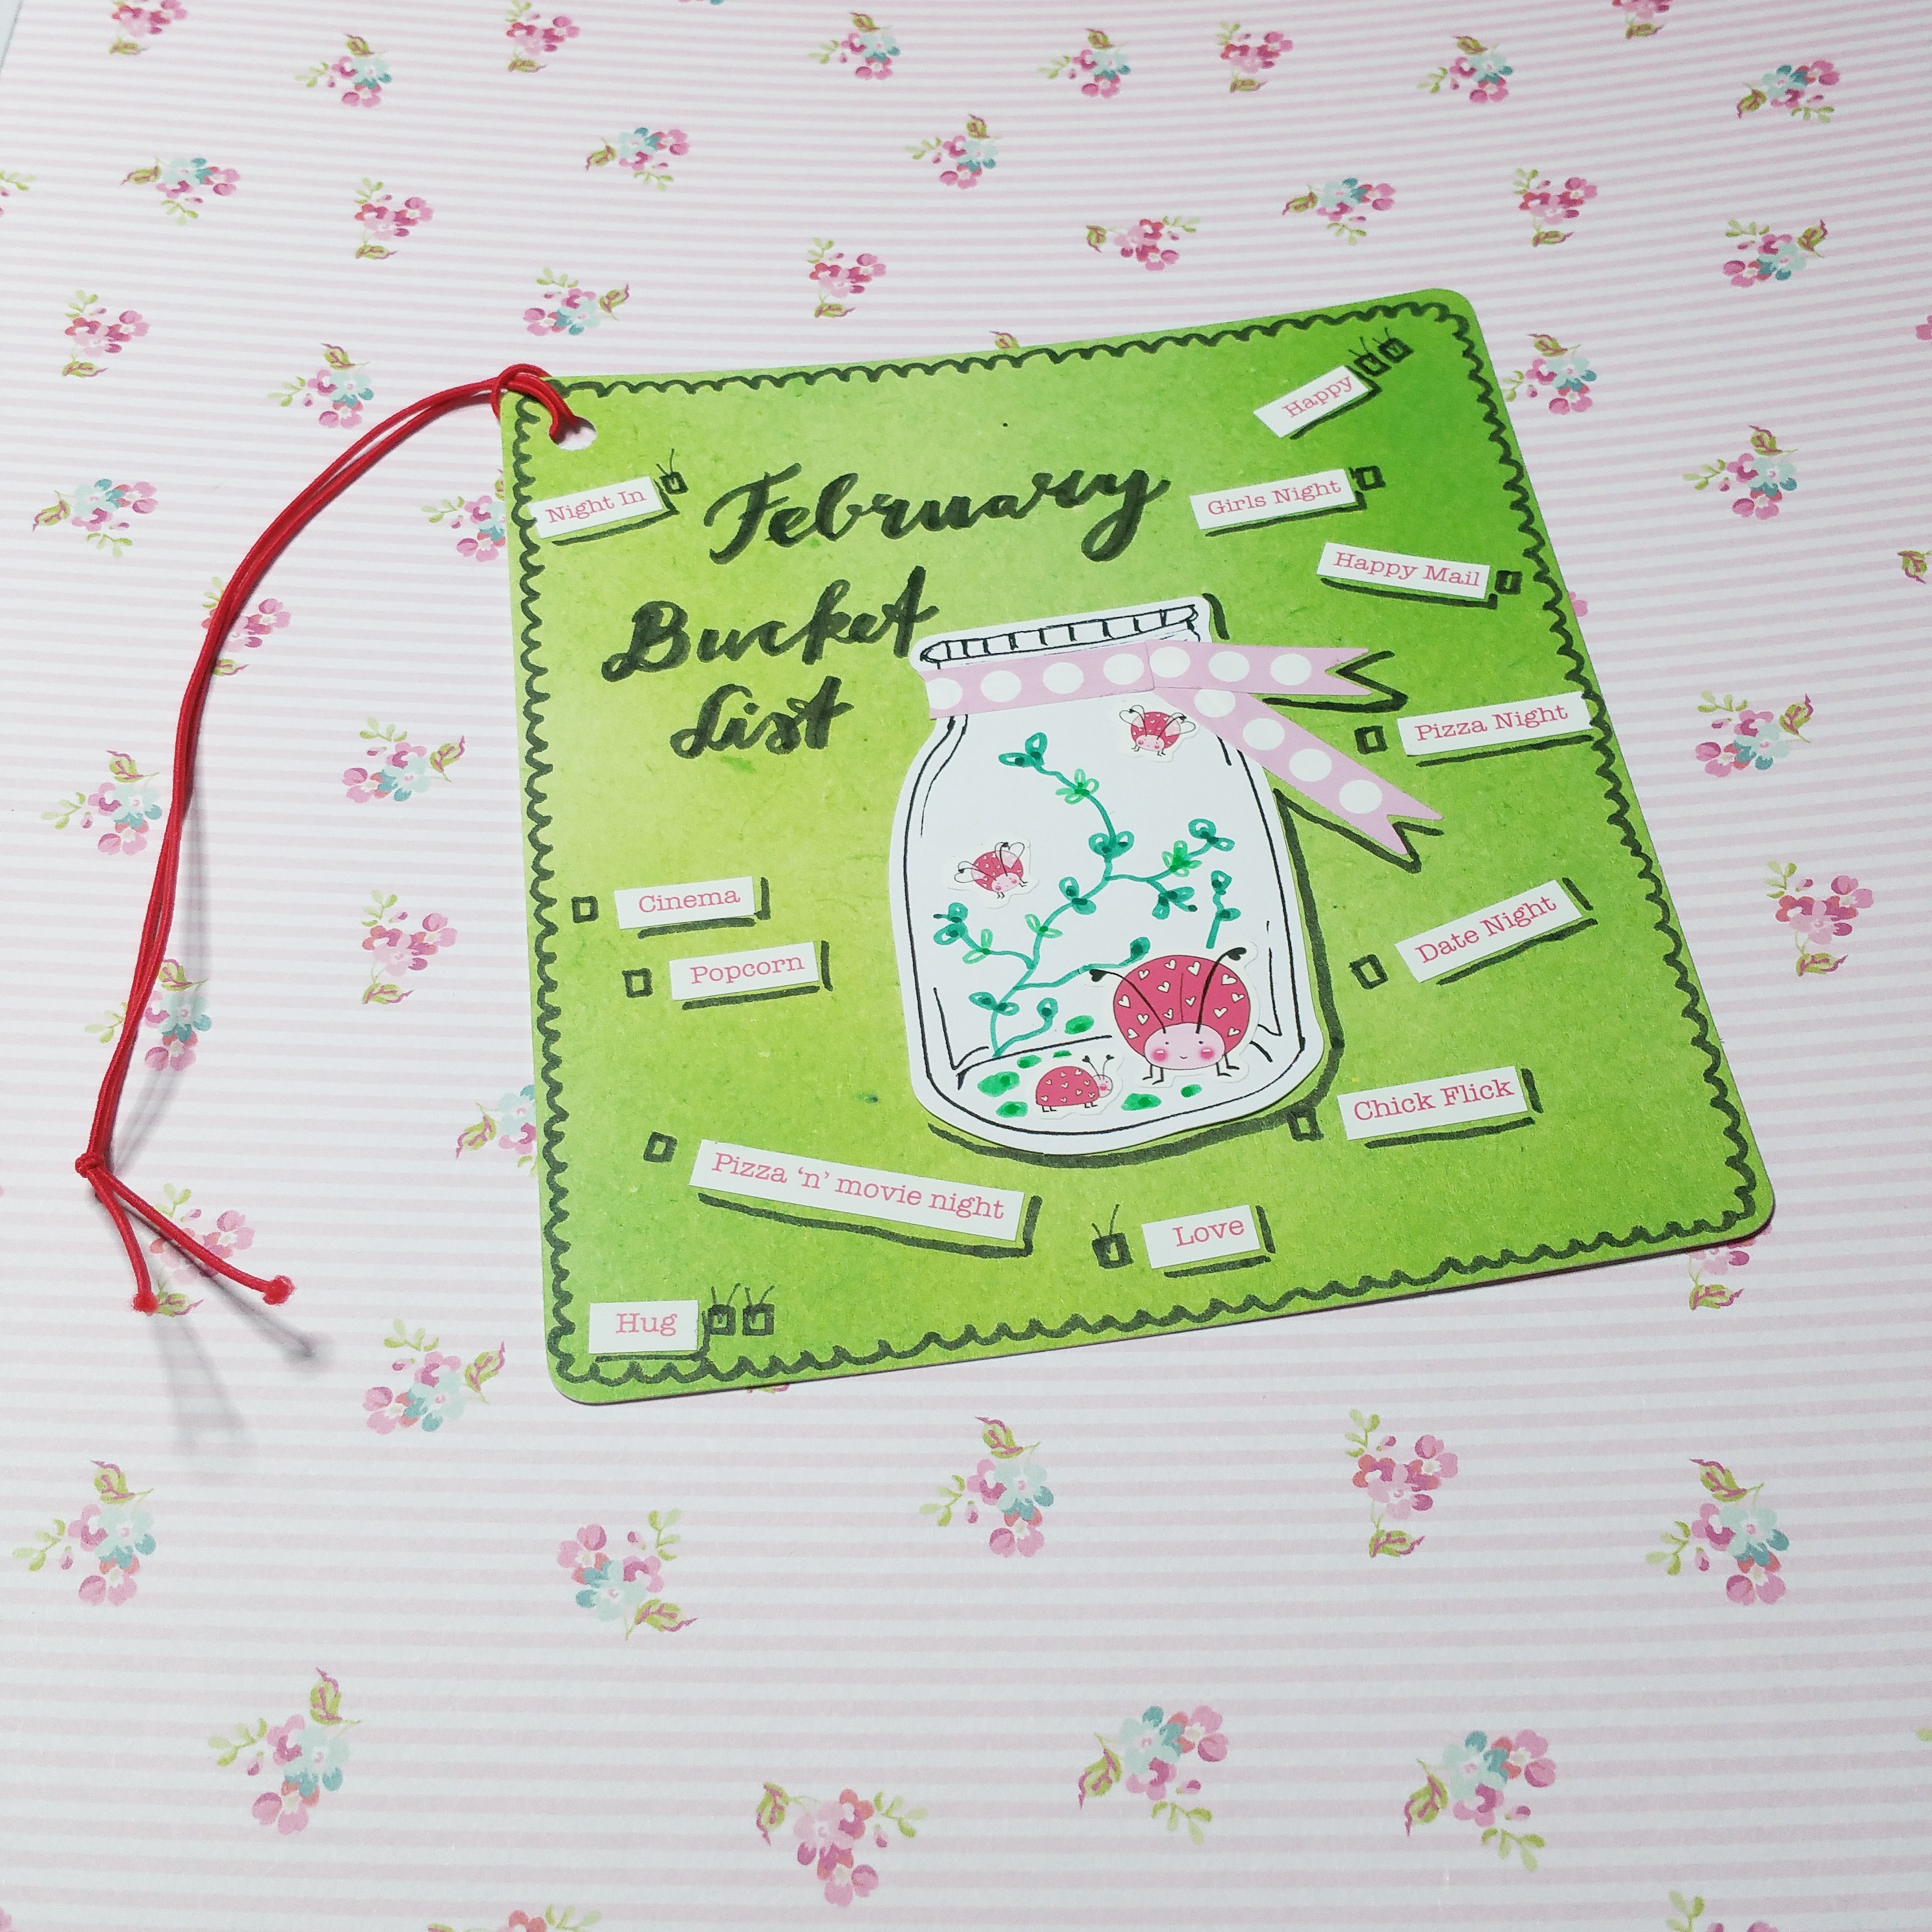
February Brimbles box is here and yet again i love it. here is the unboxing 


this box is the perfect mix between valentines and romance and a just a amazing and cute box.
the first thing i did with the box is i actually organised into a new storage box i have i did a video on this. i find having the kit laid out the way i have it really helped me to utilize what was in the box.
The first thing i did was create a scrapbook layout. i really wanted to use this picture on my daughter Mia. ( im aware her shoes are on the wrong feet lol )


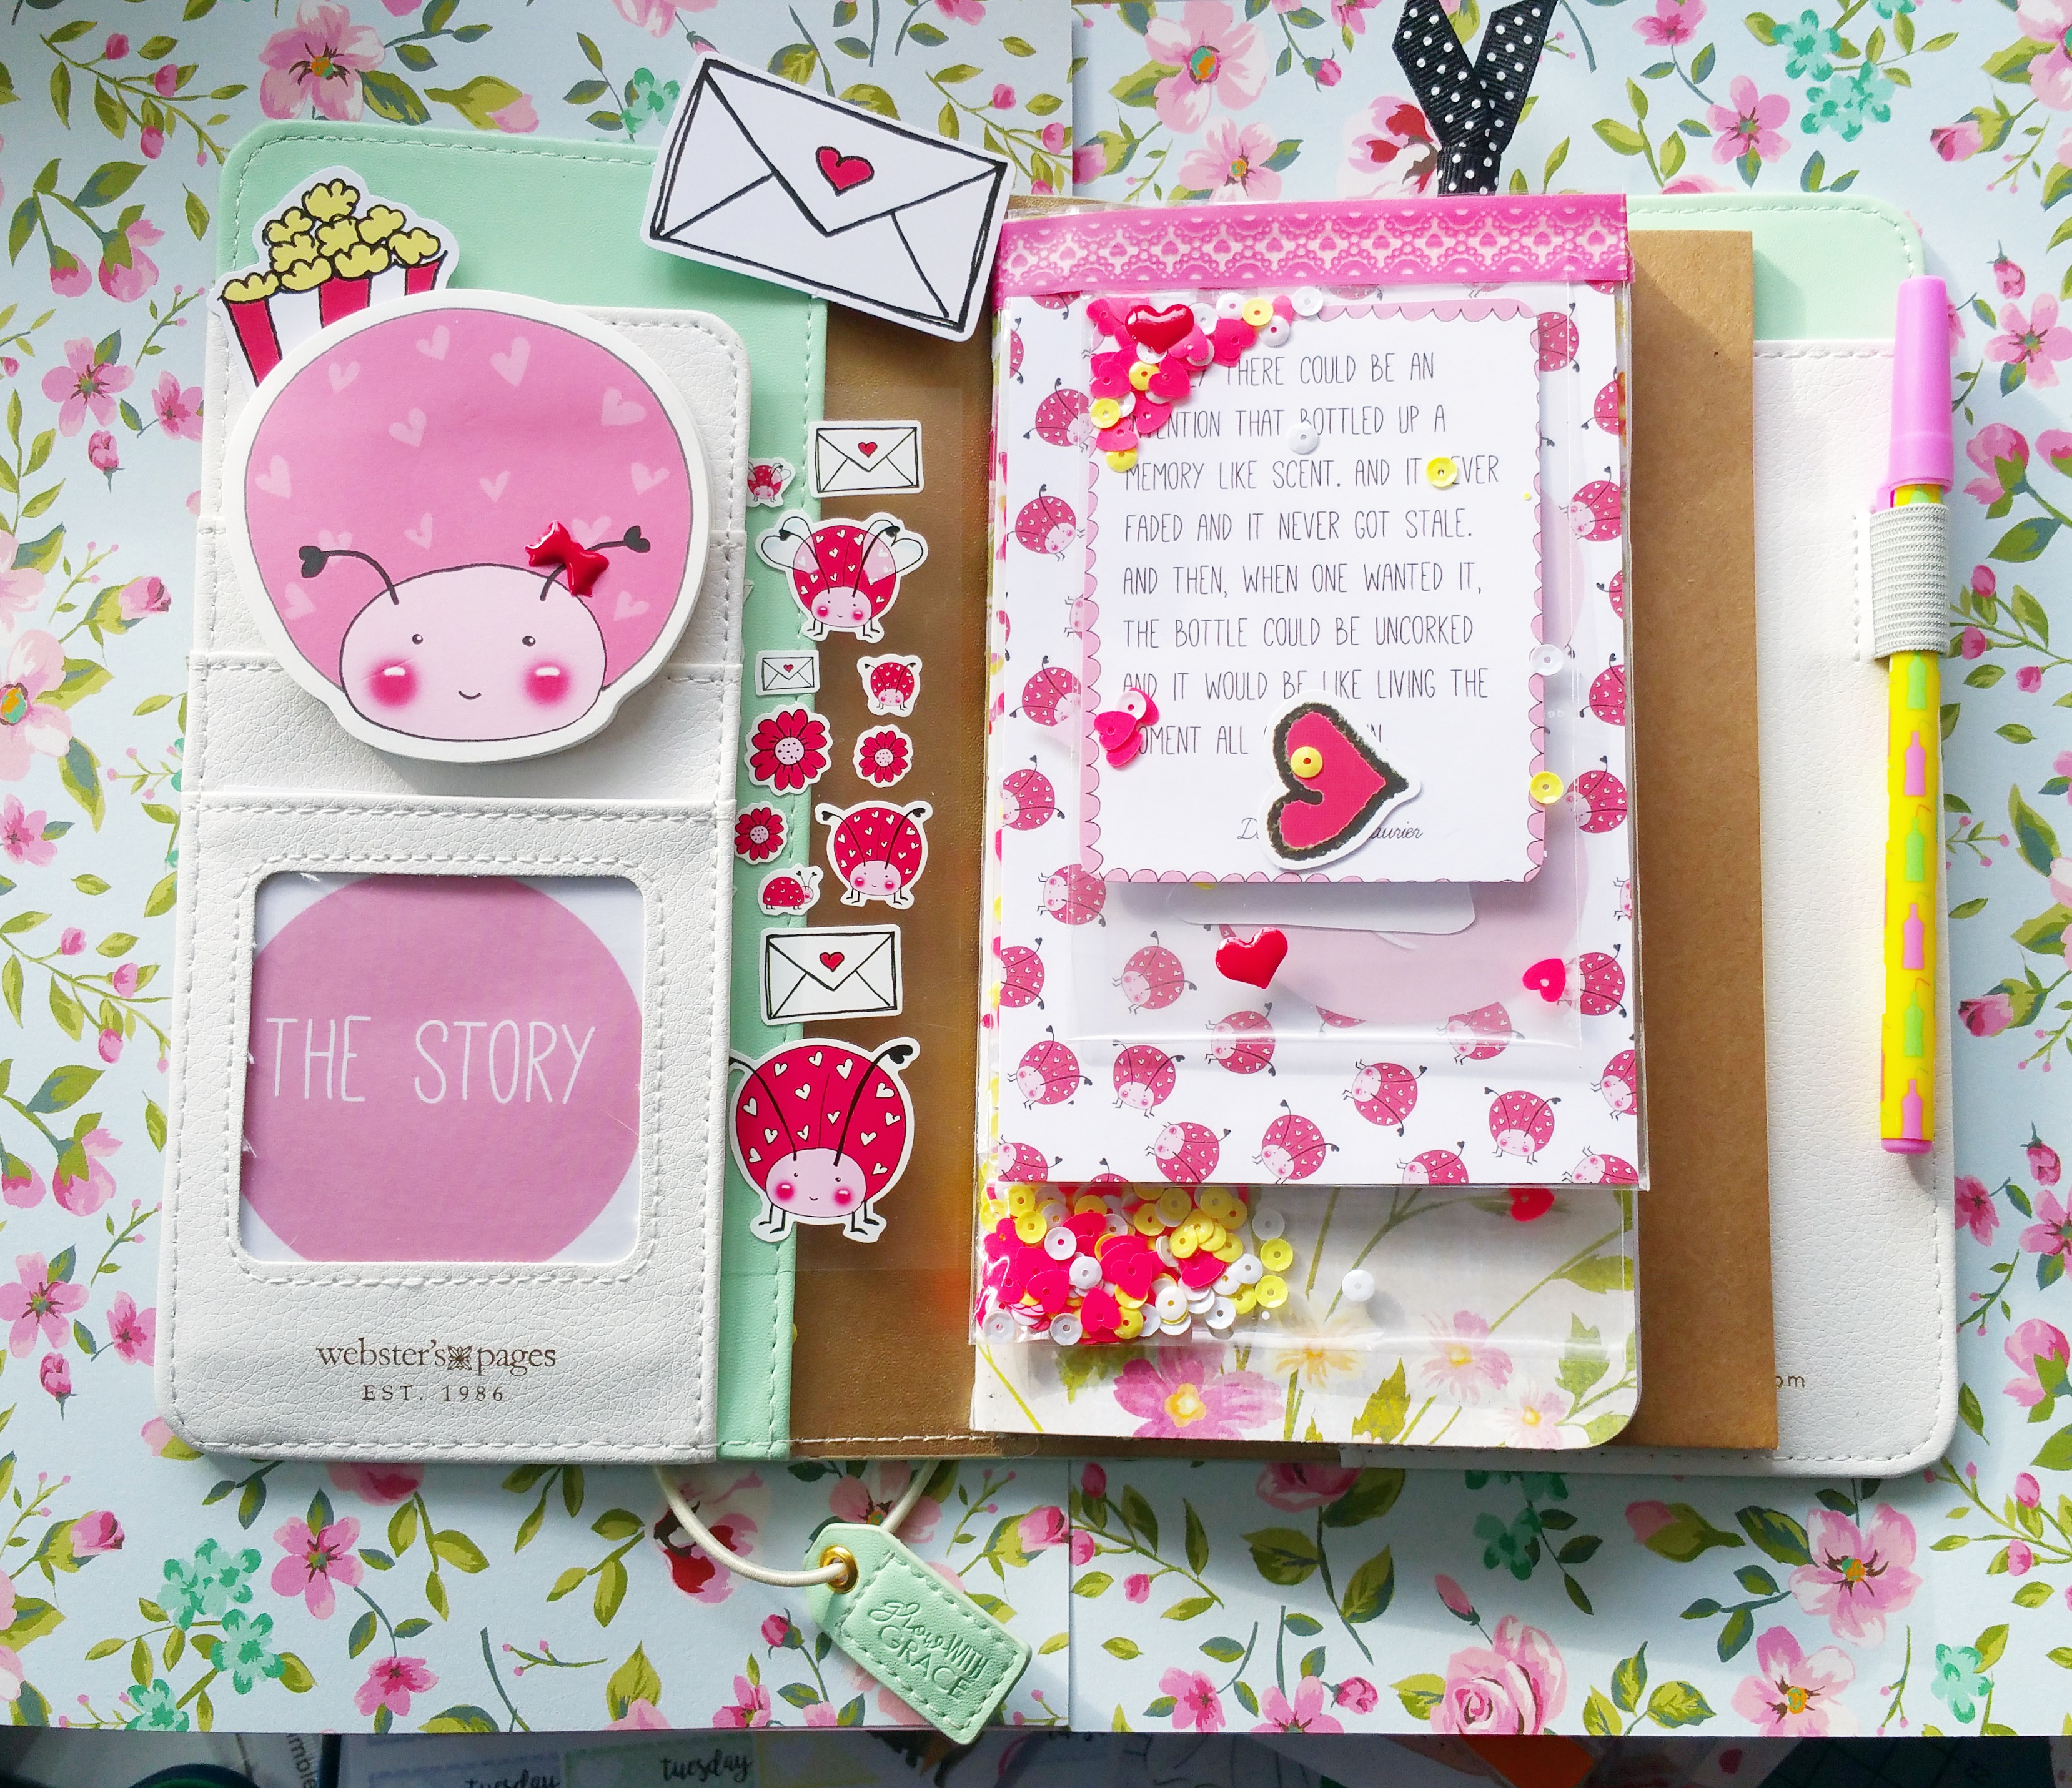
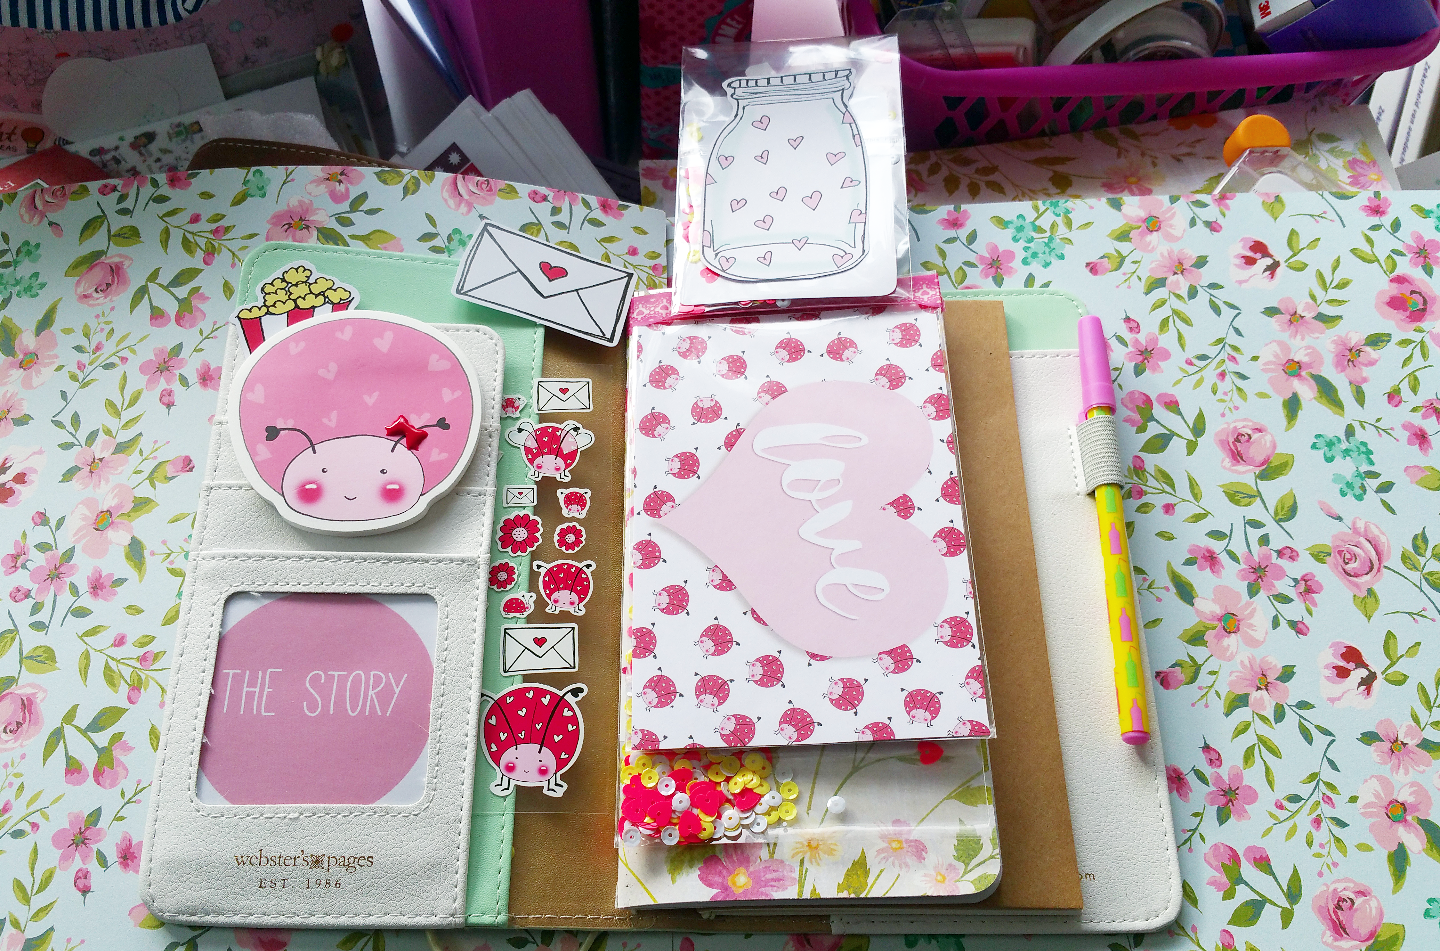
i used some of the sequins and ephemera from the box and some stickers to create the shaker mini pocket in the bottom right hand corner in some of the packaging the stickers came in.  


Then as i mentioned in the haul video. i wanted to use some of the 12"12 sheets that come in the box that had the envelopes on to make a divider in my planner to section off all my pen pals addresses.


 With the planner stickers i knew i wanted to do a layout in my person Filofax planner. i run the washi tape down the middle and re-punched it, and used a combination of the planner sticker sheet and the decorative sticker sheet to create the layout. I also used a piece of the ephemera to make a cute paperclip.


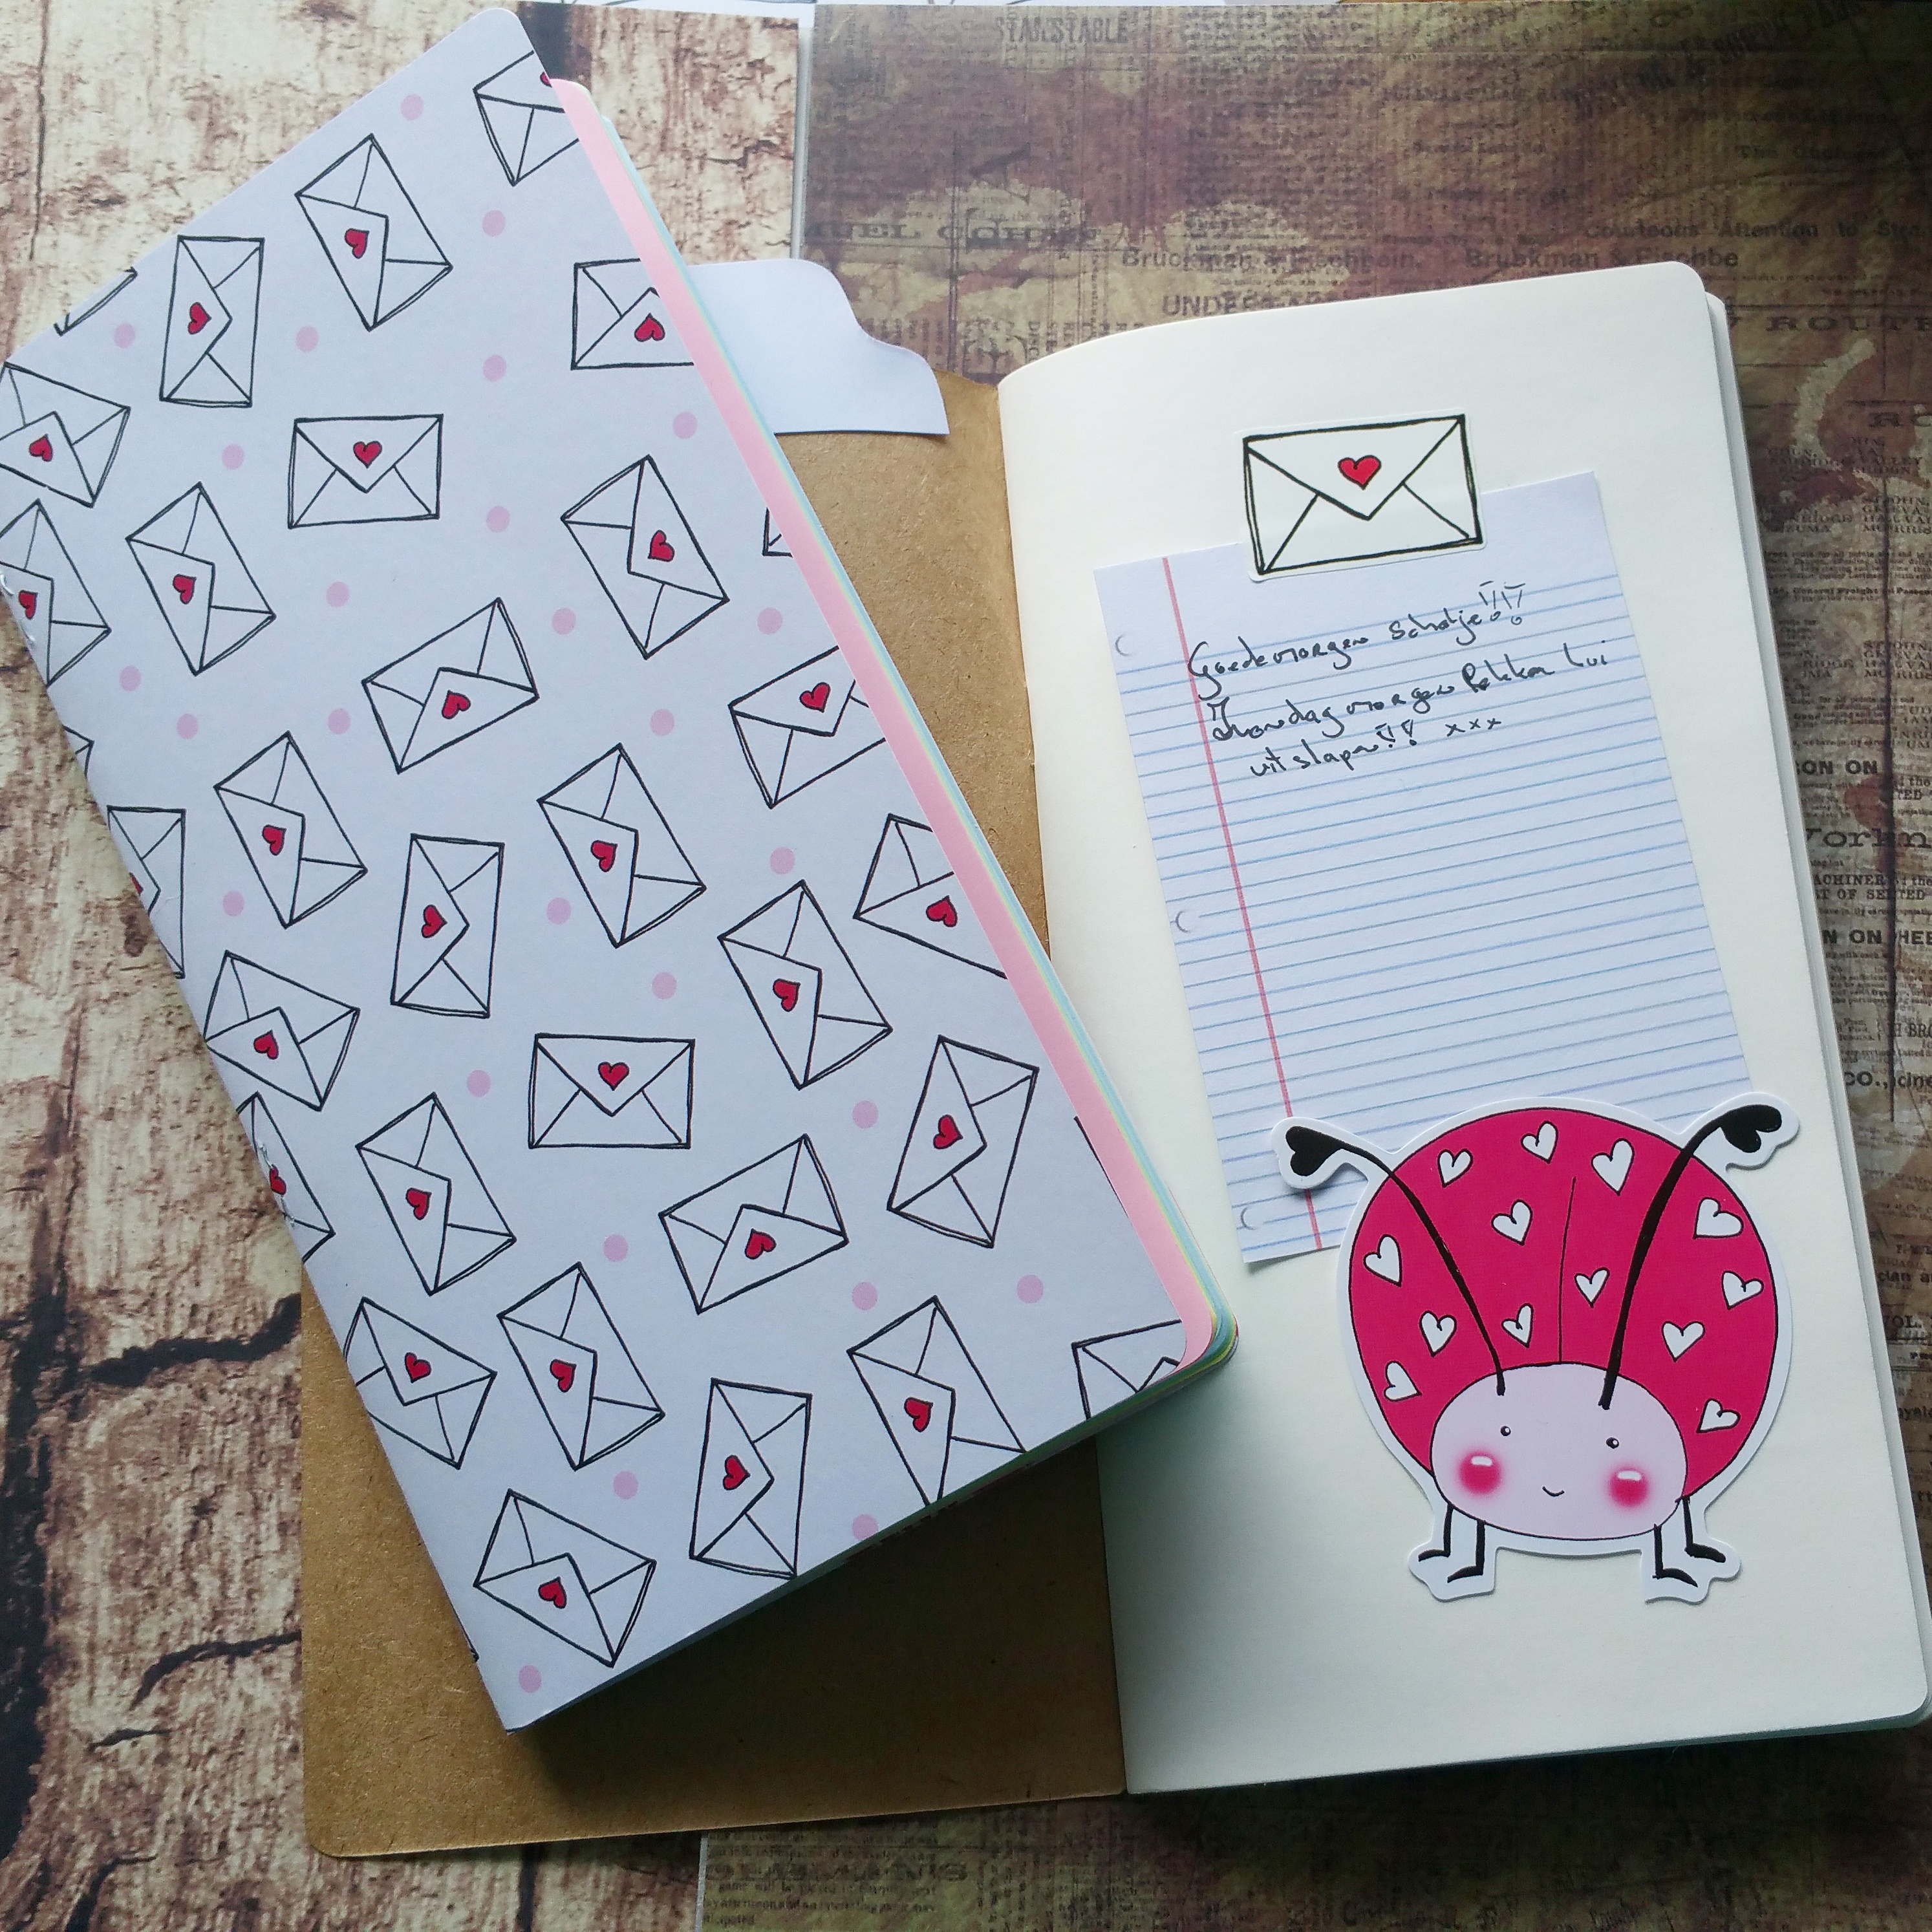
I also wanted to make a flip book out of that paper. I thought the pattern was very appropriate for flip-books and i used a combination of the whole box to pull the whole thing together it folds and the back. i used one of the sticky notes at the bottom and used a speech bubble from one of the sticker sheets and wrote happy mail on it to add a cute touch. and again i used some of the sequins and stickers and enamel dots  to decorate it.


i loved this box so much. the theme and colours are really my style and can't wait for the next one. 


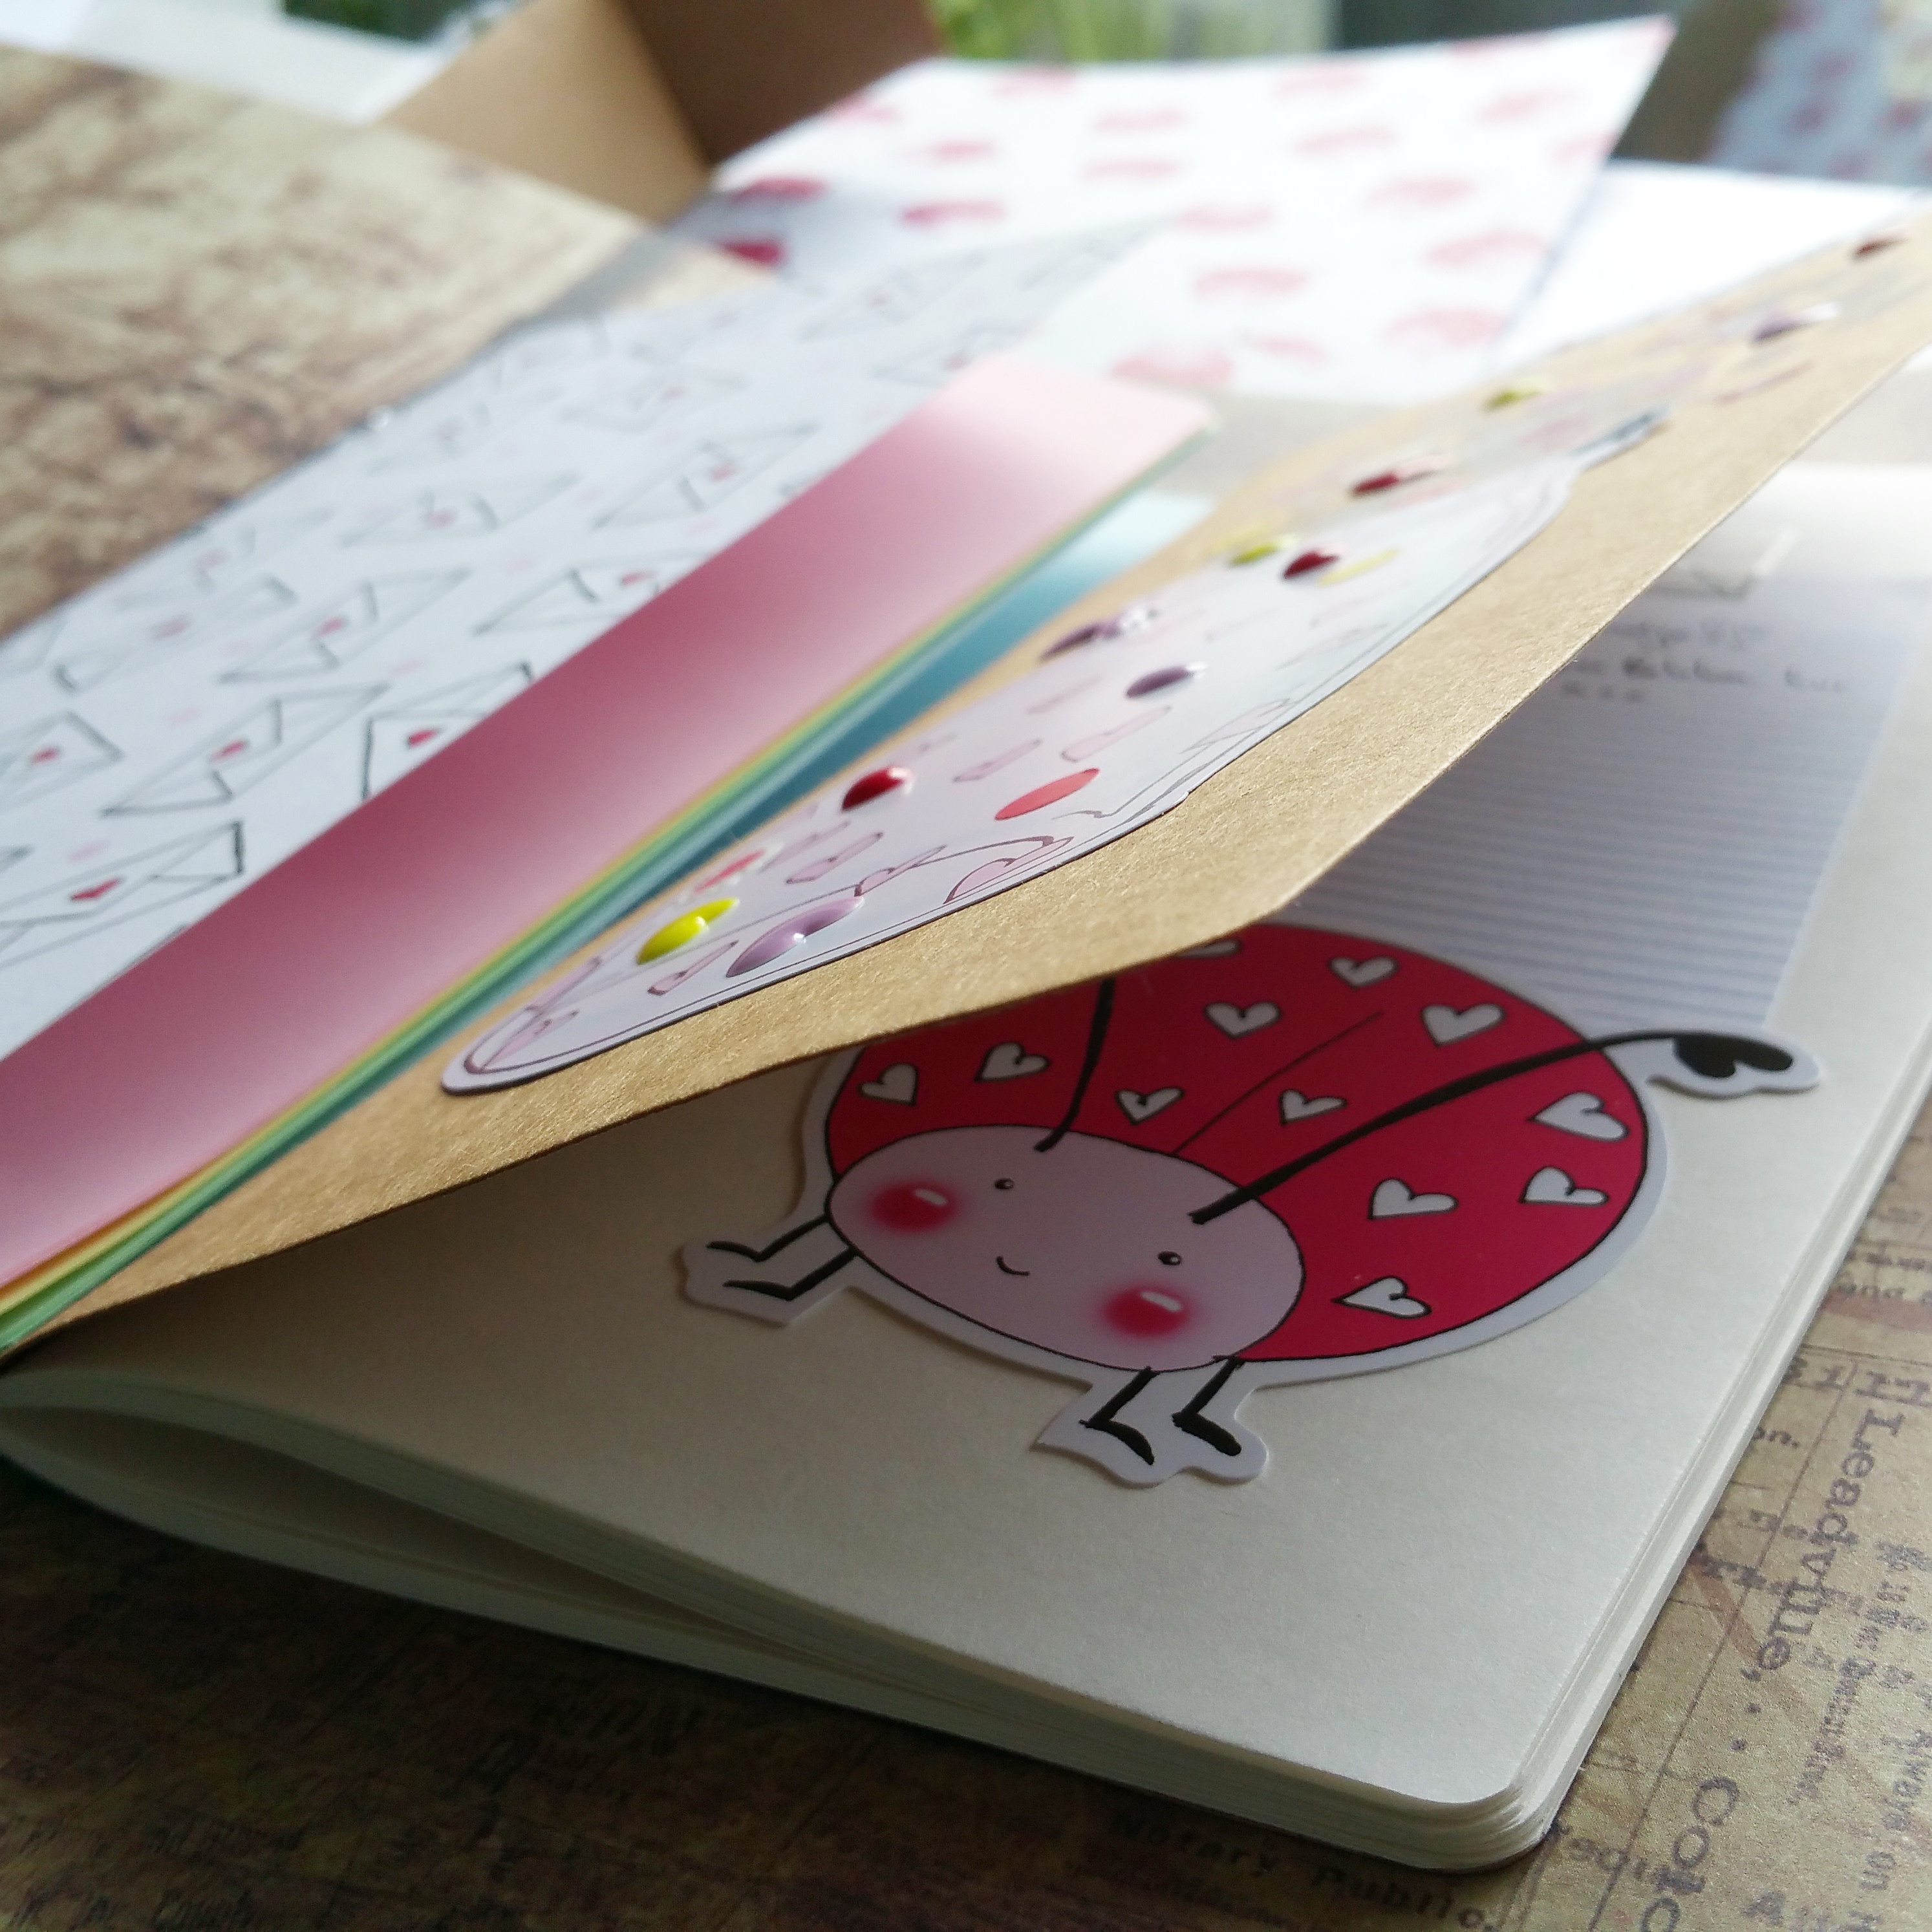
So i cut it to size and punched the holes in,then cut one of the 3"4 cards out that had the grid on and the envelope at the top. and used some of the ephemera which is the large envelope. and some of the enamel dots and washi tape and laminated it. i love how this turned out and it really is coming in handy so i can keep all the addresses in one place and keep a record of who i have replied to and who i have received letters from.


Monday 13 February 2017

Travelers Notebook Page Marker

  The eye candy of colours and art that greeted me in February's Brimbles box was overwhelming. The papers screamed to be used as notebook covers. Because they are double sided, it look double cute.


 As I made one for my regular size travelers notebook, the thought came to me to use one of the cute pieces of ephemera and the sequins, and make a tiny little bookmark charm. Sewing around it in bright pink thread gave it an added dimension.


 Taking another piece of ephemera, I ran it through the laminator, and hot glued it onto a big yellow paperclip which was in keeping with the colour scheme. A flower at the back hid the messy glue!


I'm currently setting up a pocket size planner to keep on track with my traveling/happy mail. The colour scheme and artwork, especially the envelopes, went really well with the planner, so I decided to make a set of dividers and a shaker dashboard. Instead of the sequins, this time I thought it would be fun to back the stickers with paper and place them inside.


 I decided to place the paperclip and some of the stickers, and the washi on the inside cover of the planner.


Saturday 11 February 2017

Creative Goals


Hello everyone!

I'm back today with a spread in my creative journal, all about my goals for this year! I'm loving my traveller's notebook for this kind of memory-keeping; it allows me to journal a little more than Project Life does, and really note down my thoughts and feelings about an event. 

I used the beautiful January Brimbles Box to put these pages together, and the goal-focused sentiments were just perfect!


Part of the journaling is quite personal, so I decided to create a tip-in. I used washi tape from the box, along with one of the 6x4 cards from the cut apart sheet, to create this lift-the-flap type page. It not only covers my more private thoughts, but allowed me an extra space to write my general goals for the year. I decorated the card with some phrase stickers from my stash, and some of the gorgeous foiled stickers from the box. I love the planner sticker, too.


I covered the right-hand page in some of the marbled paper from the box; I treated it almost as a scrapbook page. I layered a doily from my stash, a photo of my friends and I from New Year's Eve, and trimmed out the circular "Goals" piece from a card on the cut apart sheet. I picked out some alphas from my stash to create a title, along with a few more of those phrase stickers to tie in both pages. To finish the spread, I used a tab from the box for a bit of dimension and interest. I think it looks fab to have tabs and bits and pieces visible when the notebook is closed. 

I hope you enjoyed seeing my project! You can also find me on Youtube, Instagram and Twitter.

ChloƩ


Thursday 9 February 2017

Digital World to Planners!


img_20170203_120815_485

Even if you're not into 'Love' and 'Valentine's day' at all this month's box is absolutely adorable! I cried happy tears when I opened the box.

  img_20170205_120117_961

The pinks and the reds inspired me so much! The ideas are still comming to my mind. In this digital era it is so nice to just sit at your desk and create things with real paper and feel it in your hands.

  img_20170202_161340_444

screenshot_2017-02-03-12-10-14-1

My boyfriend and I do a lot of digital texting on our phones during the week because we live seperately. So I decided to collect all our sweet messages and make an insert for it in my Traveler's Notebook. This notebook stays on the kitchentable at home so we can write to each other on the fly. I think this is very romantic!

  img_20170205_115853_780

img_20170204_223016_640

img_20170205_212444_989

Since I am on a budget I've used Mrs. Brimble's clear sticker bags to create a waterfall shaker dashboard. (the clear bags come in every box) That way you don't need a fuse tool and it becomes very easy to make a dashboard yourself. It took me litteraly 5 minutes te create one. Since these bags come in different sizes you can make a beautiful waterfall effect by layering different sizes up uppon each other. It gives the dashboard instandly much more interest.

I hope I inspired you!
Happy scrappin'
Brigitte

Tuesday 7 February 2017

Travelling Notebook Page Decoration!

I
 spent so much of my time at the end of 2016 sorting things out with the house, I didn't have a chance to fully appreciate my Brimbles Boxes during those months. So this month I decided to dig everything out and just go to town with my Brimbles Box goodies!


Today I'm sharing a page spread I created, in a travelling notebook! This is someone else's travelling notebook, and about 4 or 5 people had already contributed to it. I chose to decorate two pages in this notebook as the owner had let the contributors choose how many pages they wanted to do.
I dug out my October Brimbles box, a few bits from my Brimbles Advent Calendar and also some things from the January box.

The October box was very autumnal themed, so there was plenty of orange popping up! I decided to go with this as the main colour, and then choose things to work with that. 


I used some of the orange washi tape and placed it randomly on the two pages. I used this floral jar sticky note from the Advent box to stamp one of the positive phrase stamps on to (from the January box). I tend to use decorative sticky notes, more like ephemera, than I do as sticky notes.
I used one of the marble sticky notes from the January box, along with a red circle spotted die cut from the October ephemera pack behind the stamped sticky note.

Once I'd arranged and stuck all these down I popped some enamel dots around the place, and stamped an arrow from the same clear stamp set in the January box, across my layered ephemera.


Last of all on the opposite page I stuck some more of the spotted red washi tape in the top right corner to help balance the two pages, and then chose some die cuts to pop on the page.
Seeing as the pack was very autumnal themed there were a lot of die cuts referring to autumn experiences. So I chose some which were more generic and would fit this time of the year just as well. I wanted to make sure these pages reflected here and now, as the travelling notebook is trying to capture where I'm at right now.

'Snuggle Weather' fit with the wintery weather we are currently having, and the pie.... well the pie just looked warm, and fit well in the corner ahah.

If you want to know a bit more about Travelling Mail, then feel free to take a look at the Travelling Mail Facebook group here.

I hope this helped to show you how you can incorporate all your boxes together, no matter what time of the year it is!

- Daisy X

Monday 6 February 2017

Using your stash!


If you're anything like me, you might have a tiny problem hoarding your beautiful crafting materials.
This is my attempt to remedy the fact that I have absolutely beautiful scrapbooking papers lying around unused and ensuring that I do actually use them and have them already conveniently set up to do so!


If you're interested in making your own inserts, definitely check out Anna's video tutorial here because it's simple and easy to follow!

Now for a peek at how I've started using my journaling inserts:


Full confession: I am not someone who finds it easy to 'journal.' Even when I was doing Project Life, I preferred to let the pictures tell the story and usually only added dates or names of places (if that) to my pages because writing down stories of my life does not come naturally to me.
But I'm trying!


My pages are colourful and a bit chaotic, but you know what, I don't mind that. (Honestly, it's probably a bit of a reflection on me!) This is purely a place to document in any way I feel like at any given point. I'm not going to worry or stress about what other people think of my 'layouts' or 'pages' because while I love sharing them with people, they're primarily for me. I think it becomes really difficult when we are more focused on what others think than on what we think of our own work; it can be crippling and terrifying to share things because worry takes over.
My advice? Don't worry! Have fun! Explore! Play!


As always, I would love to hear about the projects you make with your patterned papers. Leave a comment here (or in Anna's Facebook group) so that everyone can see them!

If you would like to stay up-to-date with what I'm creating, you can follow me on Instagram or on YouTube for more content.

Happy crafting!
Stef xx

Friday 3 February 2017

Goal Setting inspiration board (Planner)


As soon as I opened my January Brimbles Box, I knew exactly where I was going to use it!
I recently got myself a new work planner in the Kikki-k sale, I went for a nice smart black one this time. The whole 'new year, smarten things up' vibe got me good. But seeing as black, gold and white was the main colour scheme, it meant that the January Brimbles Box was just perfect for this planner!


I decided to make myself some plain dividers out of white card, because even if I move out of this planner, or change up the dashboard somewhen, the sections in this planner will always stay the same. So it makes sense to have something that will go with any colour scheme, rather than remaking them each time.

I used the white marble 12 x 12 card stock to make a dashboard. Then I used one of the journaling cards that said 'My goals for the year', to make a little decorative mini dashboard.
I decorated this mini dashboard with various things from the Brimbles Box, including some of the Black floral washi, circular phrase stickers, and some of the clear stamps.


I put together the DIY marble circle paper clips, I used a bit of E6000 glue and they stuck to the gold paper clip really well. I decided to attach the black marble one to the top of the mini dashboard to break up all the white marble a bit.

It was a very simple DIY but sometimes they are the most fun! Being able to quickly make a few random pieces into something useful, and pretty, is a really enjoyable, and relaxing process.


Of course I had to attach the amazing snowball charm to the planner! It's really nice to look over at my line up of planners and see something a little different, compared to the usual dangly charms I have attached to them. The large lobster clip on the end of it is really handy too, if it's getting in the way at all, or I want to move it about for a photo I don't have to open the planner rings to do so! I just unclip it and move it about.


When I have a small space of white that I want to fill, I find this technique of stamping very handy. I choose one stamp that will fit well in the gap, in this case I chose the arrow stamp. Then with the first stamp (straight off of the ink) I will place it in the largest gap of white space. After this, without re-inking the stamp, I will stamp the leftover ink around the first stamp in any remaining gaps. It creates a sort of fading effect and fills a gap without being too intense.

I'm really happy with my current work planner setup, I love it when a planner is all colour coordinating! The Brimbles Box is definitely perfect for this. Anna's does a great job at designing the products in the boxes so they all coordinate brilliantly!

- Daisy X

www.mygreencow.co.uk YouTube Channel: MyGreenCow Instagram: @mygreencow Twitter: @mygreencow Facebook: MyGreenCow