
Friday, 29 December 2017
What I got for Christmas 2017 | "Everything Else"
I thought I would share with you what I got for Christmas this year as I know you guys love to nosey as much as I like to nose at what you got too he he! In this video I am sharing all of the other items I was lucky enough to receive that weren't in the first video I posted.
What I got for Christmas 2017 | Stationery, Planner & Journal
I thought I would share with you what I got for Christmas this year as I know you guys love to nosey as much as I like to nose at what you got too he he! In this video I am sharing all of the planner, stationery and journal related items I was lucky enough to receive.
Friday, 22 December 2017
Christmas Journal / December Daily Flip Through - Week 2 | Travelers Notebook
Hi Everyone!
Hope your Christmas is going well. Here I am a bit later than hoped but with my week two flip through for my Christmas journal / December Daily. I hope you enjoy!
Hope your Christmas is going well. Here I am a bit later than hoped but with my week two flip through for my Christmas journal / December Daily. I hope you enjoy!
Thursday, 21 December 2017
Drawing Gum Resist

A Christmas themed page for this months blog post for Anna
(Mrs Brimbles) using her fabulous tutorials on watercolour resist from the
November patreon workshop video. I have seen this month that Anna has been
using the Gansai Tambi watercolours in gold (Starry Colours) and I just had to
get some...they are stunning. I have been so inspired by the content on her patreon page these last two
months that I really could have created a million things. I decided to focus on
3 things: Watercolour resist, using the Starry Colours paints and playing
around with the December collage sheets.

Watercolour and Drawing Gum Resist Process:
For the page prep, I used some of the Prima spray mist I got
free with a purchase at Plannercon Europe (the colour is stunning
- Precious Stone). I love the glittery effect of it. I then set to work adding
some drawing gum in swirls and as a snowflake pattern. I had always wanted to
try drawing gum as a resist, I have used wax crayons before, but never
gum.
When this was dry I added some watercolour using the gold paint and then peeled off the gum. I really didn't know what to expect, but I love the final result and it is so Christmassy. I love the effect the drawing gum over the spray mist with the Starry Colours paint over the top has created. Such vibrant colours and a lovely texture. You can see the entire process in the video below or click here Drawing Gum Resist Video.
When this was dry I added some watercolour using the gold paint and then peeled off the gum. I really didn't know what to expect, but I love the final result and it is so Christmassy. I love the effect the drawing gum over the spray mist with the Starry Colours paint over the top has created. Such vibrant colours and a lovely texture. You can see the entire process in the video below or click here Drawing Gum Resist Video.
I can highly recommend the Starry Colours paints. At first
they don't look like they have a strong pigment, but as soon as you start
building up the colour and layering them over one another they really pop.

Using Decembers Mrs Brimbles Collage Sheets
The second half of the video shows you my first pages in my
Instagram Christmas photo journal. I made the journal at the Jingle and Mingle
meet up from Anna's resources and workshop, so I will use it to add my
Instagram Christmas pictures to. The collage
sheets/printables that Anna has provided from the December Patreon are
stunning, such amazing colours, they scream Christmas! Check out further
descriptions at the end of the video (if you haven't already).

Do be sure to check out Anna's Patreon, as well as the
current month, you also get everything back dated and it's such incredible value
at only $5 or $10 a month - www.patreon.com/mrsbrimbles
Thank you for the support this year and have a great Christmas and 2017.
Kerry xxx
Thank you for the support this year and have a great Christmas and 2017.
Kerry xxx

Follow me on social media:
Instagram | You Tube |
Pinterest | Twitter |
Kerrymay._.Makes a Mess Art Journaling FB Group
Follow me on social media:
Instagram | You Tube |
Pinterest | Twitter |
Kerrymay._.Makes a Mess Art Journaling FB Group
Wednesday, 20 December 2017
New Year Planner
HAPPY NEW YEAR!
Well... almost!
I love this month's sparkly and wintery sticker kit. In the unlikely event that you haven't seen this month's Sticker Club, I have a video showing the sheets which you can watch here.
With this month's stickers I decided to create a double page spread in my planner that was all about the New Year. Something I can fill in with goals for the year, and something I can refer back to throughout 2018.

The pages are just plain A4 paper, cut in half and then punched into my planner. On the left page I've used some of the full box stickers, and the big gold sparkly 'This Year' sticker, as well as used the 'New Year, New Beginnings', 'Page 1 of 365', and 'Hello 2018' phrase stickers. Then I measured out twelve lines and wrote in the months.

At the end of each month I'm going to go back to this page and write in something I achieved that month, or something new that I've tried. To encourage me to focus on positive things and keep track of achievements, no matter how small they seem.
The page on the right is for my goals. I layered washi tape and the washi strips from the kit, and added the '2018' box sticker (which I trimmed down), and the large 'goals' sticker at the bottom. Then another box and a phrase sticker - I love to see positive quotes and sentiments all over the place!

I then put in all the gorgeous decorative woodland creatures, and around them doodled four different 'boxes'. In each of these I will write a goal for the year. I also added some arrows and circles from the functional sticker sheet. I may add some 'small' goals in the two large circle stickers too.

The washi tape I used you can find in the Brimbles store, the black washi with gold triangles, and the gold glitter washi.
After creating that main project I had plenty of stickers left, so I decorated the first week of the year in my personal size planner.

I've changed my personal inserts for 2018, so it was the first time in over a year I've decorated Week on Two Pages inserts! I've decided I don't like Filofax's blue text for the days of the week, so I used the blank header stickers to cover those up and wrote the day and date underneath instead! Here's some close ups:


And there we have it! Thanks so much for reading, and I wish you all the best for the new year :)

Grace @ms.paperlover

Tuesday, 19 December 2017
Yule Art Journal
I'm back with some of Anna Brim's Patreon artwork. This month I've been playing with the December artwork. There's a really nice mix of themes for this month, cute, abstract and a bit more technical. It meant I could try out a few different things.
As usual I decided to create a journal spread, which quickly became two. I didn't have a plan at all, I had a few choice craft items, Anna's printed artwork and a Daphne's Diary magazine.
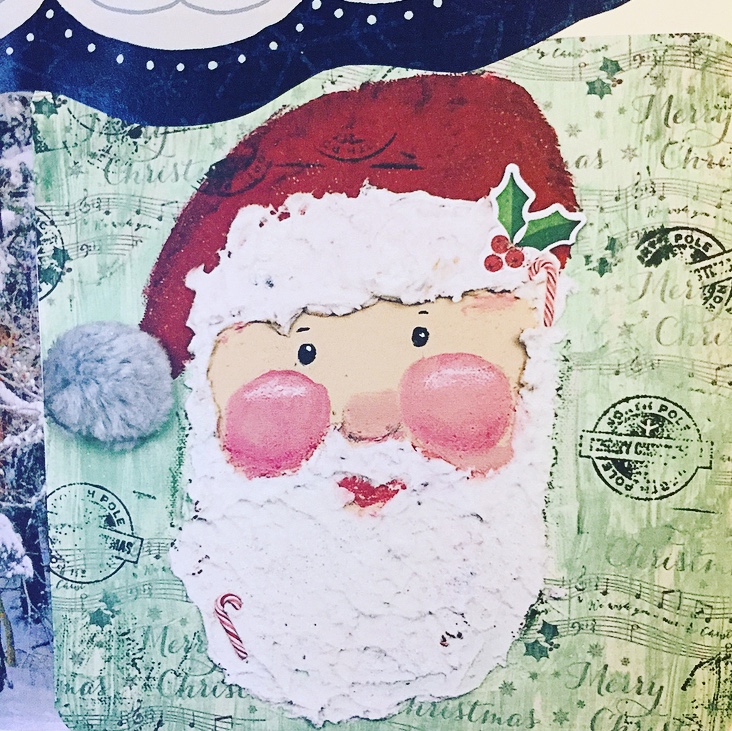
The first piece of artwork that drew my eye was the mixed media Santa. I love the different textures used, especially the fluffy pom pom at the end of his hat!
I had to pair this up with the green mixed media scrapbook paper design. This was the foundation of the page. Coincidentally, the same day my quote a day calendar happened to have 'The most wonderful time of the year' featured so it had to be added to the spread. I lined this up with the cute star, the colours and playful font matched well with the dotted line around the star.
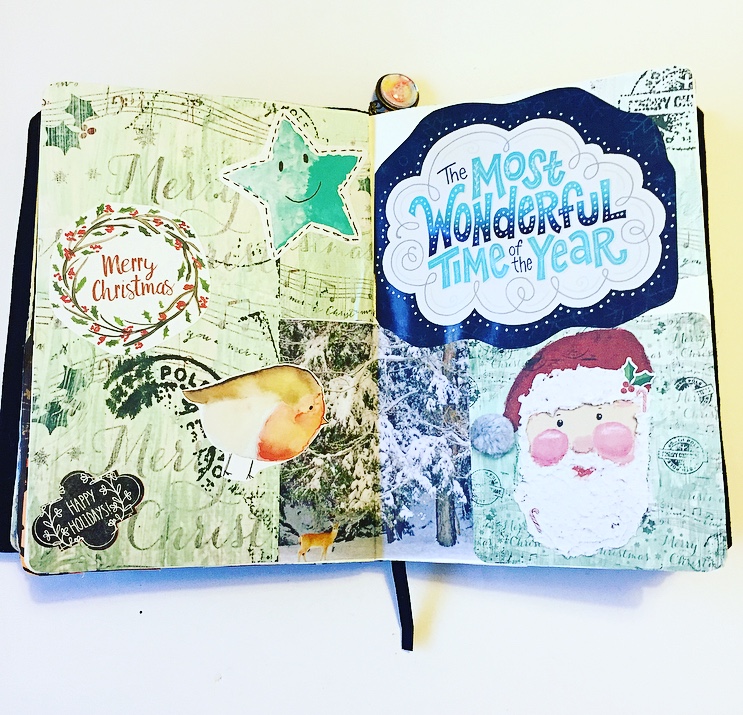
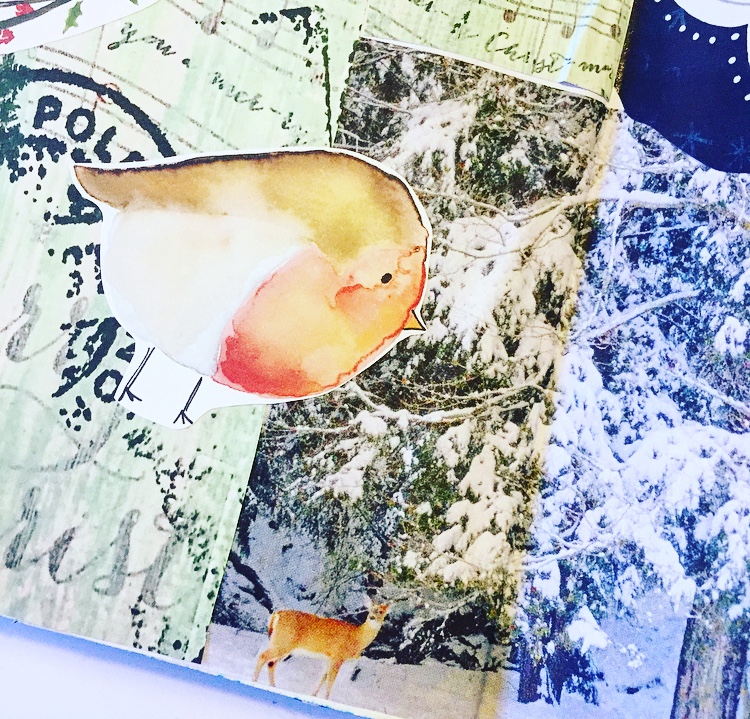
I'd been flipping though the Daphne's diary and one of the features showed a Forest image with wild Deer. It had been snowing the same weekend of creating this, everywhere except where I lived! So I brought the snow to my artwork. The Robin fitted well with this, I like the miss-match in proportion, the tiny Forest and Deer and giant Robin!
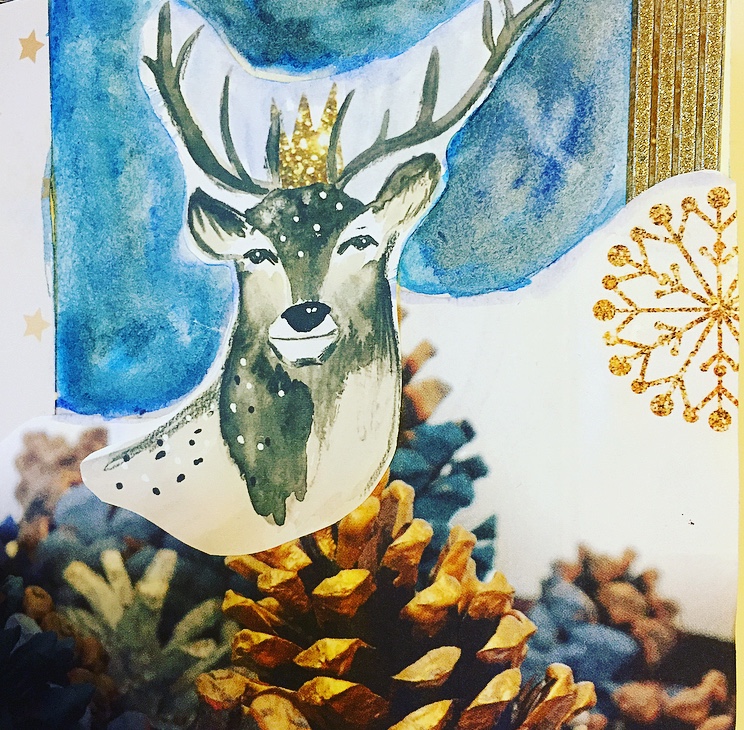
Lastly I finished the page with Anna's 'Merry Christmas' wreath with tradtitional festive colours complimenting the scrapbook paper behind it. As a final addition, for no reason at all, I added a black and white sticker from Daphne's diary in the bottom left corner. I then, as I was in the flow, decided to create another spread. I had to use Anna's Stag, it was originally designed to be a Christmas card (something that will come in handy as I haven't bought one for my works Secret Santa!). I'd seen a lovely Pinecone layout in the magazine with white, gold and blue. I had to pair it with the Stag, the rich colours of both fitted so well together.
Next I needed to pull the page together. I knew I wanted to use the star swirls, again no plan but was determined to put them on the page. After flipping through the magazine for a little while, I found a lovely image of some cuddling Polar Bear. I added this to the page and put the star swirl above it, it's actually ended up looking a bit like a full moon!
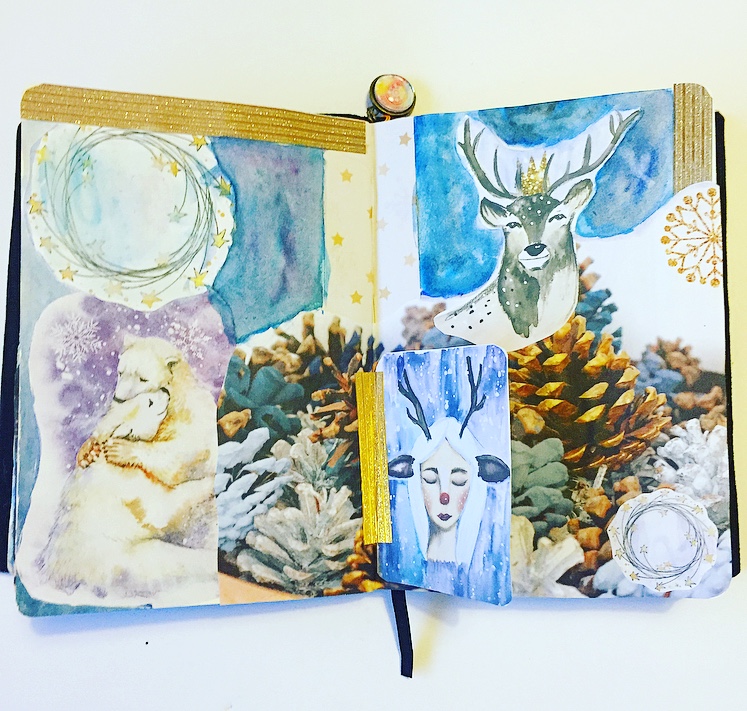
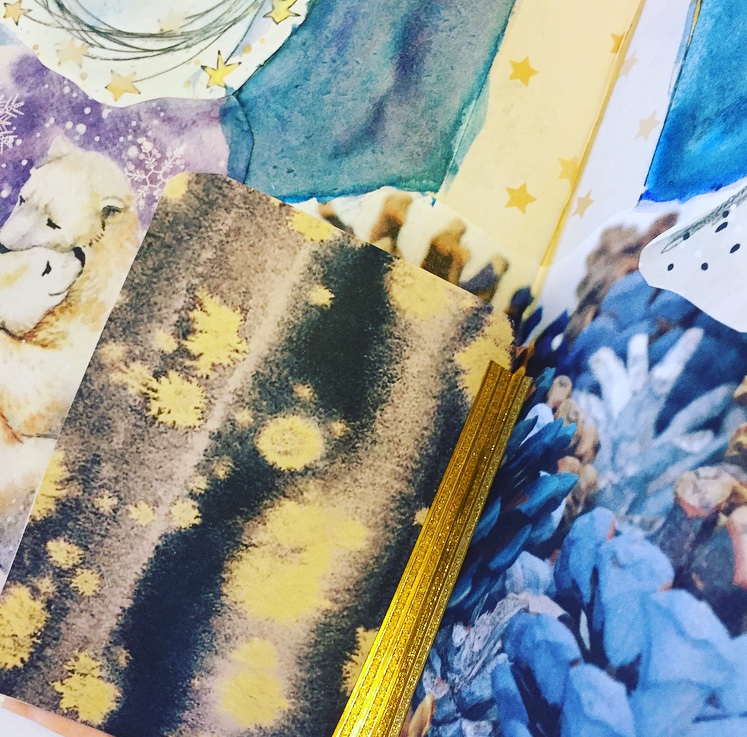
I finished of this main bit of the page with another small swirl, a border from a page in the magazine as a central point and stripey gold shimmer washi to compliment the Stag's crown. I used a mixture of blue and purple watercolour to fill in the gaps. The page didn't quite feel finished and I had some journal card sized artwork. One of which is a Spiritual Woman/Deer, at least that's how I see her. I backed this with some more mixed media artwork, beautiful purples/blues with yellow/white spoldges, almost looking like fireflies. I used the same washi to create a tip-in centrally on the page.
I'm so pleased with how these pages turned out, I felt so festive creating them!
Thank you for stopping by, Kelly.
Where else you can find me:
https://www.youtube.com/channel/UCoUNZVBg0Qe8n0Y87Sb4u6w https://www.instagram.com/the_scrapbook_girl/
https://www.etsy.com/uk/shop/TheScrapbookGirlShop

I had to pair this up with the green mixed media scrapbook paper design. This was the foundation of the page. Coincidentally, the same day my quote a day calendar happened to have 'The most wonderful time of the year' featured so it had to be added to the spread. I lined this up with the cute star, the colours and playful font matched well with the dotted line around the star.
I'd been flipping though the Daphne's diary and one of the features showed a Forest image with wild Deer. It had been snowing the same weekend of creating this, everywhere except where I lived! So I brought the snow to my artwork. The Robin fitted well with this, I like the miss-match in proportion, the tiny Forest and Deer and giant Robin!
Lastly I finished the page with Anna's 'Merry Christmas' wreath with tradtitional festive colours complimenting the scrapbook paper behind it. As a final addition, for no reason at all, I added a black and white sticker from Daphne's diary in the bottom left corner. I then, as I was in the flow, decided to create another spread. I had to use Anna's Stag, it was originally designed to be a Christmas card (something that will come in handy as I haven't bought one for my works Secret Santa!). I'd seen a lovely Pinecone layout in the magazine with white, gold and blue. I had to pair it with the Stag, the rich colours of both fitted so well together.
Next I needed to pull the page together. I knew I wanted to use the star swirls, again no plan but was determined to put them on the page. After flipping through the magazine for a little while, I found a lovely image of some cuddling Polar Bear. I added this to the page and put the star swirl above it, it's actually ended up looking a bit like a full moon!
I finished of this main bit of the page with another small swirl, a border from a page in the magazine as a central point and stripey gold shimmer washi to compliment the Stag's crown. I used a mixture of blue and purple watercolour to fill in the gaps. The page didn't quite feel finished and I had some journal card sized artwork. One of which is a Spiritual Woman/Deer, at least that's how I see her. I backed this with some more mixed media artwork, beautiful purples/blues with yellow/white spoldges, almost looking like fireflies. I used the same washi to create a tip-in centrally on the page.
I'm so pleased with how these pages turned out, I felt so festive creating them!
Thank you for stopping by, Kelly.
Where else you can find me:
https://www.youtube.com/channel/UCoUNZVBg0Qe8n0Y87Sb4u6w https://www.instagram.com/the_scrapbook_girl/
https://www.etsy.com/uk/shop/TheScrapbookGirlShop

Monday, 18 December 2017
Pages in my December Journal
Happy Christmas folks!
It's the most wonderful time of the year... mostly because I am joining in with much of the creative community who are documenting daily during the festive season. And even better, I get access to Anna Brim's fantastic printable collage elements to help decorate and embellish my journal pages!
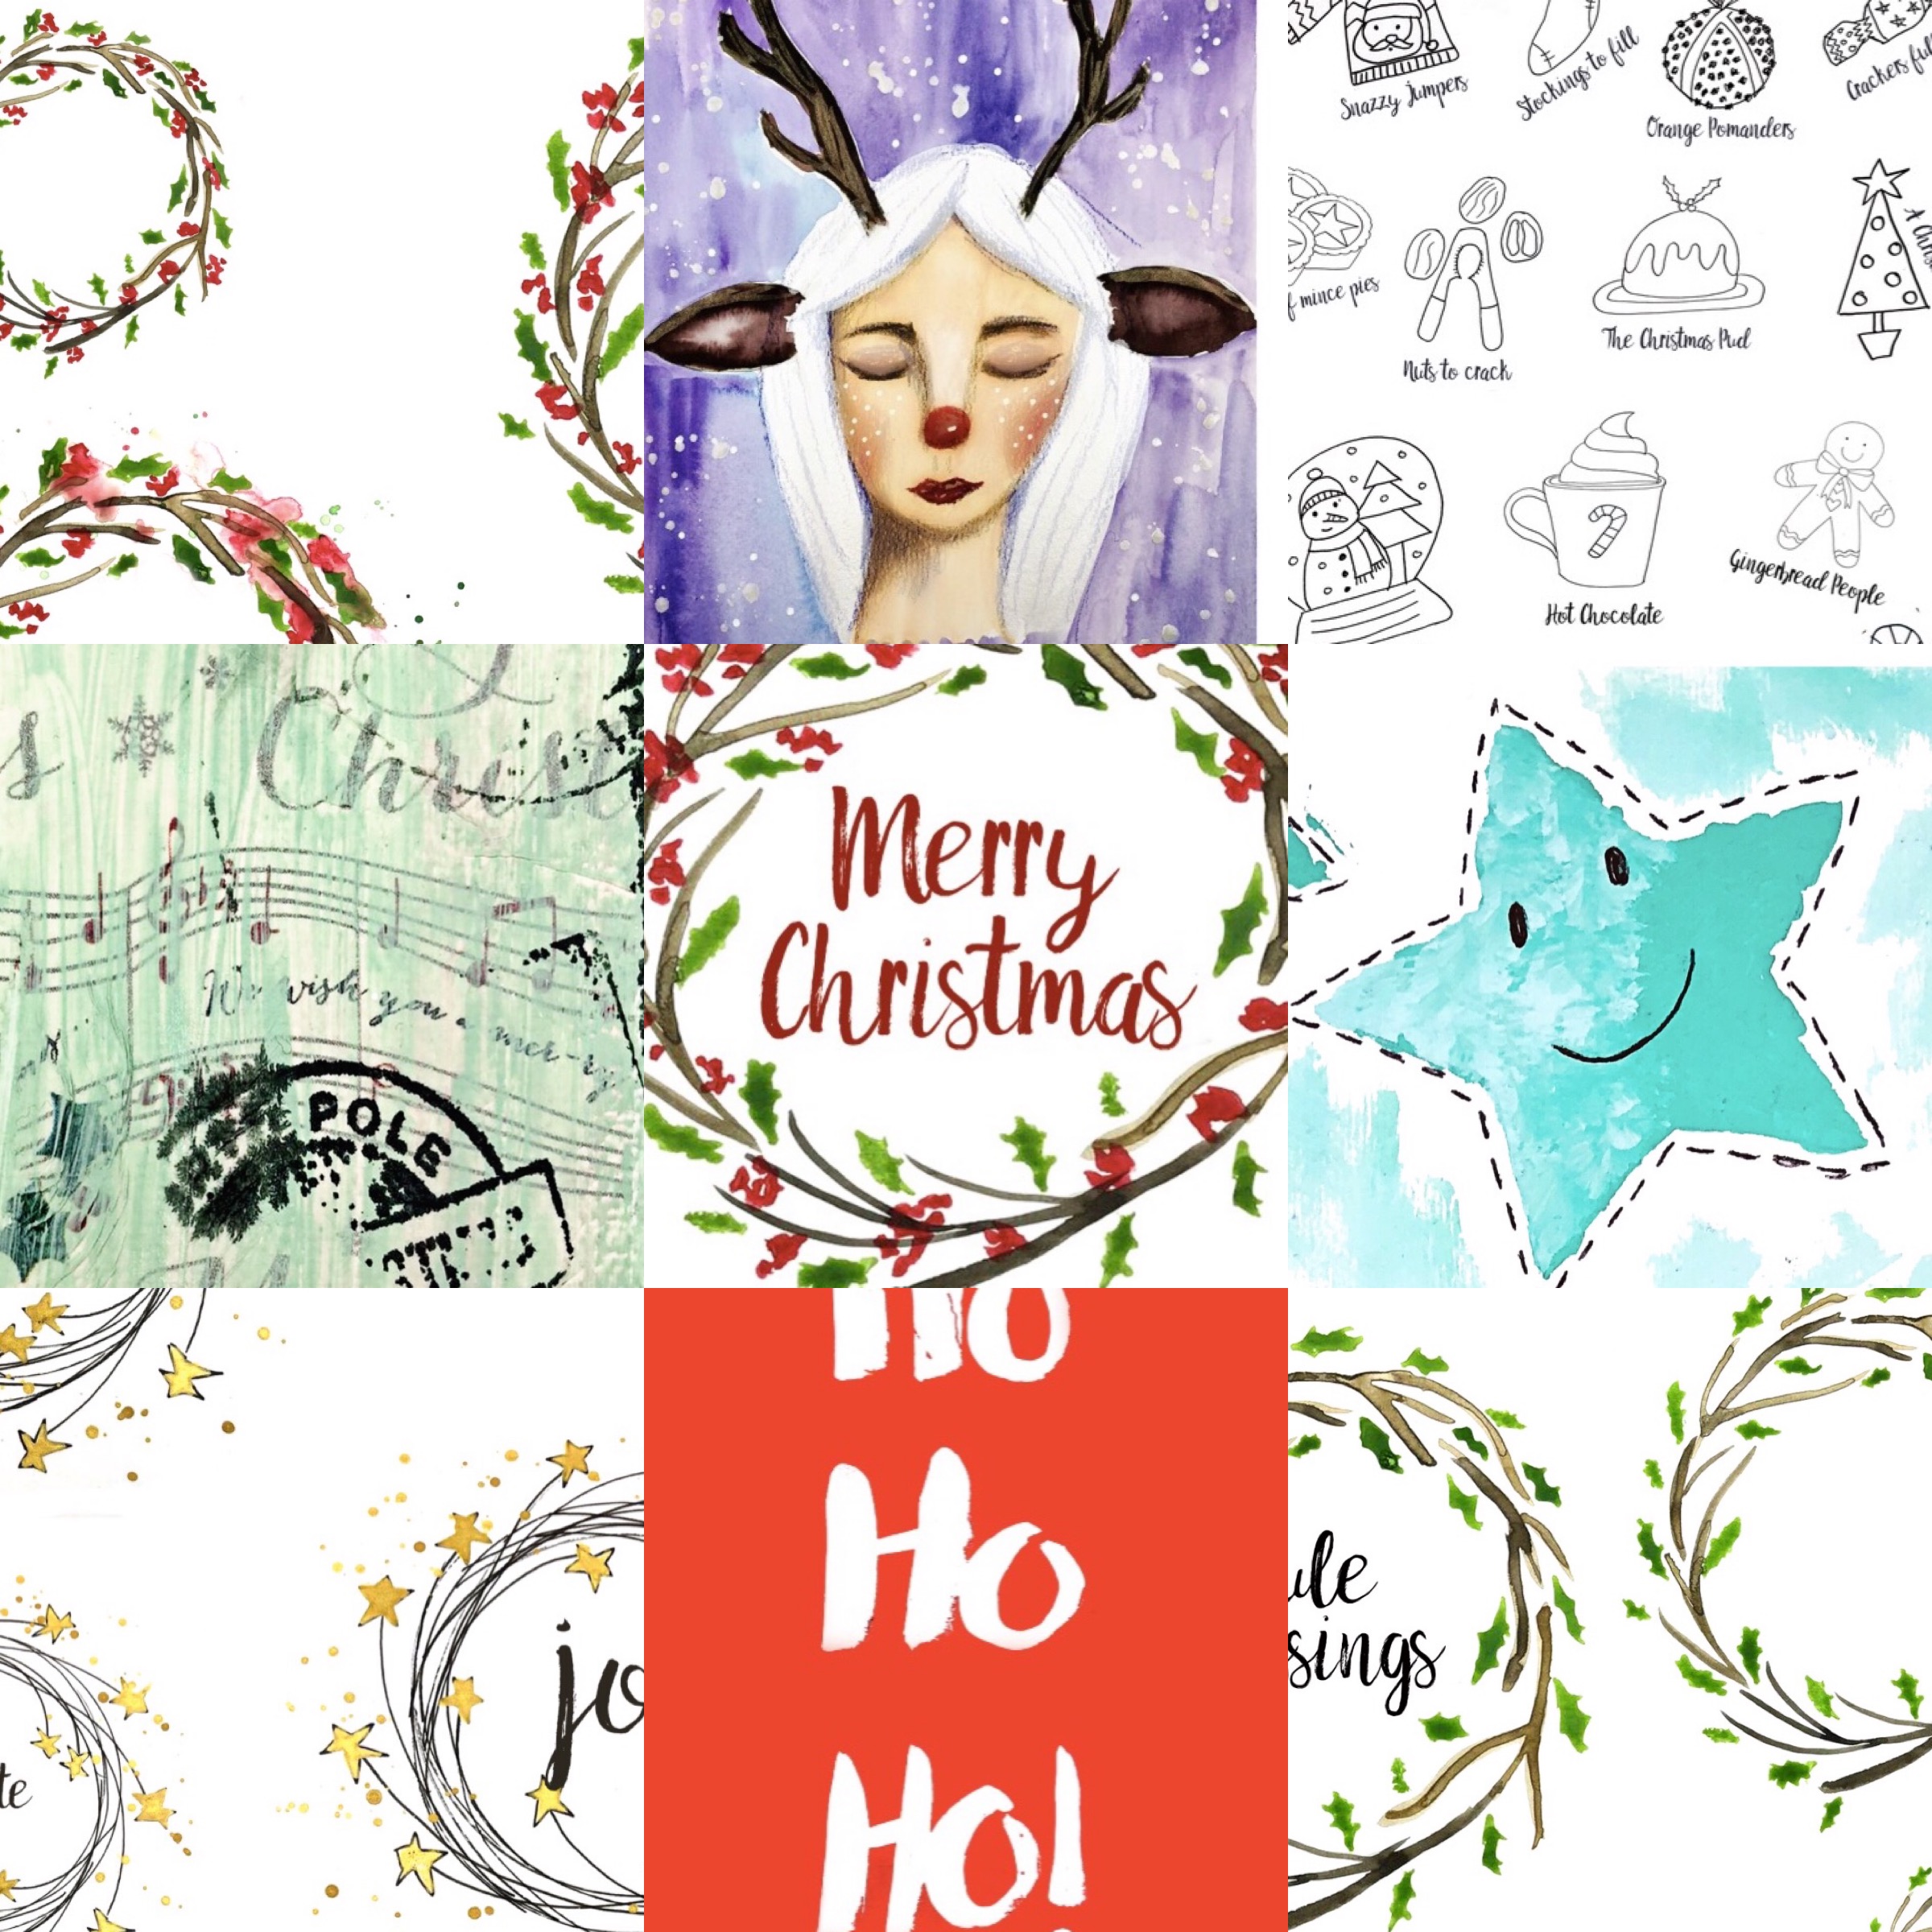
Some days I fail to take any meaningful pictures, but I am not sad about it because I am keeping up with journaling every day, which is the most important thing, and I have beautiful seasonal resources from Anna's Patreon such as these at my fingertips:
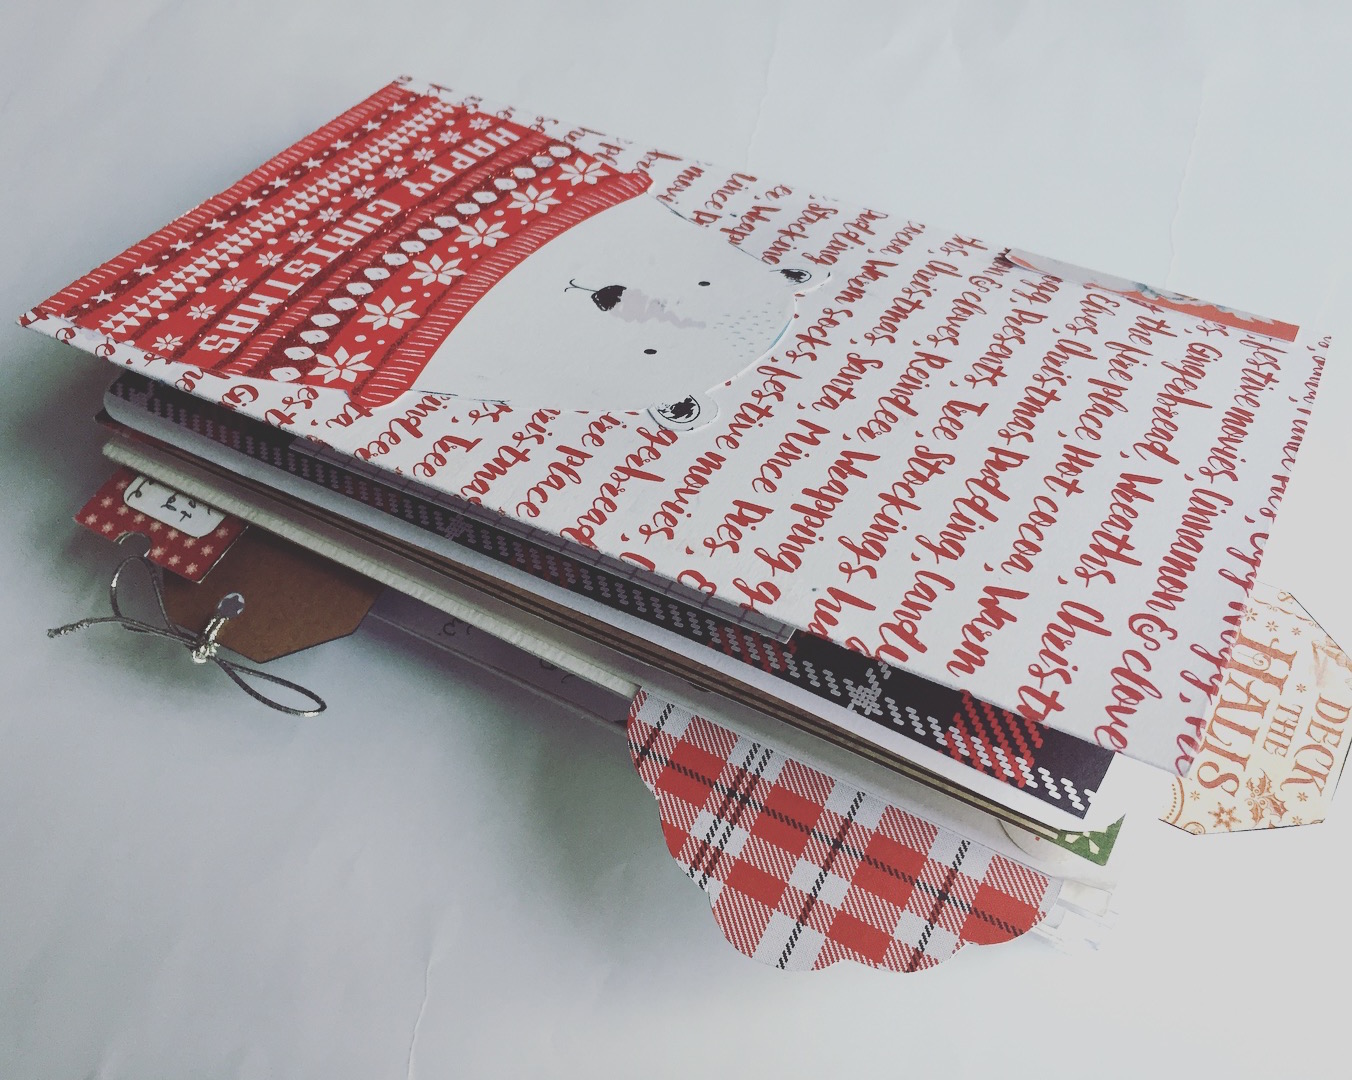
I was lucky enough to attend the Mrs Brimbles Christmas Jingle & Mingle event on 2nd December where Anna delivered an inspiring workshop where I began making my junk style December Journal. It's not a traveller's notebook insert but the pages are standard size because it suits me so much. It has four signatures of mixed papers and card and has been bound with a long stitch. I finished stitching it together at home the next day.

Some days I fail to take any meaningful pictures, but I am not sad about it because I am keeping up with journaling every day, which is the most important thing, and I have beautiful seasonal resources from Anna's Patreon such as these at my fingertips:
I was lucky enough to attend the Mrs Brimbles Christmas Jingle & Mingle event on 2nd December where Anna delivered an inspiring workshop where I began making my junk style December Journal. It's not a traveller's notebook insert but the pages are standard size because it suits me so much. It has four signatures of mixed papers and card and has been bound with a long stitch. I finished stitching it together at home the next day.
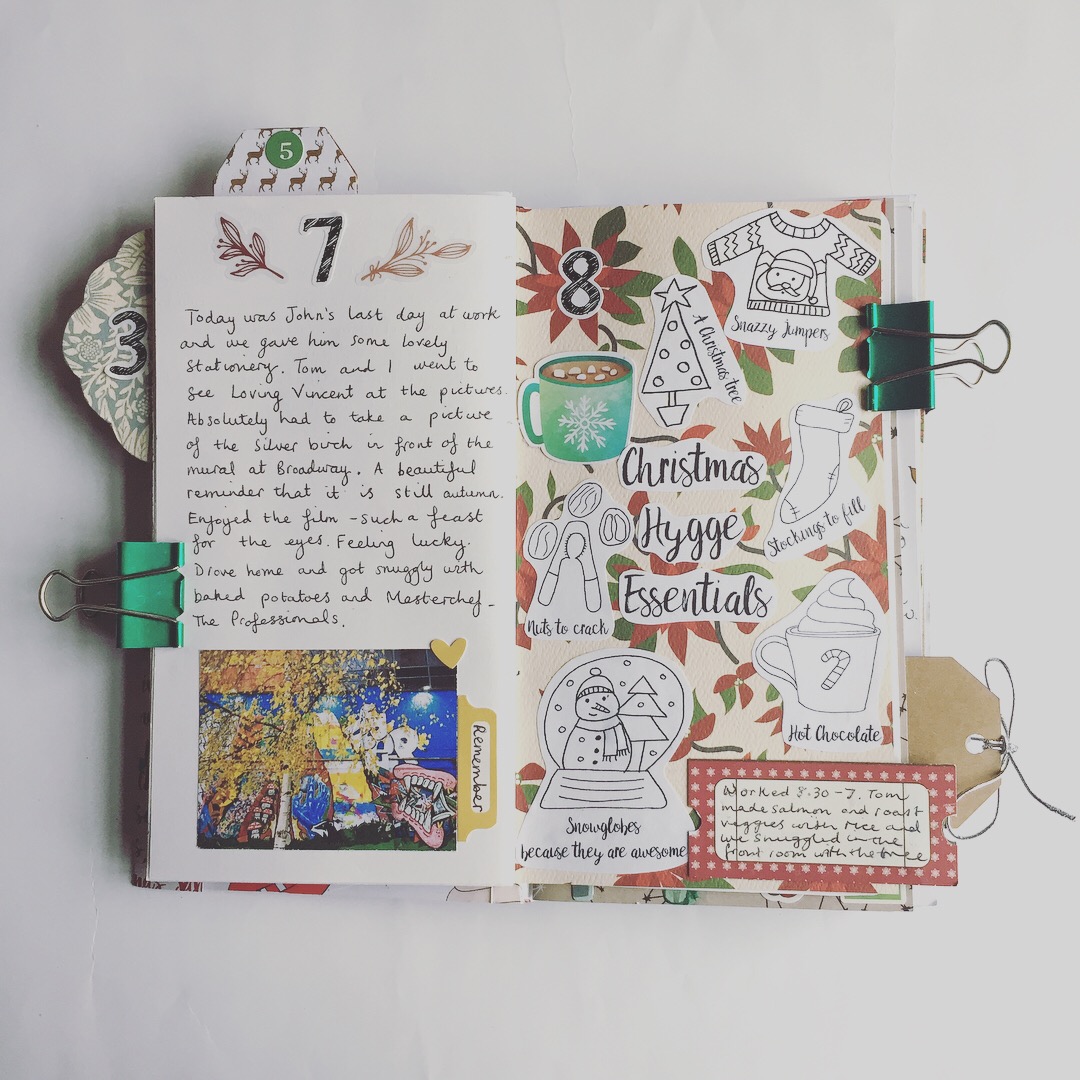
One of the collage sheets depicts an array of snuggly Christmas hygge essentials. On day eight I worked a ten hour shift and came home to a home cooked meal that we ate on the sofa while we watched a favourite TV show by the light of the twinkling Christmas tree. It doesn't get more hygge than that so, with a lack of photographs, I picked out my favourites to remember the snuggly feelings of that evening. I might colour them in, I might not. I like the way they look with the poinsettia pattern in the background and with the little spot of journaling on the ticket shaped die cut (to tie in with the cinema entry on day seven) I am happy with the page.
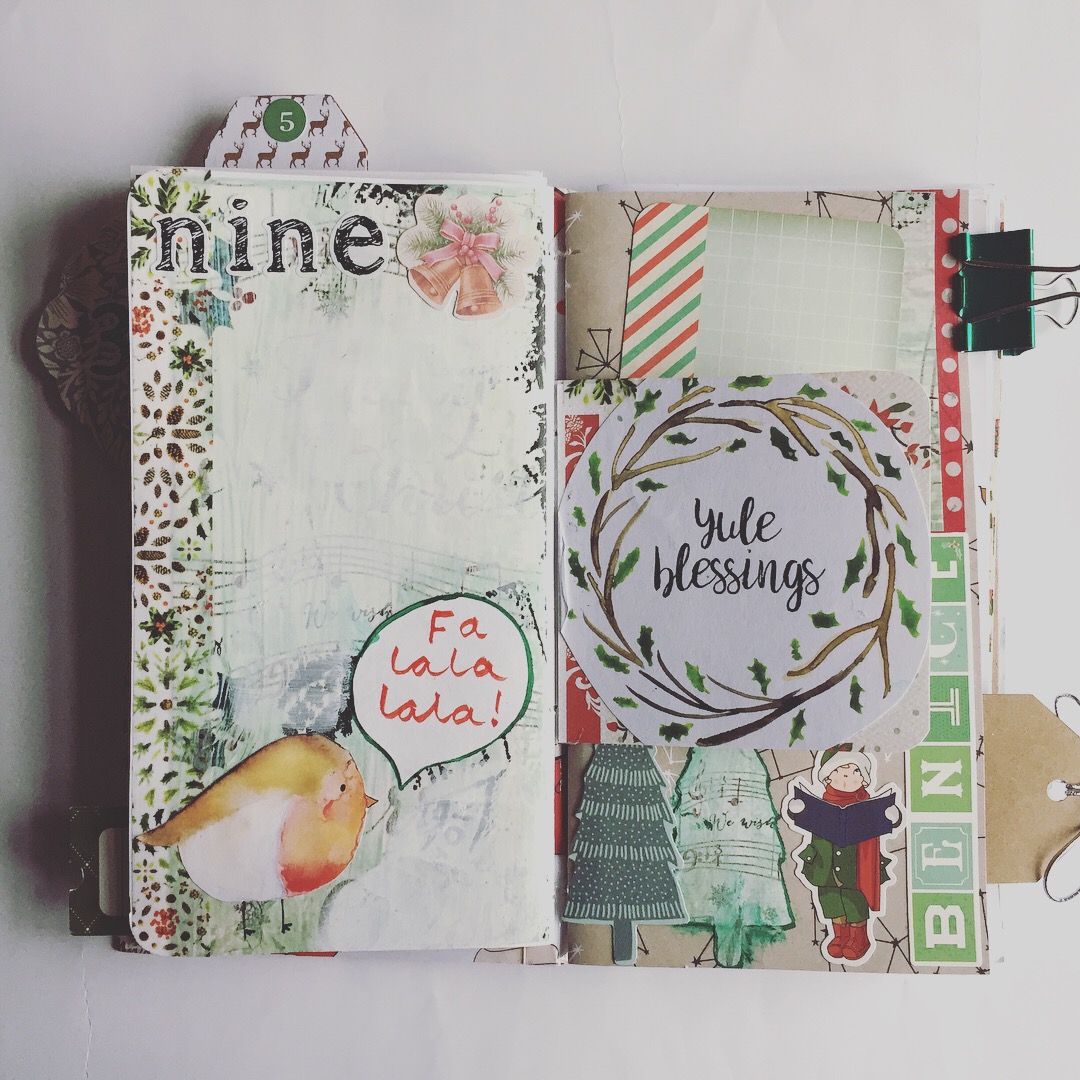
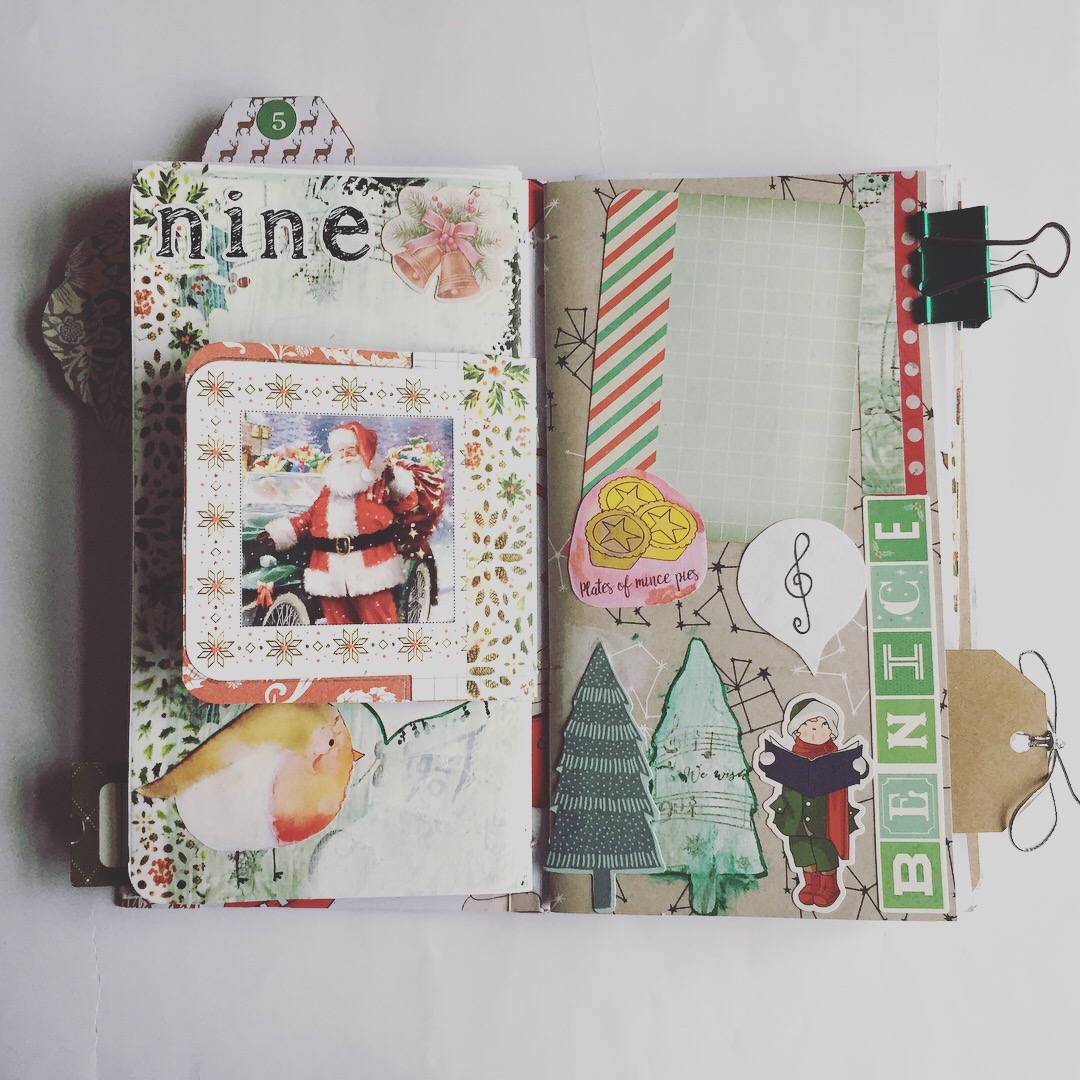
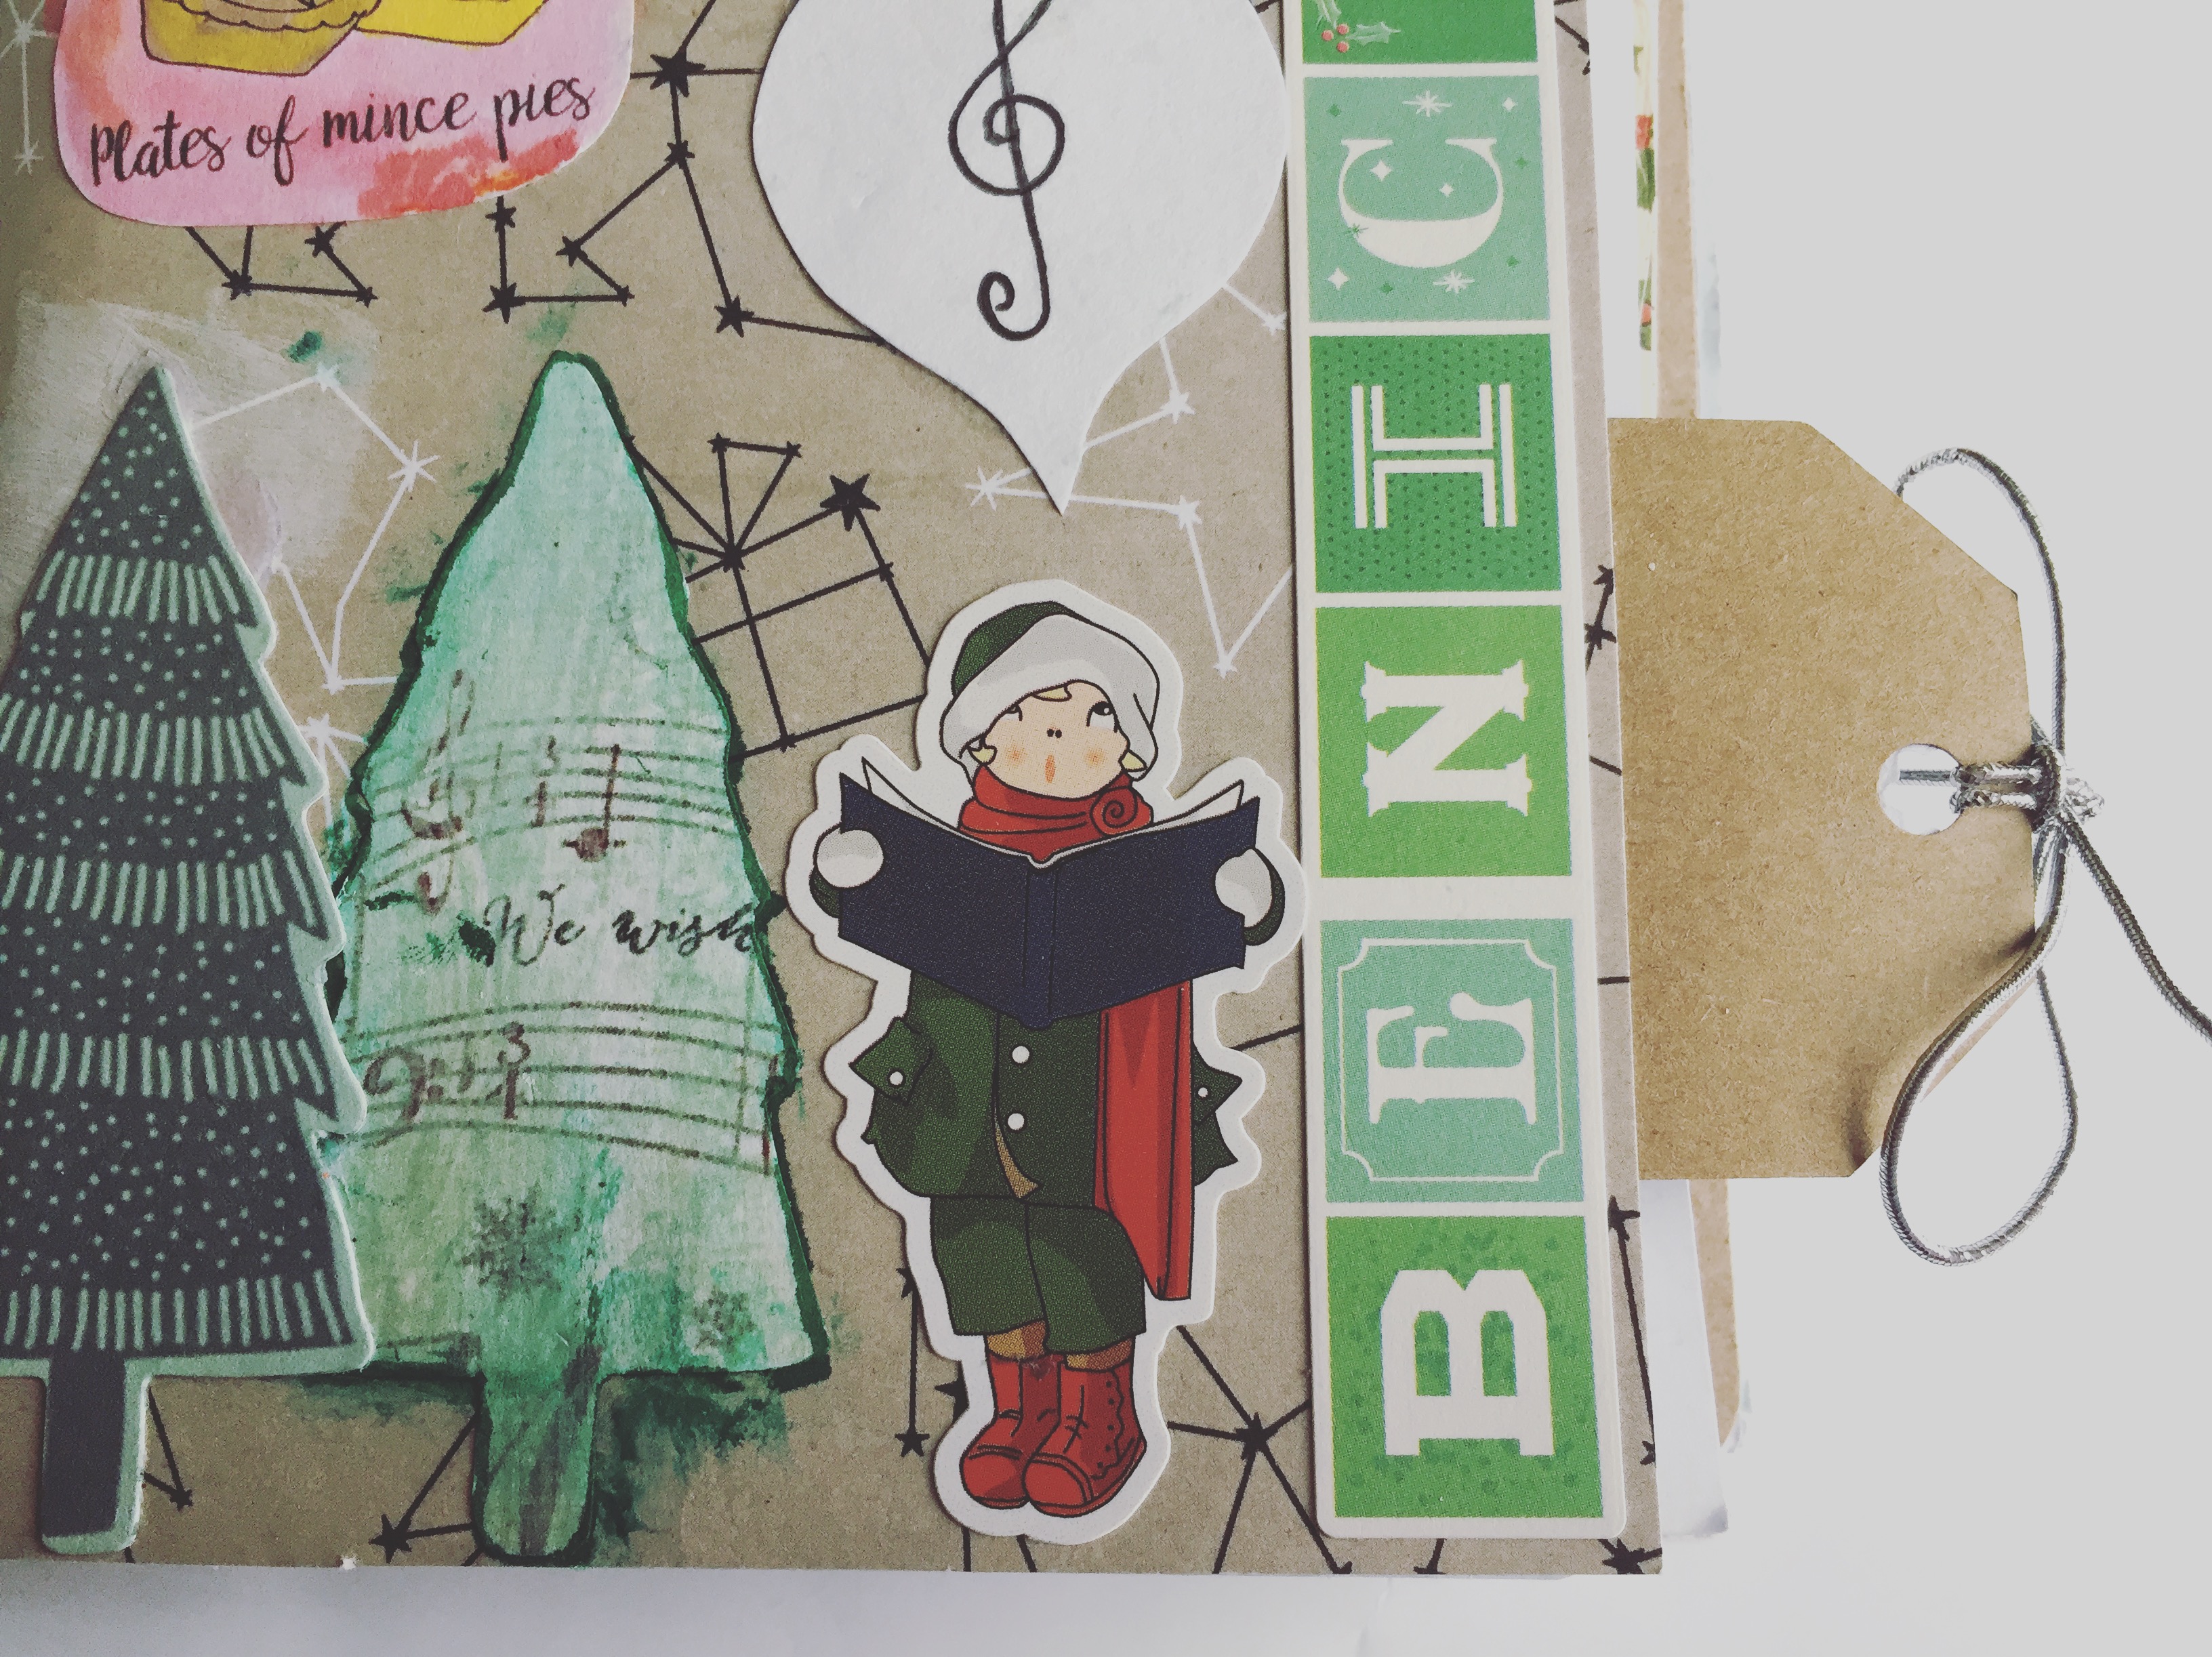
On the evening of the ninth day my Dad and I had a wonderful time at a local carol concert. Anna's artwork is prevalent on this spread as the background on the left page is made up of her stamped mixed media work that I have gessoed lightly so allow her lovely robin to stand out and to allow me to journal over the top. The 'Yule Blessings' wreath is Anna's as is the plate of mince pies from her hygge inspired page. I have also cut out one of the trees from an excess piece of the stamped mixed media. Once stuck down, I outlined the tree with green ink from a Jane Davenport mermaid marker and smudged it to add to the mixed media effect. I will be adding my journaling and my ticket for the carol concert too. The few other elements used on these pages are from collections by Paperchase, Prima, American Crafts and Carta Bella.
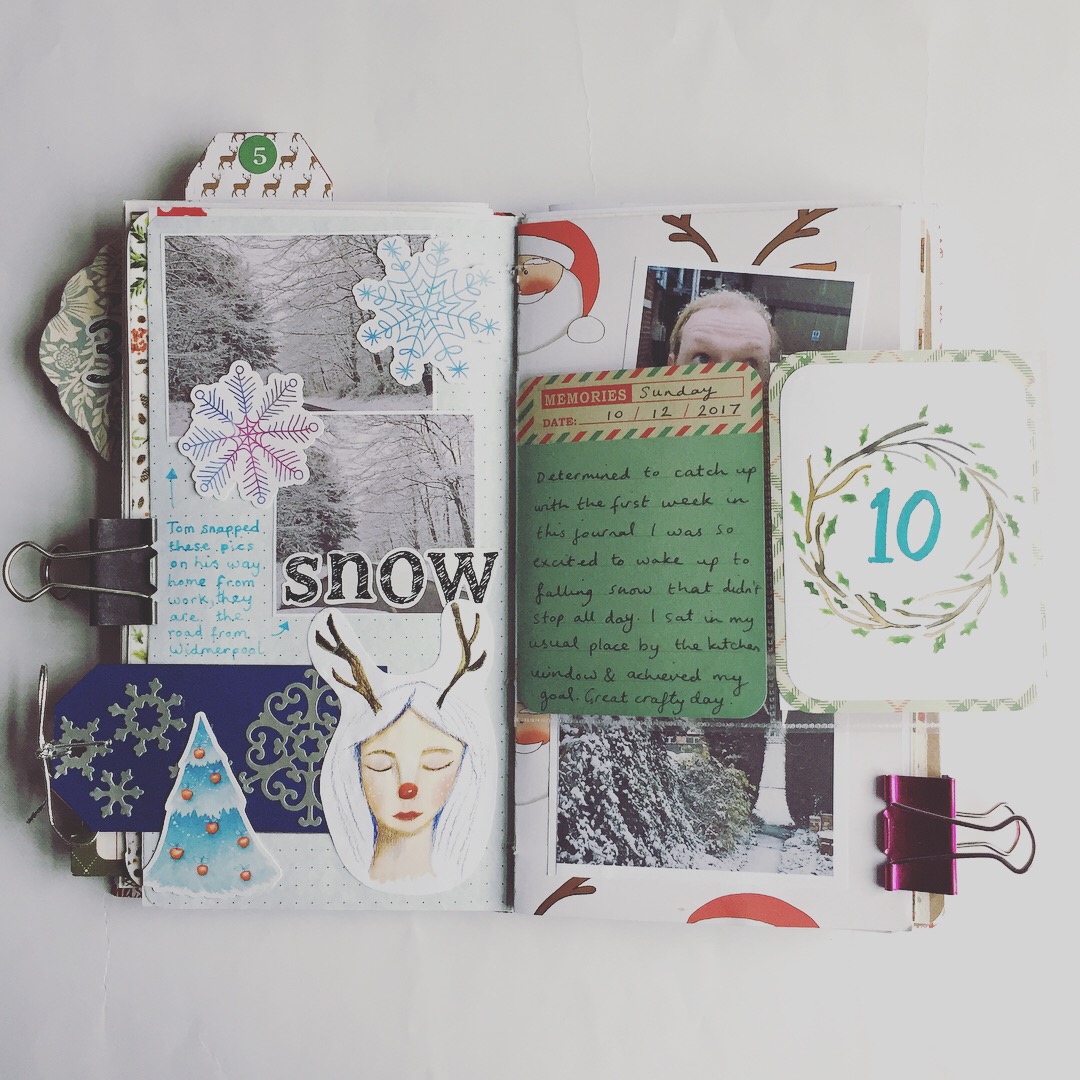
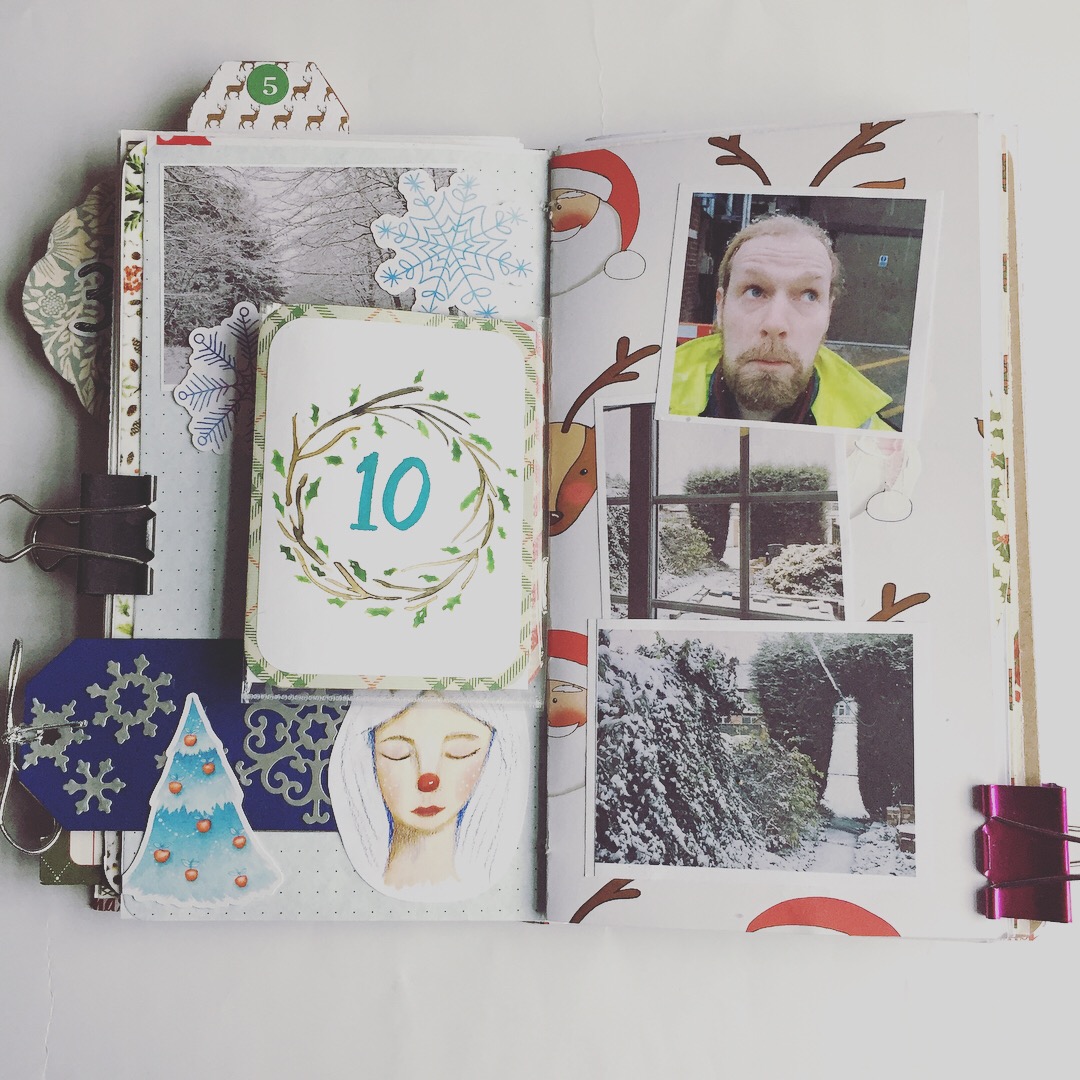
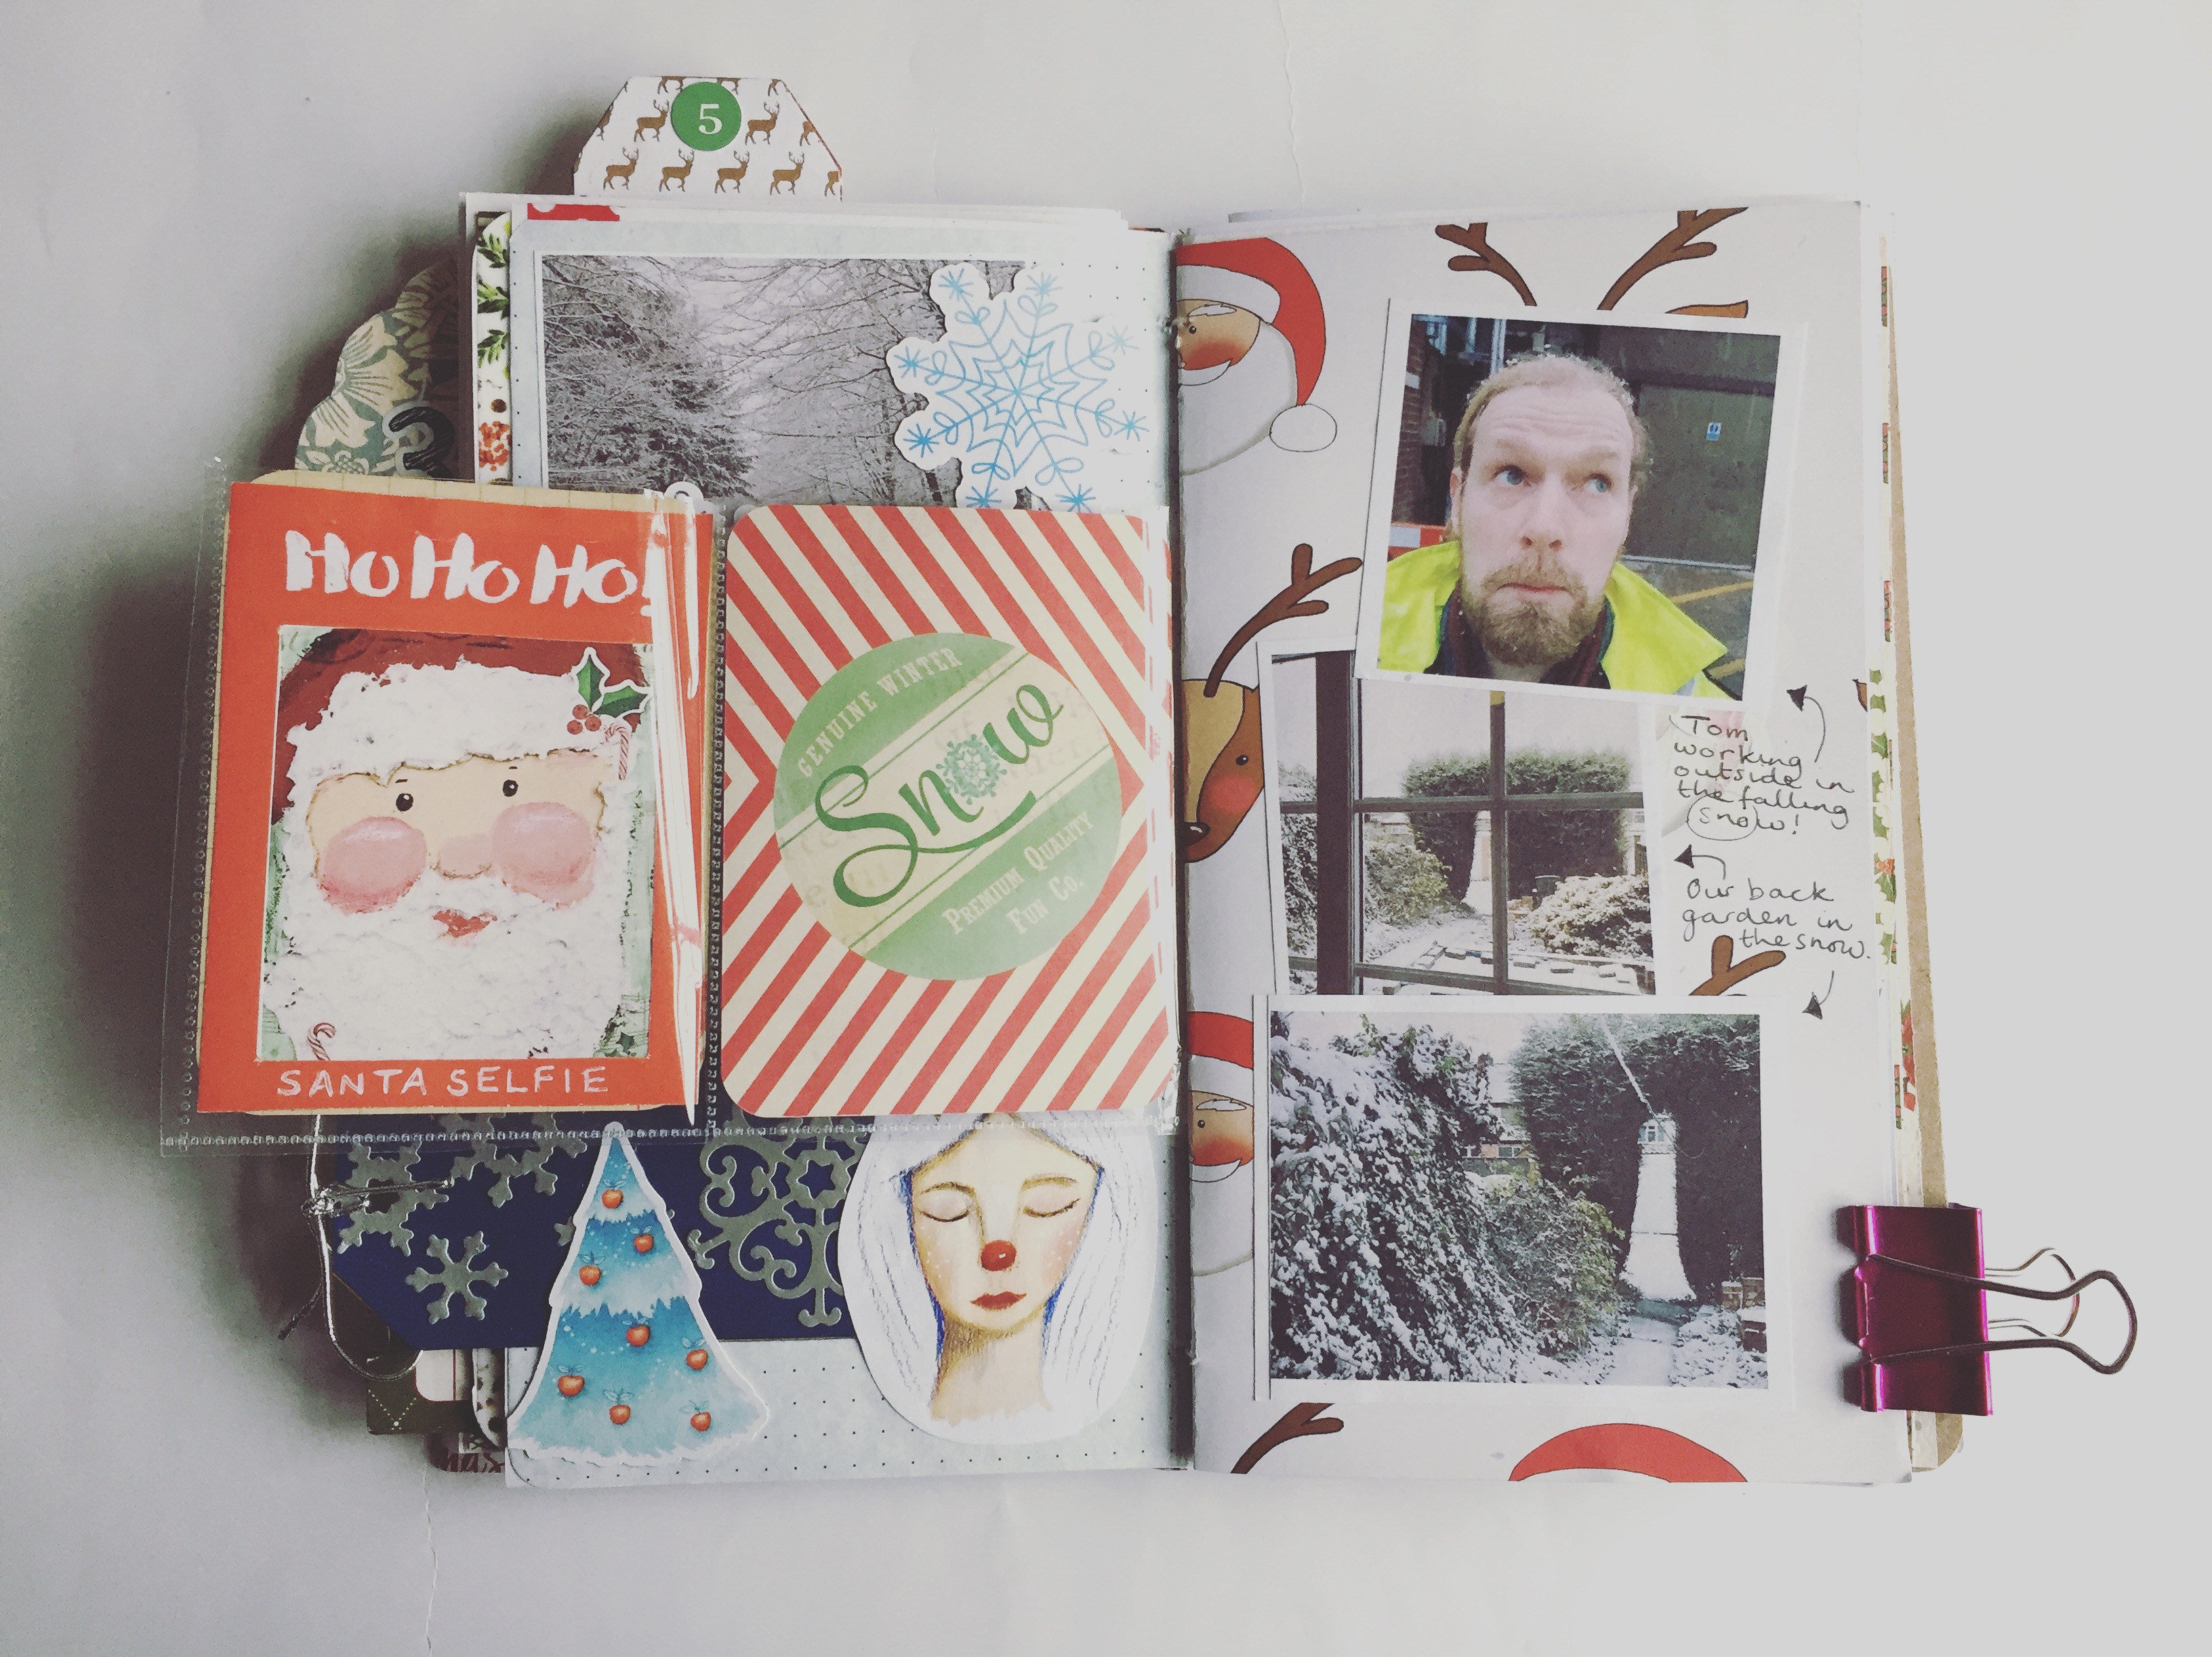
I awoke to the sight of snow falling and settling on day ten. I was particularly happy because I knew I was going to spend the day crafting and journaling and not going outside. Here you can see a few of my photos but I was inspired to use Anna's antlered wintery woman and another of her wreaths, to frame the number ten, along side them. As you can see, I am obsessed with using tags and making them stick out from the edge of the page. I made this blue one with die cut snowflakes at a workshop last Christmas.
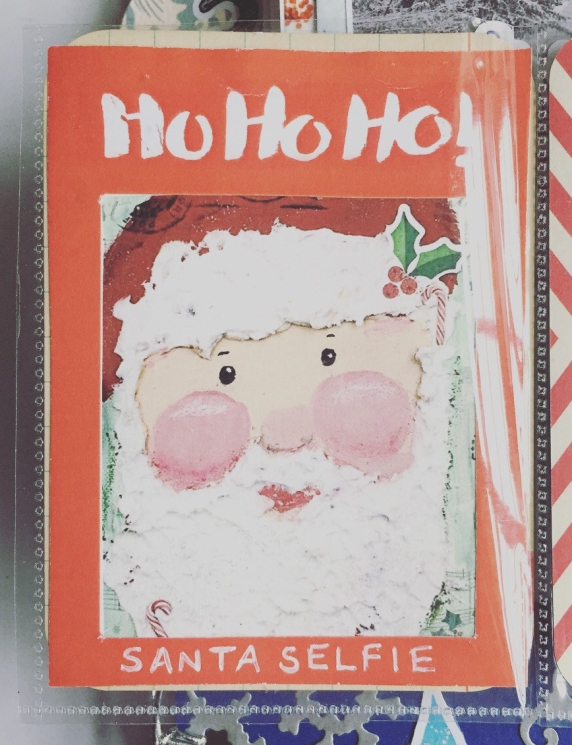
I also amused myself by merging two college elements to form a framed santa selfie to add a bit of silliness and tie in with Tom's snow selfie on the right.
Thanks for reading folks. I hope you will join me on Instagram to see more pages from my December journal and other creative projects.
I hope you have a magical Christmas and a healthy and happy New Year.
Bye for now, Steph x x x

Saturday, 16 December 2017
ColourArte Art Supplies!

Hi Everyone!
I have some exciting news to share with you that I have kind of been holding out on you with. Back at the end of Summer I applied to be on the Colour Arte design team which I am very extremely happy to say that I was selected for. You may have heard of ColourArte, for me they are most well known for their Twinkling H20s which have been around in the art journal community for some time but you may know them for one of their other awesome projects. The Twinkling H20s are shimmering mica watercolours. Yes they are as lovely as they sound!

My design team package has now arrived and I am sharing with you today the awesome products that they sent me:
In my package is a load of those beautiful Twinkling H20s which is fabulous because I no longer have those and watercolours are my favourite medium to work with. You can expect lots of videos of me using those that is for sure!

I also received gold leaf, fluid acrylics, Glazing silks and pigments.
A lot of these products are totally new to me so it is going to be a learning curve for me. I need to get to grips with what the products are, what they do and how to use them. The good thing about that is that you are in for the ride too! Whilst I am a working artist with an art education background it doesn't mean that I am proficient in every medium out there. I will be a total beginner on some of these things which is good for you as it means you will be able to see my journey with these products, how easy I am sure they are to use so that you too can learn how to use these products. I love watching artists who are experts in their field or medium but sometimes this can be a bit daunting if you are new. So you can watch me stumble and bumble my way along and join in the fun with me. One of the first projects I want to do is fluid / pouring art including some dirty pouring. If you have no idea what I am talking about you can stay tuned for that journey! I am so excited to embark on this with you and to get out of my comfort zone a bit too.
Please do check out the ColourArte website and the amazing products on offer: https://www.colourarte.com/

PLEASE NOTE: I was given this / these product(s) in exchange for my honest review and opinion, the fact that I was given these does not alter my opinion in anyway. This review is my own personal opionion on the product / company, given in good faith and has not be sponsored or endorsed. None of the links are affiliate links. Unless otherwise stated, all photography is my own.
Friday, 15 December 2017
Christmas Journal / December Daily Flip Through - Week 1 | Travelers Notebook
Hi Everyone!
I have a flip through for you today of the first week in my Christmas journal. I don't know what to call it really. It is my December Daily because I am doing it everyday in December but I also did it for a week before December too. It is basically the place I am recording all of our festivities!
I hope you enjoy having a look into my journal!
Wednesday, 13 December 2017
Art Journals: A lesson in patience and resistance!
Last month's Patreon saw Anna demonstrating the use of masking fluids and wax crayons to create resist art. Now, I haven't created anything using these techniques since I was in primary school, and only then it was with kid eat proof paint and crayons. So I was super keen to get going, so much so that I forgot to follow one of crafting's golden rules namely that of washing your paintbrush after use. So in this case washing it after using the masking fluid....something Anna also mentions in the video!
So after a few hiccups and a new brush or two - I did eventually purchase a Molotow Pen which I found a lot easier to use - I kind of got the hang of it. Then I thought I'd be a little more adventurous with it. My initial experiments saw me working mostly with watercolour paints on watercolour paper, so I wanted to try using some other mediums to see what results I could achieve.
Here I've used the Molotow Pen to create a couple of quick doodles of Christmassy symbols....I've been trying to keep the festive mood in the house by listening to Christmas Jingles, my festive vibe is ebbing and flowing at the minute...bah!

I dug out my Cosmic Shimmer Pixie Powders, at this point I must admit I have no idea how this will turn out or whether the masking fluid will react with the mica powder, but what the heck. I'm having fun and that's what's important here!

So now I'm going to fail to follow another golden rule....that of patience. Something I'm never going to master, haha. So I should have left the paper longer to dry....but I didn't and in my rush to see the results I ripped it.

Interestingly the reverse of the page has some rather cool markings and you can just about make out where the resist fluid was...I'll take that as a win!

Christmas Pud...because who doesn't love Christmas pud! So I figured after my not so successful trial with the shimmer powders and whilst waiting for the rest of the page to dry I'd add another little doodle to the bottom.

The blending kinda came about by mistake. I wasn't paying a great deal of attention (I was busy wailing away to tunes) and I dropped a huge green dollop so I turned it around by blobbing and sploshing on more paint. I had intended to do some nice shading and shaping, so let's call it an organic development!

In most of my sketchbook/art journaling inserts I tend to slip black and coloured card between my watercolour and mixed media papers as I like to do a lot of work with chalks and pastels. Alongside my pud and snowflakes page was black card. Again I really wasn't sure how this was going to turn out as a) I hadn't tried the resist fluid on the card b) I wasn't entirely sure how well the pearlescent paints were going to perform on such a dark backdrop and c) I couldn't really tell where I was going or where I had already drawn with the pen. It was a sort of stab in the dark.

I decided to literally cover the page with blues, whites and grey in the hopes of creating enough contrast with the black lines created by the resist pen. This time I let it dry whilst I wrote this blog post....so currently I don't know whether I'll be writing a success story or another mishap!

....ta da!!

I think it turned out rather well considering :)

I feel like I should have learnt some lessons here, about patience and intuition in regards to creating artwork, and to some extent it is probably true for the latter part, but I don't think patience will ever be my thing haha. I'm off to relive my childhood and dig out my crayons!
Till next time people :) x

Tuesday, 12 December 2017
Printing photos for December Daily & Project Life
Hi Guys!
Here is a little vlog from me talking about how I am printing my photos for my festive journal this year and how I will be printing my photos for my Project Life album in 2018.
Here is a little vlog from me talking about how I am printing my photos for my festive journal this year and how I will be printing my photos for my Project Life album in 2018.
Christmas all wrapped up
I thought the beautiful colours in the October sheets would pop perfectly against the black and gold papers, so I glued the paper to some cardstock to give it strength and cut out some tag shapes. I did some embossing with some Christmassy stamps I had and I think they look perfect against the papers.


I also cut out some thin strips of the papers and used these like ribbon to wrap around the presents here:


I hope you are finding some time to be crafty in what can be a crazy time in the run up to Christmas.
Don't forget to check out Anna's Patreon and you can find more of my art here, or on my blog, or on Instagram.

Subscribe to:
Posts (Atom)