Showing posts with label chloe. Show all posts

Sunday, 15 October 2017

Woodland Creatures Planner Pages


Hi everyone,

Chloé here again, sharing my October sticker kit project. I absolutely adore the woodland creatures in this kit, and couldn't wait to use them in my planner! I like to decorate my pages, but I prefer to keep it reasonably simple. The Brimbles sticker kits are perfect for this, as they include a fab mix of functional and decorative stickers.


How beautiful do the decorative animal stickers look?! Anna absolutely knocked it out of the park with this kit, and I just can't get enough of that watercolour fox. It's just gorgeous!

I had a lot going on this week, and I definitely made the most of the functional stickers. There's an icon for everything, and they're perfect for quick to-do lists. Often, I can quickly glance at my planner pages and remind myself of my daily jobs purely from the icons!


I hope you've enjoyed seeing this month's project: you can follow my social media for more crafty goodness!


Thursday, 28 September 2017

Monthly planer pages


Hello all!

It's Chloé here on the blog again today, and for this month's post I thought I would show you how I've used my September sticker kit to decorate the monthly pages of my planner. I'm currently using a mini happy planner cut and punched to fit a personal-sized filofax, and I found the stickers really versatile!


I always keep my monthly calendar pages quite simple; I like to include university lectures, work-related events, big life things, blog posts and youtube videos. Normally, I write down exactly what I want to post/upload, however I wanted to keep my videos for October a surprise! Because I include so many things, I like to just write it down with a simple colour code and not decorate at all normally!


The Brimbles sticker kit for September included these beautiful, understated florals, and I thought they'd complement the colours already printed onto these pages. I layered up some of the washi strips at the bottom of the pages, and created some embellishment clusters in the corners using the decorative elements.

The functional sheets of stickers were perfect for my monthly calendar too; I used the bin icons to show when our recycling days are, some flags to mark my main bill days, and a little pound sign for payday. Perhaps most exciting of all, I could use one of the half boxes to mark in my trip to Brussels for Planner Con Europe!


I was also super excited to mark half term in with that little grey arrow!

I hope you've enjoyed seeing what I did with some of my September sticker kit, feel free to follow my social media for more photos and craft projects!

Chloé


Friday, 11 August 2017

Chloe's Planner Pages


Hey everyone!

For this month's blog post, I thought I'd share some photos of  a completed spread in my planner. I used the super cute cat and floral stickers from the Cats in Bloom Kit, and I wanted to show how I use the functional stickers to plan. For reference, I use a mini happy planner inside a personal Kate Spade, and I find it works really well for me! I do use a bullet journal alongside this for longer lists, so this planner just has any big events and my main to dos for each day.


Of course, the checklist stickers are the most functional of all! I used these for the weekdays and the notes section, so that I could jot down my main to dos for each particular day. I use the icon stickers and arrows to highlight or represent specific tasks, alongside a few stickers from my own stash. 


The alphabet sheet in this month's kit was perfect too! I work in a school, so my summer holidays began on Wednesday; I picked out the letters to spell "Summer", to add a fun banner to that day. It was just about the only thing that dragged me through work on Monday and Tuesday!


I have to admit though.. the decorative stickers are my favourite! I fill in blank space/spots I know I won't fill with the cute icons and banners, and they're fab for covering up mistakes too. That little "Bloom where you are planted" cluster? It's covering up where I wrote an appointment on the wrong day! I loved layering the flowers up to create a pretty background for the text sticker. As I only use this planner for the main events of the day, I can go a bit crazy with decorating.

There you have it, a full week in my planner! I hope you've enjoyed seeing my pages. 

Chloé

Blog / YouTube / Instagram


Thursday, 13 July 2017

Weekly Planner Pages by Chloe


Hi all!

It's Chloé here today, and I'm sharing the gorgeous Juicy Frootz stickers from this month's #BrimblesStickerClub. I'm super excited that Anna has branched into actually making her own stickers, and this first kit certainly didn't disappoint.

With such a summery theme, I couldn't wait to use the stickers in a spread for August! I knew that the first week of the month would be super busy, as we're heading to Ireland for a wedding, so I decided that the functional stickers in the kit would get lots of use here.


When I'm decorating a week in advance, I keep my calendar next to me and make sure that I don't miss out any important details or events. This week for example, I know that our flight is at the end of the week, so there will be certain things I need to get done beforehand. I used the half boxes to give myself reminders, and the icon stickers to mark things like pay day, bin day and household chores. 


I used lots of functional stickers, but of course the decorative ones are the most fun! The adorable little fruit faces make cute embellishments for your pages, along with the tiny word strips. 


The kit also comes with some "washi strips", which are great for adding a little something extra to the top and bottom of your pages. You could even use them to block out periods of time, for example a university lecture or shift at work. 

I hope you've enjoyed having a look at my planner pages!

Chloé


Saturday, 11 February 2017

Creative Goals


Hello everyone!

I'm back today with a spread in my creative journal, all about my goals for this year! I'm loving my traveller's notebook for this kind of memory-keeping; it allows me to journal a little more than Project Life does, and really note down my thoughts and feelings about an event. 

I used the beautiful January Brimbles Box to put these pages together, and the goal-focused sentiments were just perfect!


Part of the journaling is quite personal, so I decided to create a tip-in. I used washi tape from the box, along with one of the 6x4 cards from the cut apart sheet, to create this lift-the-flap type page. It not only covers my more private thoughts, but allowed me an extra space to write my general goals for the year. I decorated the card with some phrase stickers from my stash, and some of the gorgeous foiled stickers from the box. I love the planner sticker, too.


I covered the right-hand page in some of the marbled paper from the box; I treated it almost as a scrapbook page. I layered a doily from my stash, a photo of my friends and I from New Year's Eve, and trimmed out the circular "Goals" piece from a card on the cut apart sheet. I picked out some alphas from my stash to create a title, along with a few more of those phrase stickers to tie in both pages. To finish the spread, I used a tab from the box for a bit of dimension and interest. I think it looks fab to have tabs and bits and pieces visible when the notebook is closed. 

I hope you enjoyed seeing my project! You can also find me on Youtube, Instagram and Twitter.

Chloé


Saturday, 3 December 2016

Autumn Scrapbook Page


Hi everyone!

I'm back (after what seems like forever) with a 6x12 scrapbook layout using the beautiful October Brimbles box, and a few autumn-themed bits from my craft stash. I love autumn, my little pooches and I have had some lovely walks over the last few weeks, and this box was perfect for scrapping the resulting photos. 

I went for a 6x12 layout this time, as it's been a little while since I did a traditional 12x12 page and sometimes that large, blank space can be overwhelming. I had the cardstock with leaves sitting in my stash, so I cut it in half and used that for my base. 


I used a mix of stickers, ephemera and enamel dots from the box to create a little cluster behind my photo, along with a kraft envelope, doily and tag from my stash. I attached more photos from the walk to the tag, which creates a fun, interactive element to the page. I used lots of doodling too, which I think adds a "finished" look, and is something a bit different. 


I finished off the layout with some journaling and a title from my stash, and I'm so pleased with it! The October box was a joy to work with. There's a video of the process too, which you can find on my youtube channel here.

What projects have you made this month?

Chloé


Monday, 15 August 2016

ice cream-themed planner pages


Hello all!

I'm back on the wonderful Mrs Brimbles blog with a bit of a throwback post today; I wanted to share some ice cream-themed planner pages from back in July. I used supplies from the July Stationery Brimbles Box, and a few stickers from my stash. 

I use a personal-sized malden as my handbag planner, and I find decorating the pages to be quite difficult sometimes. However, this spread came together super easily thanks to the fab stickers from Handcrafted by Sheree that were included in the box. The ice cream colours perfectly coordinated with the stickers that Anna designed, and the ice cream magnetic clip finished it off perfectly. It was such a pretty week to write on, it almost felt like a crime to fill in those to-do lists as the week progressed!

I also filmed a youtube video, which you can find below. 


Thank you for reading!

Chloé x


Wednesday, 15 June 2016

Project Life scrapbooking


Hello everyone!

I'm excited to be back on the Mrs Brimbles blog today, even though I've only got a short little post for you. I thought I would show you, again, how you can use your Brimbles Box supplies for Project Life scrapbooking. I absolutely love how versatile the box contents is! I was even more excited this month, as Anna included several 3x4 cards in a nice thick cardstock. They're super easy to write on with any pen, and the perfect size for pocket page scrapping.


Look how cute those little babies are (don't worry, they're allowed to be in these photos!) and look how fab the 3x4 cards are for backing your photos. The summery colours were perfect for these bright, birthday party photos, and the patterns are so pretty that I didn't really need to embellish at all. I just used a little bit of washi, also from the June box, and some die cuts from my stash.


Here's a funny story for you... don't put a disposable barbecue on your glass garden furniture. I did try and tell my boyfriend to take it off, but as you can see from the journaling, he didn't listen. The letter stickers from the box were great for creating a bold title, and the card had a perfect date spot too,


I used another of the 3x4 cards as a journaling spot, and I embellished these two cards with those adorable enamel shapes from the box, as well as adding some puffy stickers and die cuts from my stash.

So there you have it! Another week of project life documented, using Anna's gorgeous boxes. I hope you enjoyed!

Chloé x


Monday, 23 May 2016

Project Life Page Share


Hello everyone!

I'm so excited to be sharing my first Design Team project with the Brimbles Box, but before I do, I suppose I should tell you just a little bit about myself. My name is Chloé, I'm 21 years old, and I live in Hampshire with my boyfriend, my six pet bunnies and our yorkie puppy, Archie. I was always a creative child, but I didn't really find my preferred hobby until I was 17: Project Life scrapbooking. I absolutely adore pocket page scrapping; it can truly be as complex or as simple as you want it to be, and I can always find time for it even with a busy schedule.

With that being said, I have a Project Life page to share with you today!


(Apologies for the dodgy photo, PL pages are hard to capture lol!) About a month ago, I was lucky enough to attend the Cambs Mini Planner Con that Anna organised. It was such a wonderful afternoon; the perfect event to scrap using my May Brimbles Box. 


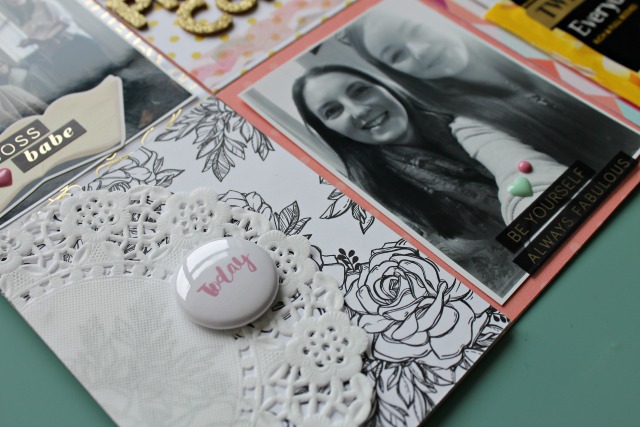
I did pull papers and some coordinating bits and bobs from my craft stash, however you can see that I dotted lots of stickers around from those beautiful 6x12 Pebbles sheets, and the "today" flair was the perfect embellishment for a filler card.


I love including memorabilia in my albums; I saved the tea bag packet from our hotel room, and used it as a pocket for some business cards I was given at the event! It's a great way to save space, whilst including all those little bits and pieces we'd otherwise throw away. Plus... who doesn't love tea?!


Finally, those gorgeous mini file folders! I've seen lots of people in the Happy Place group asking for advice about these; honestly, there are so many things you can do with them! I wanted to use one as a 3x4 filler card, AND a place to hide some more memorabilia, so I simply decorated the front (that little bumblebee is from the Brimbles Box!) and then put our hotel card inside. That "welcome" sticker and the bird are also from the sticker sheets in May's box, and I thought they really finished the inside of the card off. 

So there we have it, my first design team post! How exciting! I really hope you enjoyed having a look at my PL page, and I will be back on the blog very soon.

Chloé xx