Showing posts with label Easter. Show all posts

Monday, 11 April 2016

Easter-themed Project Life layout


Hello, friends! It's Stef here from the Noveltea Corner and this month I wanted to share with you my quick and easy Easter-themed Project Life layout.


Those of you who have seen my Project Life posts before know that I love simplicity. I don't like to overthink things too much - that's when I find myself getting stuck and frustrated and that's not something I want when I'm doing something so fun and creative! - and I love bright colours and lots of white!

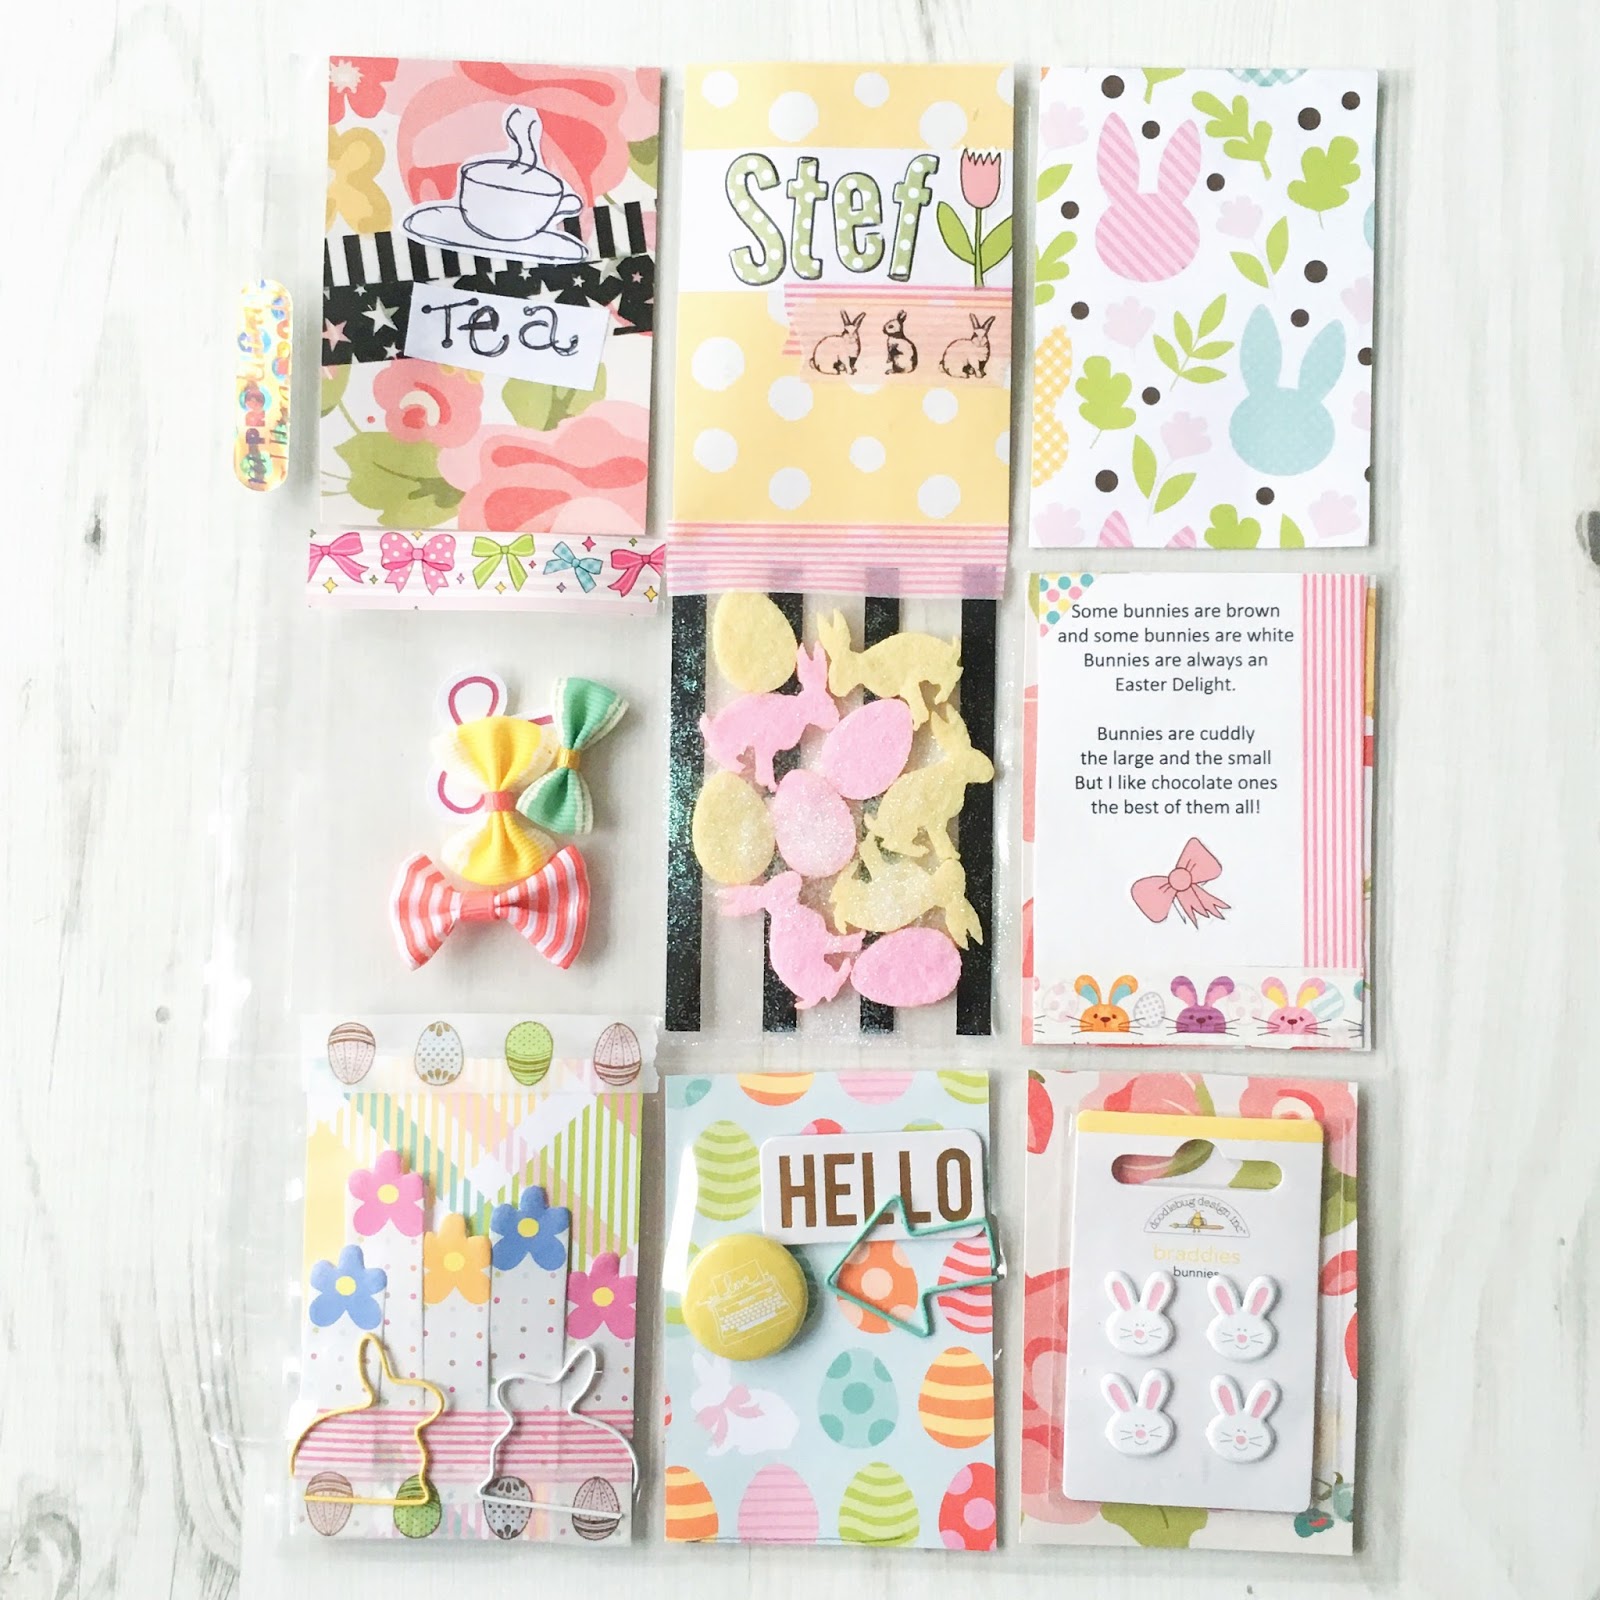
For this week's layout I used the March Brimbles Stationery kit and the fun papers that are included!


For my title card I used the cut-apart papers included in the March kit (Easter Collection by Echo Park), alphabet stickers by Basic Gray (Sunkissed collection), some Heidi Swapp gold Color Shine and a cute little bunny brad that Anna sent me as part of our Easter blog hop last month.

One of my favourite techniques at the moment is to draw a think black border around my decorative cards. I just love the way it looks.


Before I print my photos I collate them in the Collect app on my iPhone - that's what gives them the 'polaroid' style look when you print them out. You have lots of options for how to print your cards - including adding dates and titles - but lately I've just been enjoying the extra white space.

Plus, a lot of the photos for this week are light and bright and I think it helps to add to that bright, fun Easter feel!


This week I included a screenshot of a conversation I had with a friend of mine (because I find it funny that my friends message me questions about superhero pyjamas) - but it's really a wonderful way to remember these little details. Take screenshots of your conversations, your FaceTime sessions,  your favourite memes. You name it! Remember them!


This is another of my decorative filler cards, also cut from the cut-apart sheet fro the Brimbles box. Again, I've added my black border (confession: I couldn't find my favourite black pen for doing this so it looks a little rougher than normal!). I also added a cute little sparkly adhesive spot to the centre of the bunny's bow for added interest.

What you can't see in the photos is the glitter border around the bunny. I used a Gelly Roll Clear Stardust gel pen so that when you're looking at the card in person, you can really see the shimmer. Unfortunately it just doesn't photograph well at all.


I had these two photos of Easter-themed cupcakes that I helped my Mum with on Good Friday. I thought this last filler card from the cut-apart sheet was absolutely perfect because it's full of Easter-themed sweets.

I added a couple of the felt Easter scatters to cover up the word 'Spring' (it's actually Autumn here in Australia and thus not relevant to my Easter experience), but it looks very cute!


So that's it - super simple, no over the top embellishments (this time anyway), but it's a layout that is bright and colourful and very representative of Easter to me. I hope you're inspired to try out something from this layout in your own layouts in the future!

If you have any comments or questions please leave them below and I'd be happy to answer them for you, or feel free to stop by my blog and social media for more content and ideas!

youtube. Noveltea Corner
instagram. @stefgalvin

Until next time friends, have a fabulous day!

Stef xx

Saturday, 19 March 2016

Easter Pocket Letter


The lovely ladies on my design team and I were chatting about wouldn't it be cool to create something together and do a blog hop and some snail mailing. So we decided why not do an Easter themed swap. Errrr yeah, bunnies and the like, Hello! Durrrr! He he!

So everybody has been busy creating their pocket letters or snail mail and I will be showing them off altogether on the blog (my blog, the one you are reading right now) on Good Friday which is 25th March. So if you come back then you will be able to see a 'Master' blog post which will start off the Bunny Hop (I know it's really a blog hop but I just had to write bunny in there lol!). You will then be directed to all of the ladies blogs so you can see how they made their creations etc. Sound fun, you betcha!

What I thought I would do today is share with you the pocket letter that I created for my swap partner so that you could see that in more detail as when we kick off with the blog hop you won't see it so much.

Of course I filmed the process of me making it so that you could see how it all came together:


I am really rather please with how it turned out especially since I was a bit rusty and hadn't made any for a while. I went through a period of doing loads and it got a bit too much so I stopeed. (I am not looking to take any more swaps on at the moment).


I love the little details too!


This is how it looks all bundled up and ready to put in the envelope. I thought I would tie in a chocolate bunny lollipop just to kind of round it off and make it look 'sweet'.


I used a mix of items that I already had plus items that were in the March Brimbles Box. Here is a supply list for you:

Top left


Top Middle

Top Right
  • Bits and pieces I had in (unknown)

Middle / Middle

Middle Right
  • Postcard from the March Brimbles Box embellished with washi tape from Lidl plus above.

Bottom Left
  • Items from my collection already had in.

I hope you liked it and remember to pop back on Good Friday to see all the Happy Mails!

Thursday, 10 March 2016

Fauxdori Insert Decoration


Hello wonderful planner addicts! Itís Zinia here again and today I want to share with you how I decorated my Foxydori using the March stationery Brimbles Box.

Since I generally keep my decorations minimal to have plenty of space for my planning, I decided to use the washi tapes that came in my box in a different way.


So since the washi tapes that were included in my box were sort of Easter themed and I didnít feel like going for that style in my planner, I decided to punch tiny circles from my washi tape and create abstract decorative stickers. I tried to cut through the designs so you canít really tell anymore it was a bunny or an egg, you just see lovely colors and patterns.

Brimbles Box March Deco

I also used the amazing bunny stickers that Anna designed for this month to give some more interest to my little clusters of washi stickers.

Brimbles Box March Deco

As far as planning goes, I used the adorable stickers we got by Craftiní Chaos. The colors are really so darling and Iíve always been a huge fan of drop shaped stickers.

Brimbles Box March Deco

I also paper-clipped a page of the notepad to keep temporary notes and to-do lists for long term projects so I can just move it on my next week if there are still things to be done.

Brimbles Box March Deco

To add a little extra detail to my spread I used one of my most favorite Studio L2e stamp sets, Get it Girl 2, to add some motivational words.

So this is how I add little bits of decoration in my Foxydori while still keeping a lot of space for my daily to-do lists. I really hope you enjoyed, until next time, happy planning :).


 Feel free to stay in touch with me through social media: Blog ï Instagram ï Youtube ï Facebook ï Pinterest ï Twitter