Tuesday 30 August 2016

Travelling Notebook


So it's been a little while since I've popped up on this blog! Apologies for that, between travelling up and down the country, and preparing to move, things have just got on top of me. I'm getting there though. My face should be popping up more regularly on here from now on!

Today I've got a travelling notebook to share with you. This isn't mine, it's someone elses but I decided to use the contents of the past few Brimbles Boxes to fill in my pages.

If you are unaware of what a travelling notebook is then I have a full blogpost on my blog where you can have a read, just click here.
In short though it's a notebook that's sent around numerous people and everyone fills in a few pages. Then when it's full up, it's sent back to the person who set it off!

On my first page I decided to add one of the Mini File Folders that came in the May Brimbles Box. I used some of the Alphabet Stickers from the June box, and a beautiful floral sticker that also came in the May box. Inside I added my generic info and decided to draw a little map of the UK to illustrate where I'm from/will be moving to in the next month or so (fingers crossed).
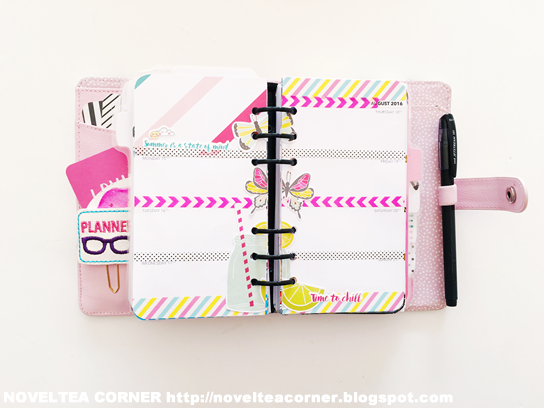
Below that I added a 'currently' section, and decorated that with more washi from the past two boxes (Cloud Washi & Floral Wreath Washi). The 'Shine Bright' washi is from one of the recollection tubes of washi.

For the main double spread in this notebook I split it into chunks. There was no real rules of what to put in the notebook, so when I filled it in I decided to add whatever sprung to mind.
Some people choose to list certain things they want people to write about, where as others leave it open to whatever the contributor feels like doing.

I used the Gold Confetti Washi that came in a past Brimbles Box, along with this beautiful mismatched one from Paperchase.
I popped the little 'weekend' sticker by Sea Salt & Paper, that came in my August Brimbles Box at the top, and wrote a little section about the upcoming weekend.
Then I used a variety of stickers from my Mrs Brimbles Sticker sheet that was in the June box, to decorate the rest of the page.

Again over here I went through all the stickers, and picked out a few that would fit well with the bright colours I was using throughout.
I'm really happy with how it turned out, and I hope the notebook's owner likes it!
I thoroughly enjoyed the challenge I set myself to use just things from my Brimbles Boxes.


- Daisy X


Friday 26 August 2016

Summer Plans


geraldinejayne.com


 This summers Brimbles boxes have been a lot brighter than our weather here in the UK! They have cheered me up no end! I went for the planner box this month because I treated myself to a bright yellow Kikki K medium size planner. I just love how happy it makes me feel. The planner with the dashboard designed by Mrs Brimbles looks amazing and invokes a summer vibe. However I was able to use this box for so much more...again! They really are very versatile!
  geraldinejayne.com

In this box there were four sheets of 12x12 paper with Anna's very own design. I decided that as I have so much happy mail to chase up, I'd make some envelopes with them!

  geraldinejayne.com

Using an envelope template, I made four envelopes so I have one of each of the designs. The papers are more thin card so they gave the envelopes great stability.

  geraldinejayne.comgeraldinejayne.com geraldinejayne.com

Also in the box were the most gorgeous pieces of ephemera or die cuts. I literally wanted to use them all in one go to make my journal bright and happy...so I pretty much did! I have written a separate blog to showcase this! Here is a sneak peek for now..

  geraldinejayne.com

In the meantime, here is a video I filmed of the unboxing of July's Brimbles Box. Enjoy and be inspired!


Wednesday 24 August 2016

Project life spread


Hello everyone! It's Zinia here to share with you a project life spread I created using some really lovely products from my August 2016 stationery Brimbles Box.

Anna designed some really beautiful 3x4 cards for this month's boxes but you can also create your own custom cards by using the other products that are included in the box.


The box actually had a beautiful 12x12 sheet of paper by Shimelle but it was a bit too bold to use it as is. So I decided to fussy cut one of the tea cups from the pattern and stick it on top of another paper from my stash.


Another way to create a custom card is to use stickers. The boxes this month included a few different types of stickers but for my spread, I decided to use the Shimelle phrase and alpha stickers. I chose phrases and colors that matched with the rest of my spread and added a few lines of them in the middle of the card.


I also wanted to include some of the beautiful wahi tapes that were included in my box so I covered a blank card with strips of the pink floral tape. I left a small area empty to fit my journaling.

To embellish it a bit further I fussy cut the bunting piece and stuck it between the journaling and the washi.

That's it. I hope you inspired to create something beyond your planners with the beautiful bits from your Brimbles boxes. They are always so versatile.

 
Feel free to stay in touch with me through social media: 
Blog / Instagram / Youtube / Facebook / Pinterest / Twitter

Friday 19 August 2016

Planner Sticker Organisation


I don't know about you but one of the biggest reasons my spreads are not as decorated as they could be is because my stickers are so disorganized. I pride myself in being a very organized person but running a Etsy shop, planning a wedding for our daughter has made my life a bit chaotic. I get a lot of stickers in the mail from various shops, subscription boxes etc and I also make some for myself so I feel like if I had it all organized I would sit down to plan and it would be effortless as far as finding the right stickers to use in my spread.

So after seeing so many people create a sticker book i decided to do the same for myself and even categorize it a bit. So I am sharing this on Mrs Brimbles blog today. Here are a few simple steps to make the process not so daunting.

Things you will need to get started:
Paper (I just used some cheap cardstock I knew I wouldn't use for much else)
Glue runner or glue stick
Disc or a ring bound planner
Hole punch depending on what style of book you are making
Paper trimmer


#1 compile all your stickers together. If you are like me some are here, some are there so get them all together.


#2 Sort them in some categories that you think would be helpful such as "decorative" "functional" or even just by shop. However you see the separation of one or the other helping you to maximize your planning experience. This of course is optional and since I had so many I opted for setting up mainly by shop.

#3 measure what would be the largest set you would be needing to fit on a page. Most of mine were relatively the same size so I made my pages a bit big to fit two sheets on a page.
I think mine is a bit bigger than I would do next time. My sheets were cut to 8 x 10

#4 Cut a stack of paper into the largest size needed for your biggest sticker set and then hole punch them all. I am planning on making one like a Happy Planner look so I am using the disc and therefore utilizing the happy planner punch but you can do the same with a ring bound book as well.


#5 Using an adhesive runner Put little adhesive on the backs of your sticker sheets and place on your cardstock you have prepared for your book.

#6 OPTIONAL: Create you some tabs for all your categories and sort the sticker pages you have created into the categories you deemed important to you. Start putting in your sheets. You can do this with a 3 ring binder, Happy Planner style disc etc.


Here is what mine looks like. As you can see you can also create a cute cover for your book and now you can easily carry it around with you as you are planning making it so much easier to use those stickers instead of collecting the stickers! Now have fun making your own book!


So get busy and make yourself a sticker book, make your life easier when you sit down to plan. Show us your sticker books!!!

Here is one of my past spread. I need to do a new one with this months goodies. I will share a pic of them as well.

This months goodies in the planner box:

Cute Pencil bag and love that charm and washi

Close up of the charm


Love these stickers from Sea Salt & Anna's own designs. That bee and that adorable girl is just so cute! Flair to match too!


Head over to pic up extra's that may be left from the box click here >>>Mrs Brimbles Shop


Thursday 18 August 2016

Planner Page Layout from Stef


Hello, Brimbles fans!
This month I'm sharing another planner layout with you featuring the gorgeous items in the July box.
It's been very, very chilly here in Melbourne for the last few weeks and when this box arrived I practically jumped for joy because it was a spot of sunshine in a rather grey, Winter-y season! With a great array of papers, stickers and ephemera pieces to choose from, the sky's the limit with what you choose to do with these wonderful paper crafting items.

I felt the need for some warmer-weather inspiration in my planner to get me in the mood for the upcoming Spring, and I just love the way everyone coordinates together so beautifully! 


How have you used your July Brimbles box?

As always, you can find me over at the Noveltea Corner or on Youtube and Instagram for more inspiration!
Until next time, happy planning!

Monday 15 August 2016

ice cream-themed planner pages


Hello all!

I'm back on the wonderful Mrs Brimbles blog with a bit of a throwback post today; I wanted to share some ice cream-themed planner pages from back in July. I used supplies from the July Stationery Brimbles Box, and a few stickers from my stash. 

I use a personal-sized malden as my handbag planner, and I find decorating the pages to be quite difficult sometimes. However, this spread came together super easily thanks to the fab stickers from Handcrafted by Sheree that were included in the box. The ice cream colours perfectly coordinated with the stickers that Anna designed, and the ice cream magnetic clip finished it off perfectly. It was such a pretty week to write on, it almost felt like a crime to fill in those to-do lists as the week progressed!

I also filmed a youtube video, which you can find below. 


Thank you for reading!

Chloé x