Showing posts with label Gemma. Show all posts

Thursday, 7 December 2017

What an Amazing end to the year!

so the last Brimbles sticker club kit for 2017 is here, and what a amazing end to the year. 

This kit was so full of sparkle it was amazing.

I firstly knew I wanted to do a planner layout in my new personal size Websters pages planner, which I have been totally addicted to over the past 2 months since I got it for my birthday.

Around this time of year I like to try and get super organised and get the flat clean and organised going into the new year  (I can hope at least!) 

Also anyone with kids will tell you your front room becomes Toys R Us in seconds on Christmas Day, so I wanted to make sure I had time written in to organise things before I totally lost the plot in the madness!!


Also this year for New Years we are having family over to bring in the new year so doing this spread 3weeks in advance was perfect. I loved the different widths of washing strips and all the decorative stickers I felt really went well with the layout.

I also used a few gold puffy stickers that I had recently bought from the mrs Brimbles stall at this years Christmas jingle mingle. 


I really love the colours in this and love how it turned out.

Then I wanted to do a journal page .. now I'm not going to get into the whole clicha " new year new me shpeel' ( is that a word lol) that is thrown around a lot this year, however I've had such a crazy year this year from getting married to coming down with a mystery illness and I really wanted to create a page to help me get a few goals for next year out of my head and written down.


I love how this all worked out and I am looking forward to next year yo see if I can keep to these goals.

anyways Merry Christmas all and Happy New Year from me !!

see you in the new year

Gemma Silk ( still getting used to the new name haha!)

YOUTUBE     BLOG.   INSTAGRAM


Sunday, 5 November 2017

Christmas Paper Wreath

ITSSSS CHRIIIISTMMMAAASSSSS!!

haha .. sorry I couldn't resist.

The  November brimbles sticker club kit this month is so full of Christmas spirit and I just couldn't wait to get into it.

I did an unboxing of It on my channel if you wanted to take a look. 

Theres one Christmas craft I really wanted to try, and that was make a paper Christmas wreath.


I used various papers from some Christmas paper pads I had in my stash.

I made a lot of paper rosettes I have a how to video on how I make these, and then glued then onto a cardboard ring I had cut out. 

I then stuck some of the decorative stickers from the kit onto some plain white card stock and fussy cut them out, I did this so they would sit nicely on top of the rosettes. 


I have really been loving my Dina Wakley Media Journal lately. I got it for my birthday from my lovely mum and I've pretty much been doing a page in it every day.

I loved the little Mouse stickers from the decorative sheet especially this little guy ( they do have names but the escape my mind) I painted the background with just some basic red acrylic paint then used some paper from the Christmas paper pads that came from the pound shop last year to make some card presents.
I then used my posca paint pen in white to write on my quote.
I punched out some stars with some of my star punches just to add some detail onto the background.

then I added some christmas phrase stickers from the mrs brimbles shop to finish the bottom of the page.


Gemma Silk


blog.     youtube.     instagram 


Sunday, 22 October 2017

Gemma's Autumn Planner & Journal Pages


Well autumn is upon us and I can honestly say I'm so happy.

I hate summer and all the heat so as soon as the  temperature drops and the tree leaves start changing colours I start Redding my planner for all the activities and days out walking in our local park.  


This months brambles stickers where beautiful .. Anna gave us design team members a choice between the autumn stickers that where in the kits or a Halloween option, I chose the autumn ones as we don't really do A lot for halloween with the kids being so small. I did an unboxing for the kit on my channel.


firstly I wanted to make a new dashboard for my personal planner.


I Love the colours of fall so I water coloured the back ground and used some of the decorative stickers to layer on top. I then also added some of the word stickers.


I also added a few leaf stickers that where on a previous sticker sheet I also got from he mrs brambles shop that is still available in store now.


 I then wanted to do a planner spread. I sed some of the check lists and headers to plan out my MANY to do this month but was still able to use some of the decorative stickers I loved so much as there was some that where smaller so where perfect to be used in this size planner. 


I was very inspired to do a journal page with this months kit too. I used some of the decorative stickers again and created the page on the left. I used a few stickers from the other sticker sheet as mentioned and linked above and the rose sticker was from a crate paper range called carousel. 


This months kit was amazing the colours in it really harnessed the colours of autumn.


see you next month love Gemma Silk

youtube.  Instagram.   blog  


Monday, 11 September 2017

September flowers planner & scrapbook page


Well September is finally here!!

Finally my little munchkins are off back to school and i can finally get back to feeling some what human again and get some crafting in.

If you could see the state of my desk, you would know i have been busy, and my first point of call was the September Brimbles sicker club.

This kit was just simply gorgeous, the colours in it where brilliant and the mix of black , grey,green and pink are not a colour palette i would necessarily put together yet seemed to match perfectly. i did a unboxing of this on my channel if you wanted to take a look.


Obviously the first thing i thought was Planner spread, i did film a plan with me for this. i really loved how this come out.


As soon as i see the decorative sheet in this kit i instantly thought of a scrapbook layout i had been planning to do for a while.
The layout was of a photo of my children Mia and William at my wedding last month. They where playing around and having fun behind the photographer and having so much fun.


i firstly fussy cut the flowers from a scrapbook paper i had, then used some of the beautiful stickers from the decorative sheet and intertwined them in so they looked like wild flowers and they also added some extra colour and depth to the layout. I did film the making of this layout if you wanted to take a look.


I really loved this kit and am looking forward to the next.


where to find me :
Youtube    Instagram      Blog


Wednesday, 9 August 2017

Gemma's Pages


I really loved the August Sticker club kit this month. The pastel colours of the flowers i really loved i new i wanted to use them in my journal.

This first Page is about my last therapy session, id finally gotten signed off from therapy i used one of the stickers from the decorative sheet that looked like a paint streak, and then used some of the numbers from the alphabet sheet to put in the date of the last session. 


On my next journal page i wanted to document this photo of me and my mum, it was taken at my Hen night. The floral stickers really worked well for this page.


i then knew i wanted to do a planner spread. i used the kit this month in my personal size planner. i used some washi tape from my stash which is from KIKKI K and from home sense.
again i used the number stickers to mark the dates, then a few of the decorative stickers around the page to tie it all in together.


I also loved using the letter stickers on my scrapbook pages. The font and the size of them seem to go with any layout i do and stand out really well.


Sunday, 2 July 2017

Gemma's Plan With Me!


July's Sticker Subscription was defiantly full of fun and bright colours.


Heres the unboxing:


I had so many ideas when it came to this box. Firstly i knew i wanted to do a planner spread, i loved how bright and fun these stickers where. I decided to film a plan with me.


I love how this came out. There was enough stickers to do a full spread which i love and i still had room to make it a white space layout as i do not like the no white space look.I also loved the amount of washi tape strips that came in it too.

When i see the decorative stickers, i loved how cute they where. i instantly thought of my 5 year old daughter Mia, shes been learning her words and writing and spelling at school and i thought they would be great for her to make herself some flashcards.


She loved making these and had so much fun putting the stickers on the cards and trying to figure out how to spell what they are. 

Then i wanted to do some journaling, with it being only 30days until my wedding im started to journal every day on how im getting on with the last few wedding plans. i decided to use some of the stickers i had left on the sheets to do a page to do this. everything on this page is from the sticker sheets APART from the love hearts with the G & S on which are from hobbycraft, and the washi tape round the very edge is a tape runner from wilkos.


Thursday, 9 March 2017

Gemma's far flung galaxy....

For this months march box i intently knew what i wanted to do with a lot of the box as soon as i opened it. 

i did a unboxing for my channel as i always do. Once the video is filmed i always sit and have a good look through it all and as soon as i see the blue galaxy looking paper i knew i wanted to make a art journal for myself.


i also added some of the ephemera to the front. This is the first one ive made its not defiantly perfect, its the first time i have stitched a book together and i love how it turned out.


Then for the first page i stuck the post card from this months box on the inside as i really loved the quote that was on it. and the first page i did in it was a page on my daughter Mia. i love the washi tape so much  i think it will be on every page as i continue to fill this little book up.

Then for the other blue galaxy paper i pictured this scrapbook page. i wanted to leave the section on the left embellishment free as it was just too pretty to cover, however i used some of the page flags to create a layered frame for the photo.


then i used the stickers to do a layout in my planner. i love the colours and i really warming to the idea of using stamping in my planner. The stamp set this month has some really useful planning friendly stamps that i loved using.


Thursday, 16 February 2017


February Brimbles box is here and yet again i love it. here is the unboxing 


this box is the perfect mix between valentines and romance and a just a amazing and cute box.
the first thing i did with the box is i actually organised into a new storage box i have i did a video on this. i find having the kit laid out the way i have it really helped me to utilize what was in the box.
The first thing i did was create a scrapbook layout. i really wanted to use this picture on my daughter Mia. ( im aware her shoes are on the wrong feet lol )


i used some of the sequins and ephemera from the box and some stickers to create the shaker mini pocket in the bottom right hand corner in some of the packaging the stickers came in.  


Then as i mentioned in the haul video. i wanted to use some of the 12"12 sheets that come in the box that had the envelopes on to make a divider in my planner to section off all my pen pals addresses.


 With the planner stickers i knew i wanted to do a layout in my person Filofax planner. i run the washi tape down the middle and re-punched it, and used a combination of the planner sticker sheet and the decorative sticker sheet to create the layout. I also used a piece of the ephemera to make a cute paperclip.


I also wanted to make a flip book out of that paper. I thought the pattern was very appropriate for flip-books and i used a combination of the whole box to pull the whole thing together it folds and the back. i used one of the sticky notes at the bottom and used a speech bubble from one of the sticker sheets and wrote happy mail on it to add a cute touch. and again i used some of the sequins and stickers and enamel dots  to decorate it.


i loved this box so much. the theme and colours are really my style and can't wait for the next one. 


So i cut it to size and punched the holes in,then cut one of the 3"4 cards out that had the grid on and the envelope at the top. and used some of the ephemera which is the large envelope. and some of the enamel dots and washi tape and laminated it. i love how this turned out and it really is coming in handy so i can keep all the addresses in one place and keep a record of who i have replied to and who i have received letters from.


Monday, 30 January 2017

Watercolour Inspirational Quotes


HAPPY NEW YEAR

I'm a little late. BUT the January brimbles box has landed here and you know what im going to type .. i love it all. as always i did unboxing of it on my channel here . 

where do i even start!! 

this box is very themed for the new year about goal setting and the colours with gold and marble are just amazing.


First i started with the clear stamps that came in the box. they had these inspirational quotes on them that where all Annas own designs and where also throughout this whole box.
i used some water colour paint on some plastic packaging and the stamped it onto the paper to create this amazing effect.


then i knew i wanted to make a dashboard for the A5 planner.


i used one the cards from the cut apart sheet and some of the washi tape. and a few stickers from my stash and laminated it.


i then used a few more cards from the cut apart just to pop in the pocket so they are ready for me to use them as washi tape holders.

also with this kit there where some planner stickers. i ended up filming a plan with me video using them if you wanted to check it out.


a slightly different way i used this box was one of the 12"12 card stock sheets, i wanted to make this sign for my wedding and this card stock was the perfect background. i made the sign in Microsoft word and printed it and mounted it into the white and gold marble side on this card stock.


i really love this box. and i can not wait for the next one.


Friday, 9 December 2016

Pen Pal Pockets


So December box has landed.

I will most probably say this about every box but i love it!! i did an unboxing video opening it all up and i love all the colours in it and the different tones of blues and greens obviously with Anna's art work throughout which is the best part about it.

every month there is some 12"12 card stock and this month i decided with some of that card stock i would make a new pocket book that i have been enjoying making this last month.


1) i first chose the card stock i wanted to use. these two where ones i got in the box.

 
2) then i cut them down to size and figured out how many pockets i wanted.


3) i then made some adjustments to the pockets and stuck them down, with double sided tape. then used some of the washi tape that came in the kit to frame the sides and the bottom.


4) i used one of the sticky notes that came in the box as an embellishment on the bottom left and i fussy cut one of the penguins from some of the off cuts of card i had left from cutting the pockets.

 
5)i then went through my stash and used some of the word stickers that came in the November Brimbles box just to add the the bottom right hand corner.


6) then i used some of the stickers that came in the December box to embellish the top and also some of the enamel dots that came in the November box just on the green pockets to give them some depth.

 
7) then i used some of the stickers from the 12"12 sticker sheet by Simple stories and used some of the alpha stickers on that sheet to spell out hello. Then used some of the other stickers to embellish.

 
8) then i used some stickers from another 12"12 sticker sheet by Simple stories called The Reset Girl to spell out the lovely ladies name.


9) then i just filled it with some goddies and a letter for her. 


10) finally i packaged up i used some of the washi tape that came in the box and taped the edges and used the stamp that came in the kit to stamp some snowflakes all over it and used on of the snow men post it notes to used as part of writing the address on it.  


I love how this tuned out and i still have so much to use. As i said in the unboxing video for this box in the new year i will be starting to scrapbook in a 12"12 album so the other papers from the kit will be saved ready to scrapbook and i will blog about them as and when they are done.

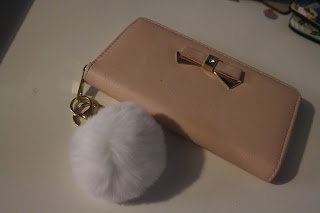
I also love the key-ring that came in the box so much as soon as i finished filming the unboxing video it went straight on my purse.