Showing posts with label Planner Inserts. Show all posts

Saturday, 4 August 2018

Unicorn Planner Pages


 Welcome to Part 2 of my Unicorn Sky sticker kit layouts. I loved this set so much that I made two layouts in the same month to celebrate them because I just couldn't help myself (you may have seen my August layout earlier). Again, I mixed and matched Anna's stickers with papers and washi tape I already had lying around, and for a change I decided to be sparse on my stickers to make them stand out more.


Up until this year I've never been a big fan of vertical planning although now that I've been playing around with it for a few months I can see the appeal and it definitely ticks a lot of my list-making boxes (planner pun intended) because I am such a list person. I've been experimenting with different layout styles and have settled (for now) on a half-page columns for Monday-Thursday - because, honestly, I'm so busy working that there's not a whole lot happening on those days! - and full page columns for Friday-Saturday where I need a lot more space to document what's happening.


 It was also really nice to get back and grab some pens and do some doodling on my pages. I haven't done that for ages, either, and it was a lot of fun to just fill in a few little spaces that popped up in the layout.


 I'm a huge fan of layering pieces together to create something different and I loved using Anna's unicorns to pull the whole thing together. Look and this precious one - it's like she's waiting for all the amazing things to happen in this week!


 All the extra paper, ephemera and washi tapes come from stores locally here in Melbourne (and some of it is quite old now so tracking them down was tough) but I'm a firm believer in using what you have and mixing and matching where you can. It just creates a lot of visual interest.


 I'm looking forward to putting down all my plans in this week's layout. I think it's going to be a great week! 

 Stef


Friday, 3 August 2018

Completed Planner / Diary Insert Flip Through (April - June 2018)

Today I am sharing with you a flip through of a completed planner / diary insert from April to June 2018. I mention where all of the stickers etc are from in the chat through but they are mainly from my shop. The insert is a B6 that I made and designed myself.


Friday, 20 April 2018

Completed Planner / Diary Insert Flip Through (Jan - Mar 2018)

Today I am sharing with you a flip through of a completed planner / diary insert from January to march 2018. I mention where all of the stickers etc are from in the chat through. I usually post photos of my pages on instagram so come follow me over there if you would like to see more!

Thank you to my current Patreons who are supporting me as this helps me to be able to create more content for you free on my YouTube channel. Big, Big love xx I hope you enjoy!


The Mrs Brimbles online shop for everything planner, journal and stationery as well as online art journal courses: http://www.mrsbrimbles.co.uk/shop

My Patreon where I create lots more art: https://www.patreon.com/mrsbrimbles


Thursday, 5 October 2017

Halloween Planner Inserts

Check out these Halloween planner inserts!

Purchase your copy of the Halloween Planner from: https://www.etsy.com/uk/listing/555791017/halloween-planner-halloween-2017?ref=


PLEASE NOTE: I was given this / these product(s) in exchange for my honest review and opinion, the fact that I was given these does not alter my opinion in anyway. This review is my own personal opionion on the product / company, given in good faith and has not be sponsored or endorsed. None of the links are affiliate links. Unless otherwise stated, all photography is my own.

Friday, 21 July 2017

Completed Planner Insert Flip Through

I have just finished a diary insert which runs from January 2017 so I thought I would do a flip through so you can see what my pages look like when a week is done with!


Tuesday, 9 May 2017

Planner Spread


Hello lovelies! This month I wanted to share another planner layout, this time featuring items from a past Brimbles Box - I don't know about you, but I always have bits and pieces left over and I love pulling them out and making sure they're shown a lot of love!

As always, I have a process video available for you, should you choose to watch it, otherwise read on for more photos and thoughts on my process!


I wanted something bright and happy for this week - looking at pages like this reminds me to be positive and to focus on the good things.


When putting these pages together I began with the die-cut pieces from the box and then started pulling my colour scheme from there. Obviously, the brightest objects were the popcorn and hearts, so I used the beautiful pinky-red colour and yellow colours in my washi tape borders as well, to help balance it all out!


I've used dimensional stickers - like enamel dots - in my planners many times before with little ill-effect. Maybe it's just being a tactile person that makes it okay for me? Still, I love having that little bit of height in my layouts to give it a bit of variety and make it stand out!
As always, if you wish to connect with me on social media, you can find me on Instagram and on Youtube and I'd love to chat with you!

Until next time, happy planning!
Stef xx

SaveSave

Wednesday, 16 November 2016

Christmas Planner Set Up


img_9391new

I've been wanting to do this for a while but waited until I got this months Brimbles box. The reason being is that it's Christmas themed! It's a fantastic box! This is the first Brimbles box where we no longer have an A5/personal/stationery type box. There is now have one main box for everyone. Included in the box were:
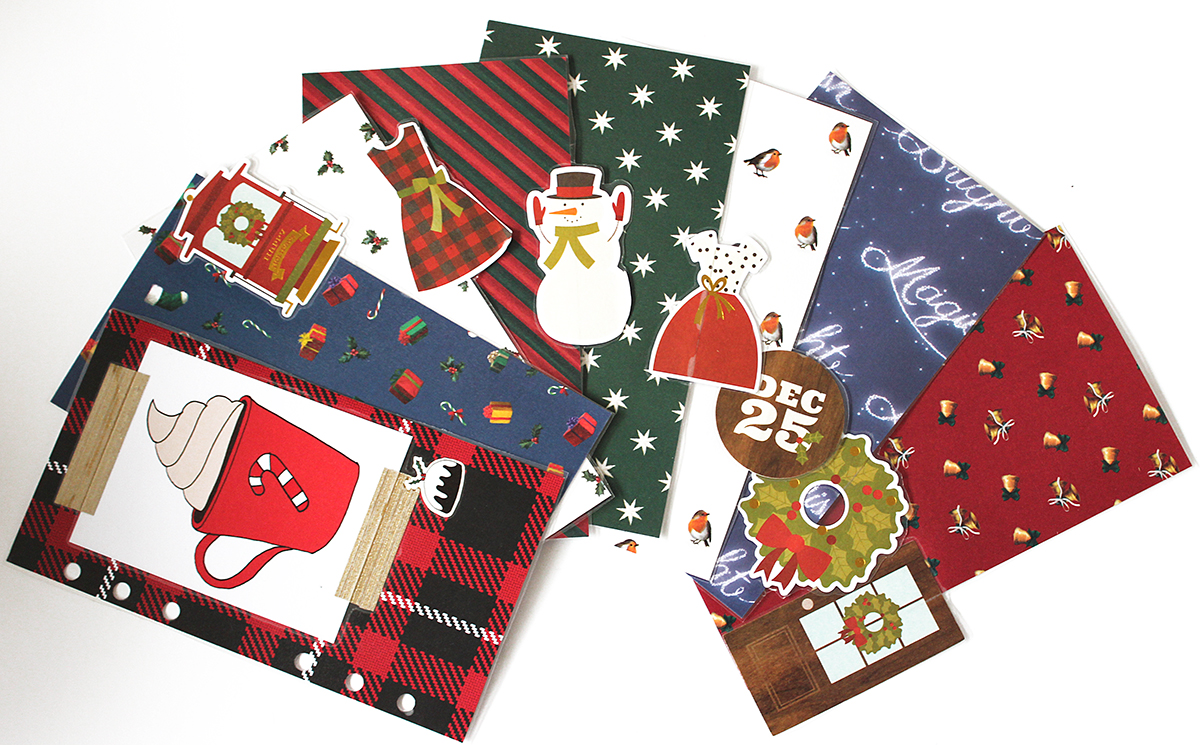
  • Three 12x12 scrapbook papers (one of which could be cut up for journal cards) All had Anna's artwork
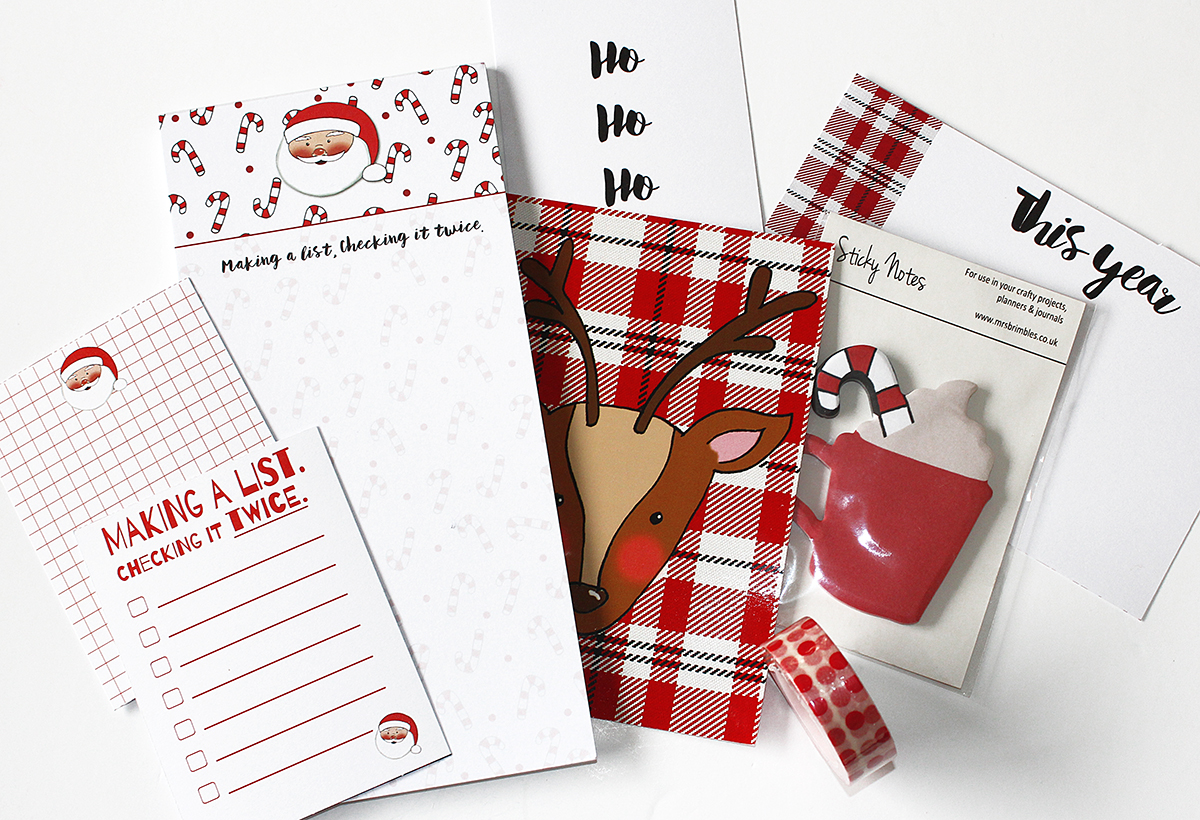
  • Washi Tape
  • Santa Paperclip by Cherry Blossom in the Market Square
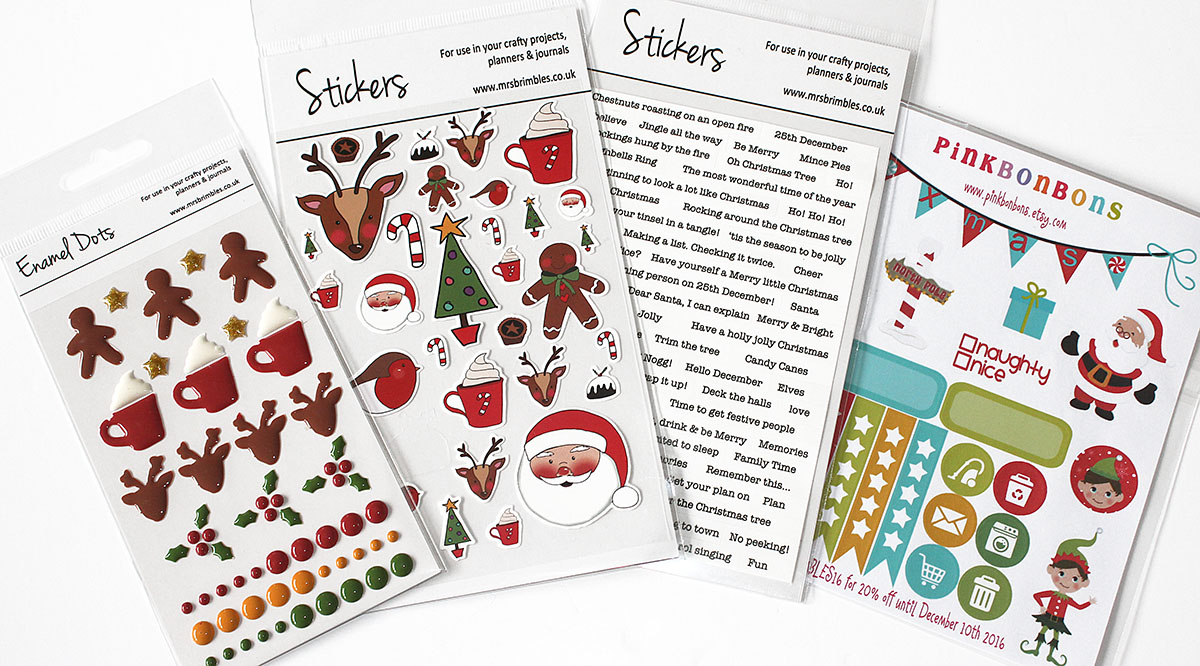
  • Two packets of stickers with Anna's designs (images and word strips)
  • Enamel Dots with Anna's designs
  • Sticker sheet by PinkBonBons
  • List Pad with Anna's design
  • Sticky Notes with Anna's design
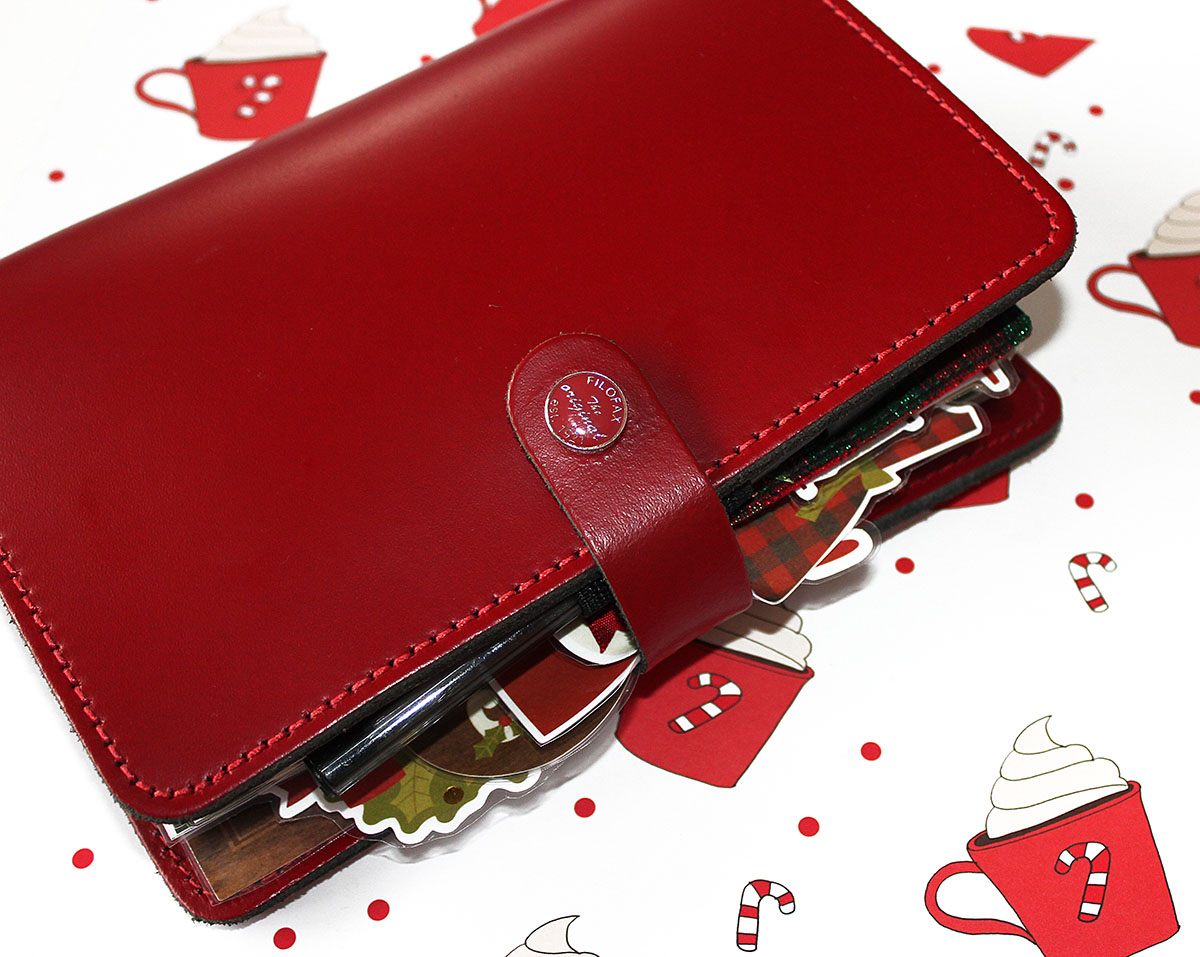
I already had my Pillar box red Original Filofax in Personal waiting for this! I have included other items in my planner setup, some from the Brimbles shop/past boxes, some from other shops. I will link everything (if the items no longer exist for sale, I will link the shop). 
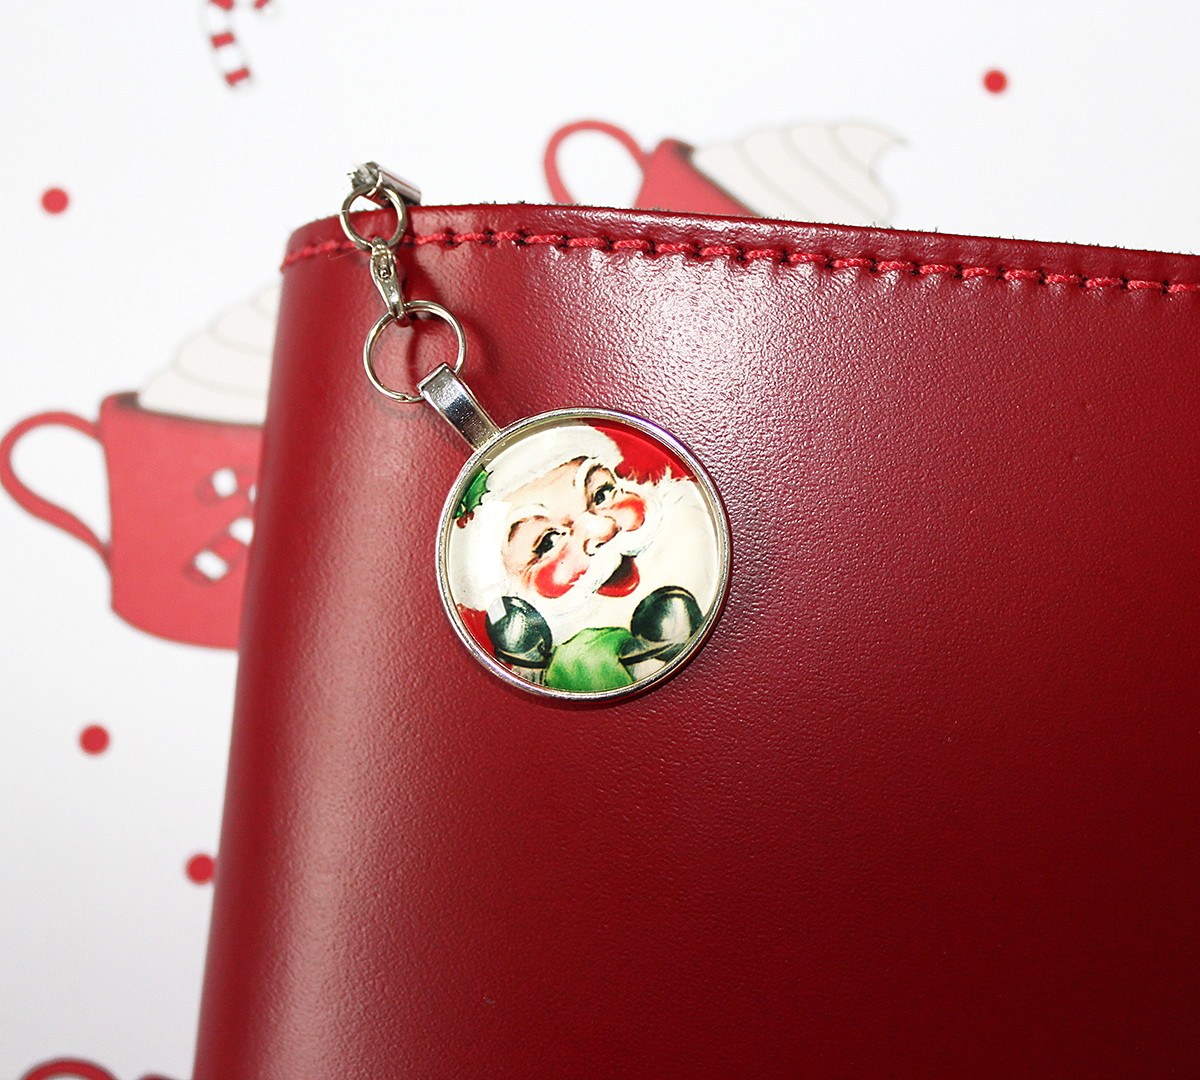
One little thing I want to show is the Santa planner charm I've used. I LOVE this charm. It was in last years November Brimbles box. I had it ready and waiting haha.
  IMG_9393.JPG

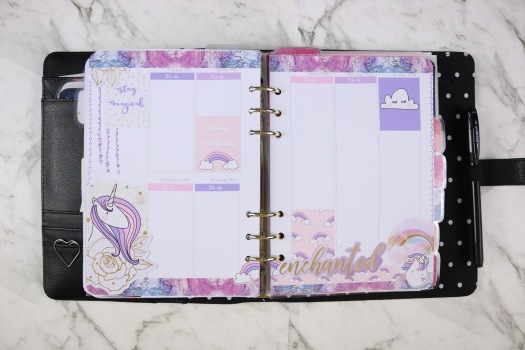
So my dashboard! I wanted it to explode Christmas but also have a traditional feel. There's quite a bit in my dashboard section. So to begin on the left hand side. At the moment I've chosen a black Inkjoy pen, nothing fancy but I like the way it writes. I've taken a section of scrapbook paper from Anna's 12x12 designs, I love this plaid pattern. It works so well for what I wanted to capture in my planner. In front of that I have a series of paperclips, the round ones were from Mrs Brimbles shop. They were tin pin embellishments that I turned into paperclips. The Santa is by Cherry Blossom in the Market Square. The ribbon is by Santoro and the envelope is by Docrafts. I've then taken one of the journal cards (cut from the 12x12 sheet) and added it to the back pocket.
  IMG_9394.JPG
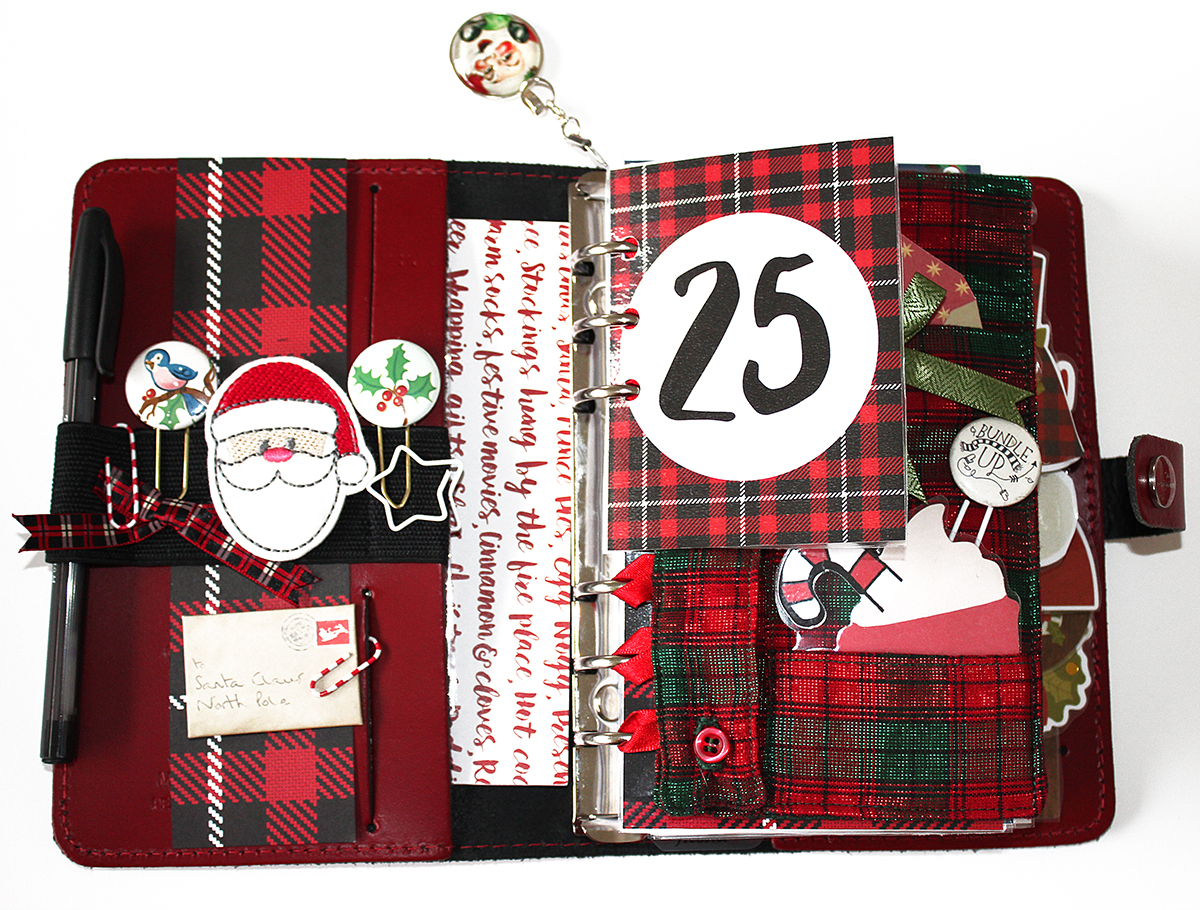
On the right I have layers and pockets! Two of my favourite things! At the front I have another journal card which I've laminated and punched into the planner. It has that gorgeous pattern and a huge 25 on it! Best day of December!
  IMG_9395.JPG

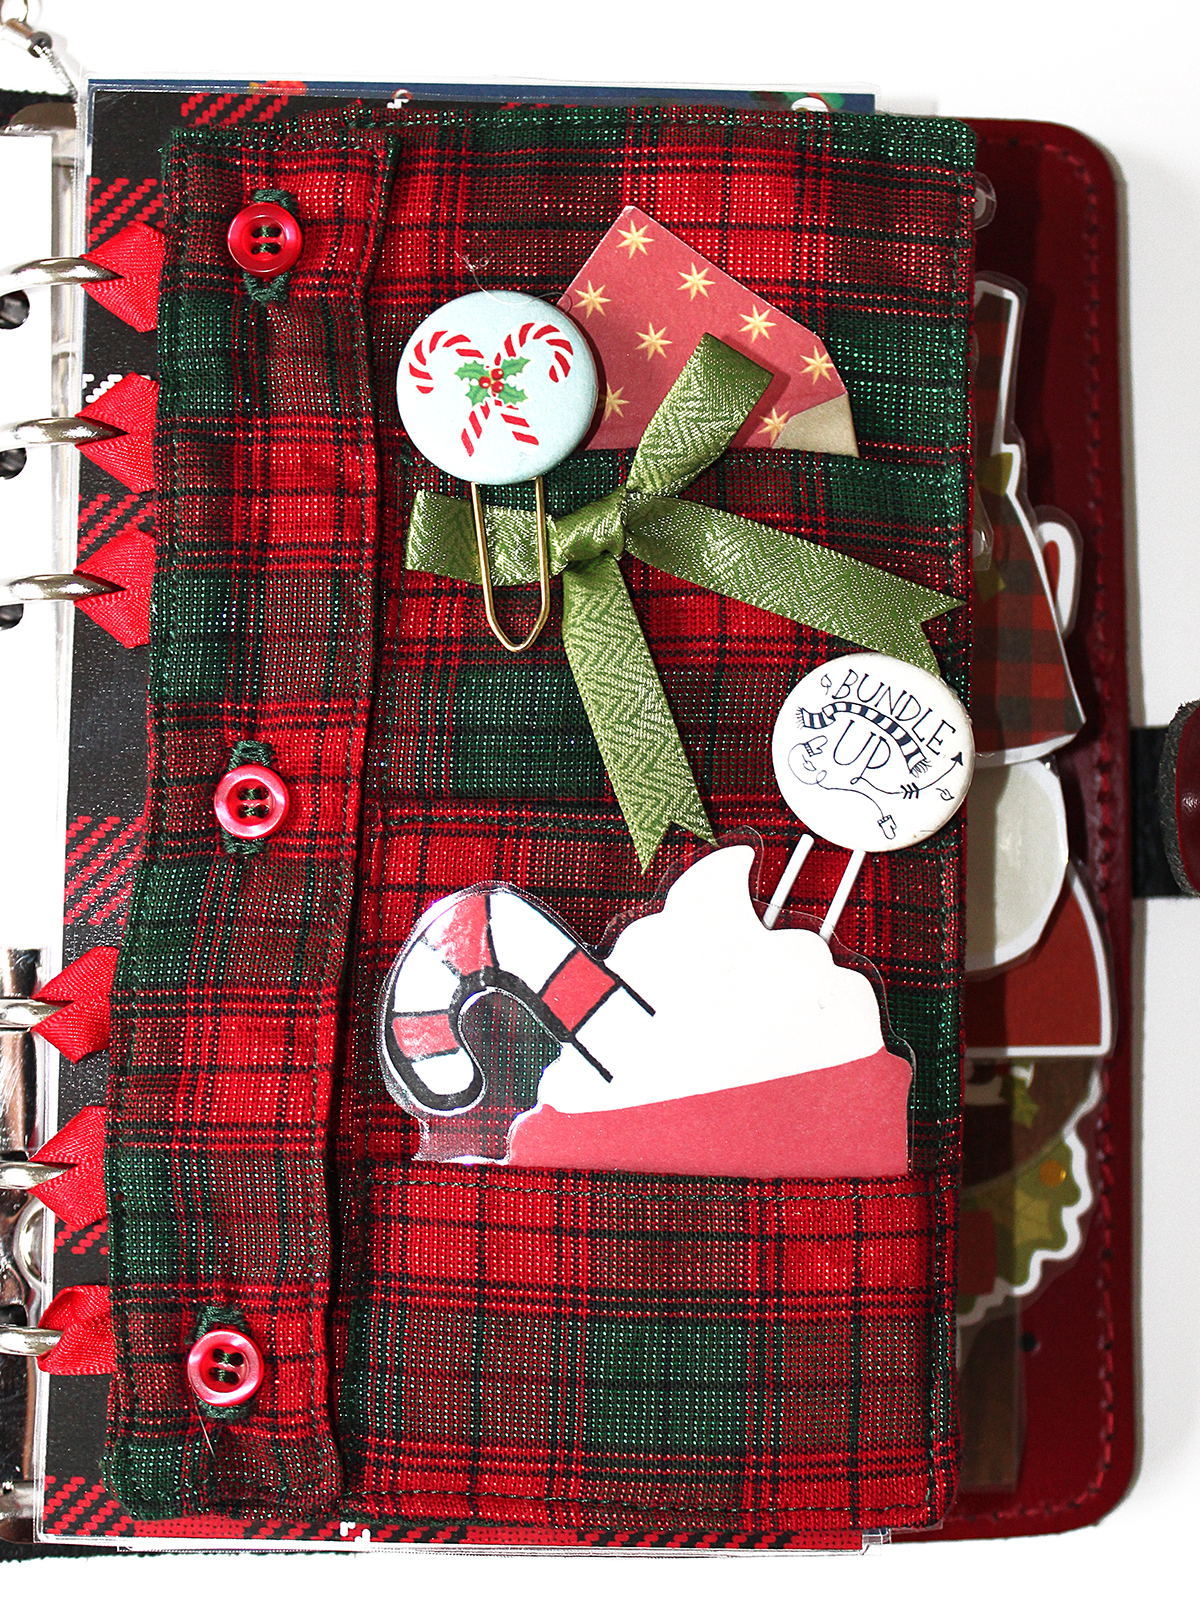
Underneath this I have a planner pocket made by The Sew Unique I bought this at the UKPA Big Meet. I'd seen teaser images for this product previously and made a beeline for them. This one caught my eye straight away. Again it has the pattern I was after, the colours are rich but it also has shimmery fabric. It's beautiful. It has three pockets with the top one being quite deep. I've decorated it with the same products seen on the other side of the dashboard. I've also laminated one of the sticky notes and added that.

  IMG_9396.JPG

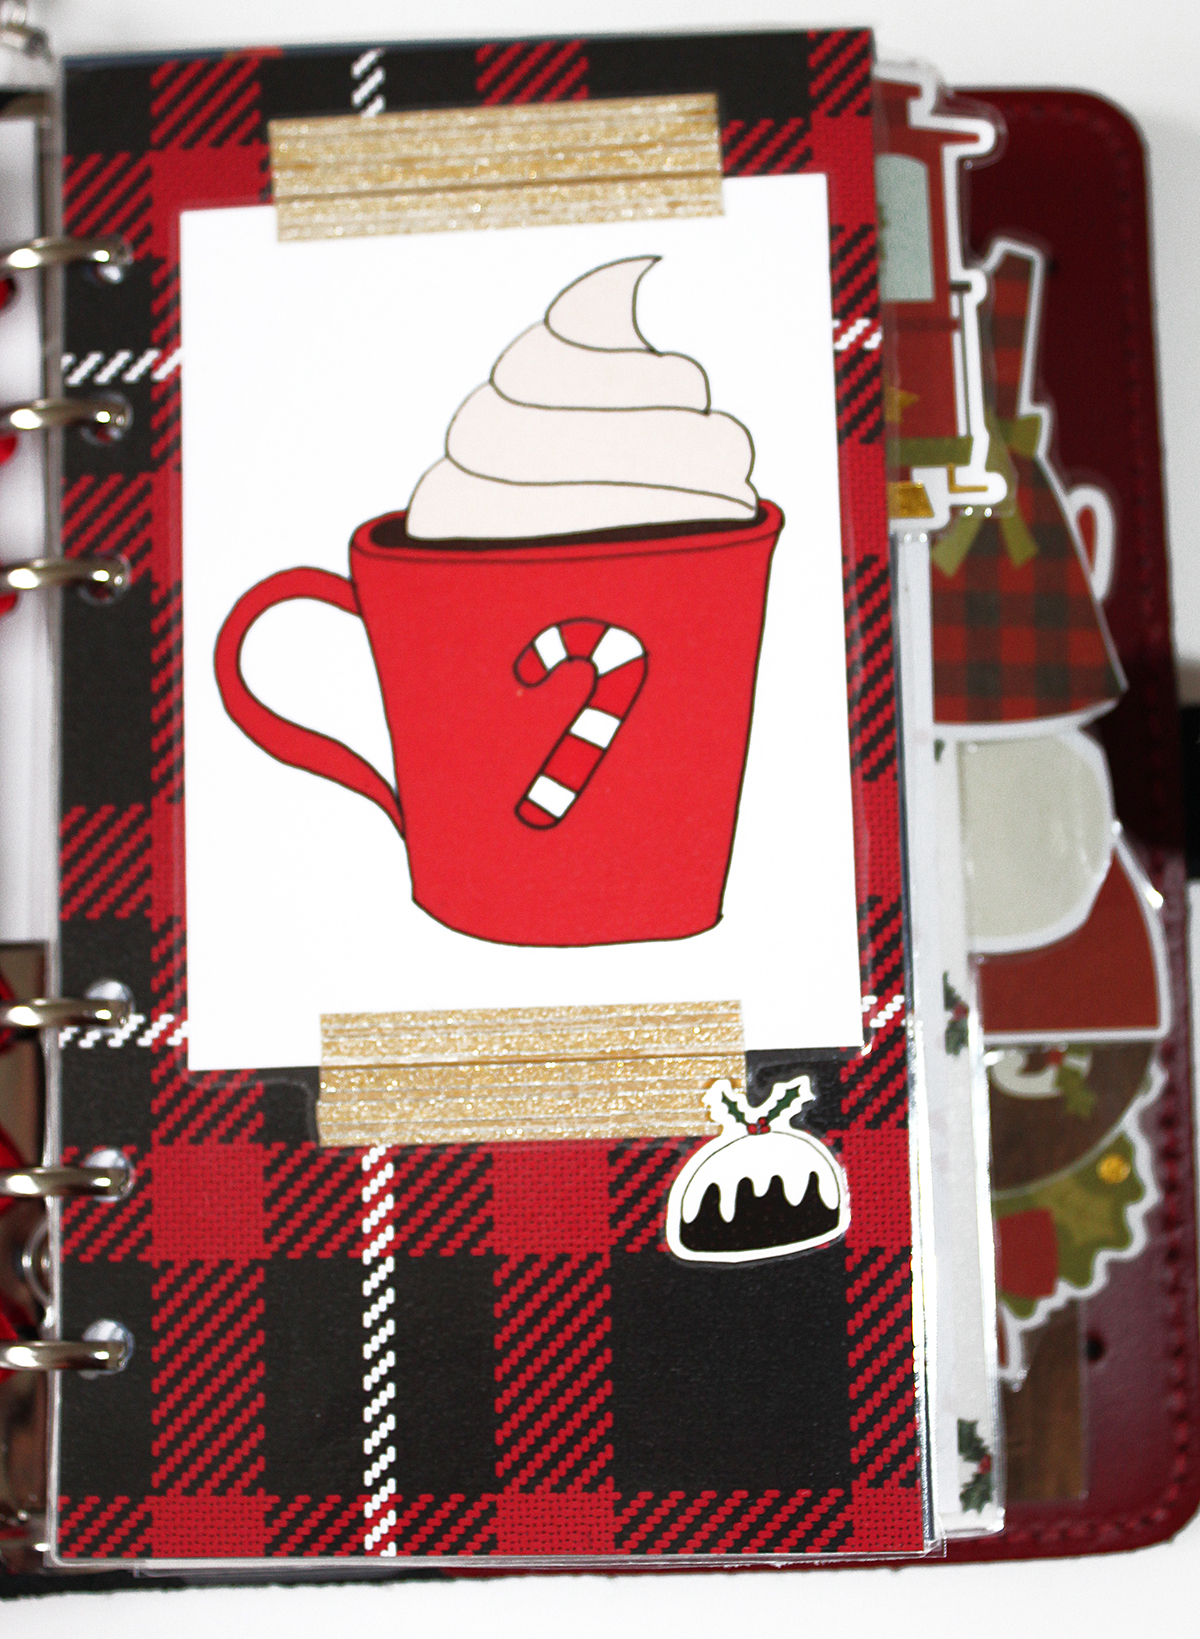
Behind this pocket, I have another dashboard section! This is a section from the 12x12 scrapbook paper cut down to personal size. One of my favourite journal cards from the selection has been added here, the cup. This is held down with gold washi from my shop and there's a little Christmas pudding sticker from this months box. Behind this I have a few more bits before you get into the planner. Another laminated journal card ( I can't get enough of them!) and the list pad paper. I've cut this down to fit and punched it. It'll be used as a quick notes section.
  IMG_9400.JPG

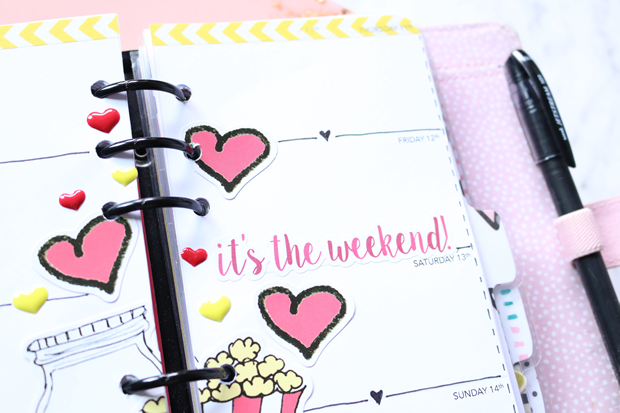
Onto the nitty gritty of the planner. I have been meaning to make my own Christmas Planner inserts but it hasn't happened. It's been a busy month with lots of changes, I've decided to stick to a sticker kit. To be released soon ;) But I needed planner inserts! I do prefer using other people's work, perhaps it's because I spend SO much time looking at my own work. I knew Anna had inserts on her Etsy shop for a whole range of things. I'd been eyeing up the Christmas inserts last year and decided this year, I needed them. 
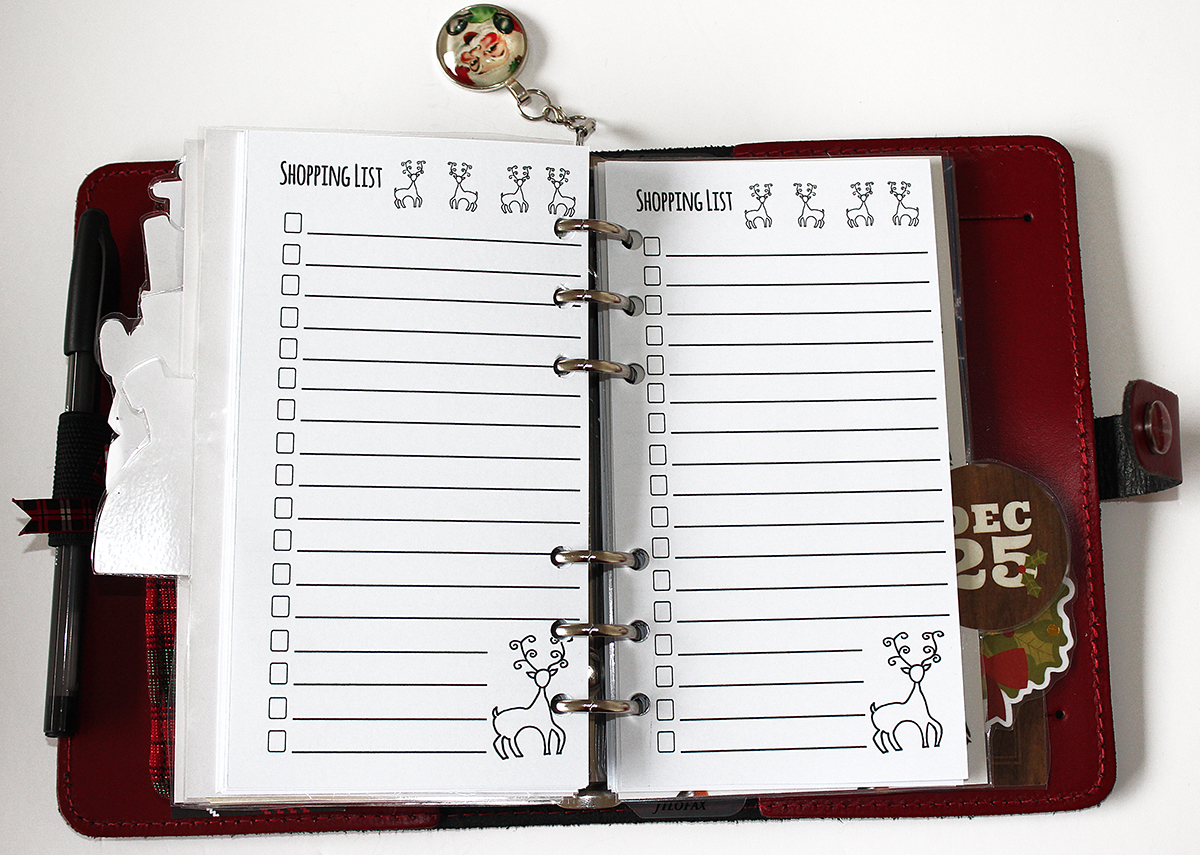
You get loads for your money! You can setup your entire planner! There's two designs to choose from, a Gingerbread Man or a Deer. I decided to go for the Deer as it matched this planner setup. It is a download, as mentioned I make my own planner inserts so a download works well for me.
  img_9407

img_9408

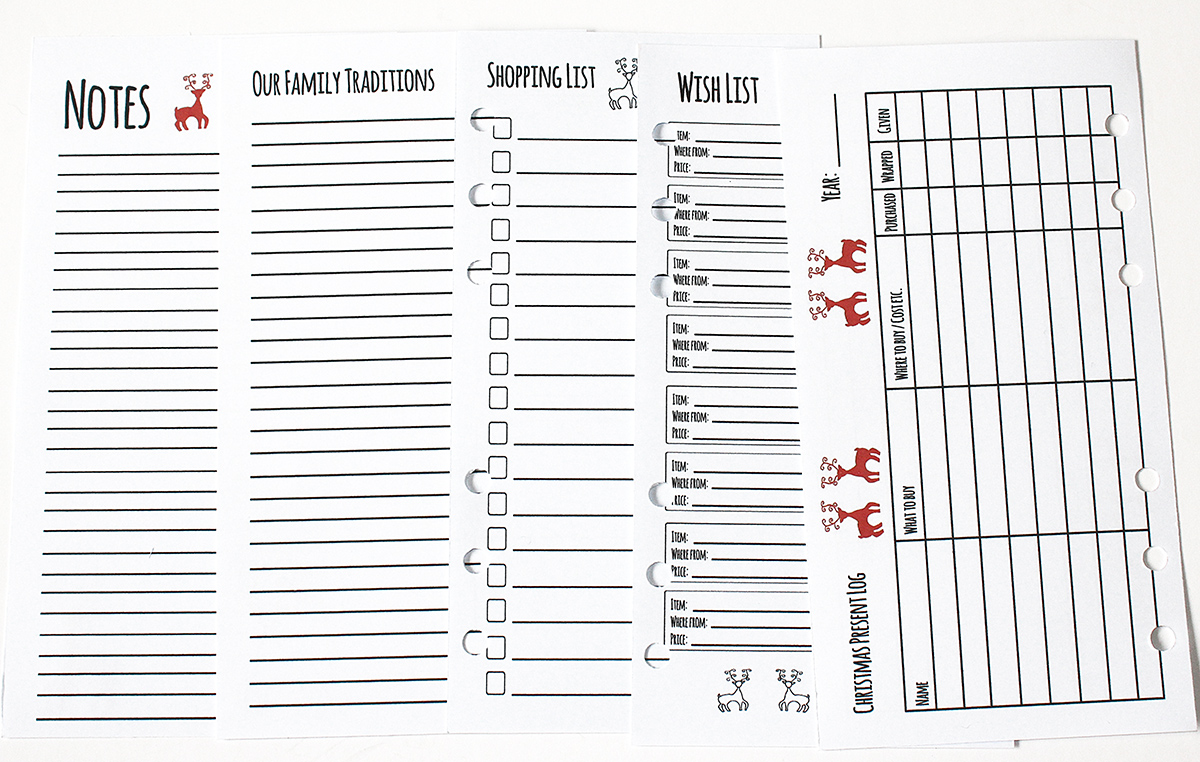
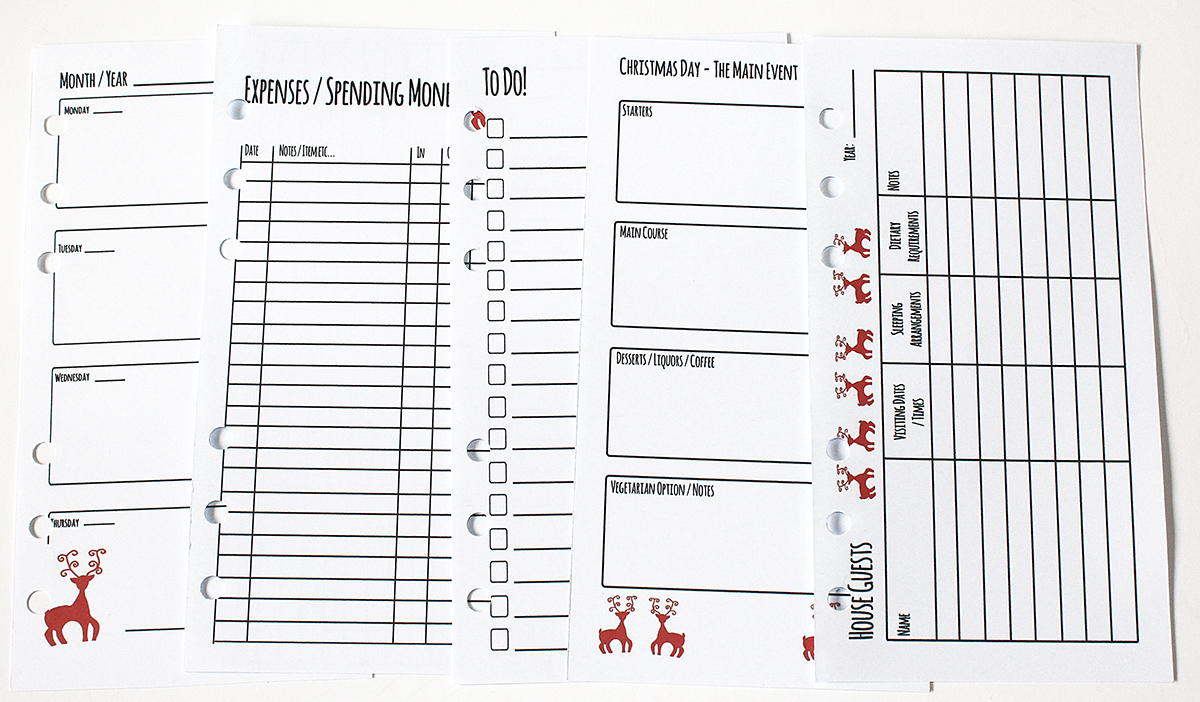
In the inserts pack you get (description taken from listing): To Do Check list Shopping checklist Spending money / expenses tracker Recipe pages Notes paper Guests Tracker - keep track of when people are coming, where they are sleeping, what they can eat Gifts received and thank you note tracker Family Traditions Meal Planner sheets Diary inserts Christmas present tracker - keep tabs on who you have shopped for and what is left to buy Christmas card tracker Addresses
  IMG_9404.JPG

The last thing to show you from the planner setup are the dividers. These have scrapbook paper from the September Docrafts goody bag. I could have used the 12x12 scrapbook papers but I want to save the rest for TN dividers. The tabs were bought from Mrs Brimbles shop. I've purposely not labelled these. When I've used this method before, I find that I start to recognise the ephemera for the section included. I love how they've turned out, so festive!

  img_9412

This is what I have left over from the planner setup. All of these items will either be used in the planner as I start using it or I will use it in my creative journalling.
  img_9410

So that's what I've done with this months box so far and my Christmas planner setup!

 Thanks for stopping by, Kelly xxx

Friday, 16 September 2016

Planner Inserts from Dodo Pad

I was sent some inserts from the lovely people at Dodo Pad to share with you guys so here we are! Check them out and the other paper products and planners they do here:

https://www.dodopad.com/


PLEASE NOTE: I was given this / these product(s) in exchange for my honest review and opinion, the fact that I was given these does not alter my opinion in anyway. This review is my own personal opionion on the product / company, given in good faith and has not be sponsored or endorsed. None of the links are affiliate links. Unless otherwise stated, all photography is my own.

Thursday, 16 June 2016

Planner Page Decoration


Hello planner friends! I'm back again with another personal planner layout featuring the super lovely Pebbles stickers from the May Brimbles Box.


The Front Porch stickers are perfect for a Spring-themed layout. I love the natural look of these ones against the wood panelled paper (from my scrap basket) with the bright pop of colour from the washi tape (by MAMBI).


One of the best aspects of washi tape is how you can layer it up to get different effects. The transparency of the coloured tape allows the pretty gold dots from the tape in the May box to still shine through, giving it cohesion.


Layering your stickers on top of one another, and across multiple pages also helps to build a cohesive design.

If you'd like to see how this layout came together, feel free to check out my process video below:


As always, you can see more of my layouts on Instagram and on my blog. Until next time, happy planning!

Friday, 15 January 2016

Monday, 9 November 2015

Sweet, Vintage And Organised. 2016 I'm ready!

Hello, Its Charlie from seasaltandpaper.com! I don't know about you, but now that Halloween is over and Christmas is only around the corner I'm thinking about my planner set up for 2016. I've decided on using one planner, yes you read that correctly, one planner only for 2016. Next year I'm using a faux dori with a vintage feel and my September stationery Brimbles Box contained everything I needed to get it all setup. Don't you just love it when you revisit your stash and you realise you have everything you could possibly need!?

{seasaltandpaper.com}{seasaltandpaper.com}

My faux dori fits cahier size inserts and luckily this 2016 diary which I picked up in TXMaxx fits perfectly inside along with two Moleskin notebooks.

{seasaltandpaper.com}

I will more than likely want to take the diary out and chuck into my bag without the notebooks so the first thing I needed to make was a pocket in the back to hold some spare sticky notes and notepaper. The paper pack which came in the September box is so pretty I couldn't decide which print to use - in the end I went with the floral paper.

 {seasaltandpaper.com}{seasaltandpaper.com}{seasaltandpaper.com}

I love how cute the tin pins are, again so fitting considering my theme and super easy to turn into paper clips. Here I've simply peeled them off the card and used the plastic backing to cover the sticky pad behind.

{seasaltandpaper.com}{seasaltandpaper.com}{seasaltandpaper.com}{seasaltandpaper.com}

My notebooks got a quick spruce with some of the stickers from the box. The rest I've kept back to use for my weekly page decoration.

 {seasaltandpaper.com}

I made a page marker by laminating one of the journaling cards and added a yarn tassel - because I'm still very much obsessed with adding a tassel to everything!

 {seasaltandpaper.com}

I laminated a smaller one too and made it into a washi on-the-go card. The geometric and floral mix is just so pretty and matches the diary perfectly.

 {seasaltandpaper.com}{seasaltandpaper.com}

The cute vintage pen is the icing on the cake and finished off my decorating spree nicely. Dare I say it but I may be ready to go!


{seasaltandpaper.com}

There are so many things I haven't got around to using yet, September's box was filled with so many goodies! It will all go back in my stash ready for when inspiration hits me. I love the stationery Brimbles box it really does leave it open for you to decide what to make from it. Who knew that I'd be in a vintage kind of mood in December!? {seasaltandpaper.com}