For the month of October, I received this amazing Brimbles Box (Personal Ring Planner) and instantly knew that I would be using the majority of these things for a Halloween mini-album instead of in my planner!
I found this tiny 4x4 album and page protectors by DCWV in the clearance section of JoAnn's Craft Store here in the U.S. and fell in love with the size! Even though some of the Project Life cards are larger than the album, I really wanted to use the entire package of Halloween Project Life cards in it... ALL 40 of them!!!
I decided to keep decorations to a minimum since I don't have my pictures to put on the pages/cards yet... I used the 2 washi tape rolls and the Crate Paper "After Dark" puffy stickers that came in my Brimbles Box; I also colored and cut out a few stamped images (from The Greeting Farm).
Here is video of a quick flip through...
(I apologize now for the bad lighting! I recorded at night so the video would be quiet forgetting that I can add music to hide the noise, lol!)
Here are some thumbnail pics of the pages in case you cannot view the video...
And YES, I did manage to use all 40 project life cards!
Except for the 3 little scraps that you can see in the background, lol!
Oh, and I still used the other items to decorate my planner for October/Halloween too :)
* * *
I hope you enjoyed seeing my little mini-album and that it inspires you to get creative with your crafty items no matter what they were initially intended for!!!
Following on from my video on Friday regarding the Paperchase Blogger Event, I thought I would share with you the items that were in my goodie bag and also the items that I purchased on the day.
For more information about Paperchase please visit: http://www.paperchase.co.uk/
PLEASE NOTE: I was given this / these product(s) in exchange for my honest review and opinion, the fact that I was given these does not alter my opinion in anyway. This review is my own personal opionion on the product / company, given in good faith and has not be sponsored or endorsed. None of the links are affiliate links. Unless otherwise stated, all photography is my own.
On Wednesday I was very lucky to be invited to attend the Paperchase Spring Summer 2016 Colelction Blogger Event. The event was to showcase the new collection releases planned for next year so you can imagine how excited I was to attend.
The event was held at the Paperchase flagship store which is located in Tottenham Court Road, London. If you have never been and you are in London you 100% have to make a visit. I was amazed when I first went and still am every time I go. The store is huge and is over three floors. The best thing about this store is that you will find the entire collection whereas in some smaller stores they only have a few pieces from each range. I never come away empty handed, it is impossible not to! Everything just appeals to this stationery lover. Not only do they stock their own range of planners but they also have a sizeable Filofax range too!
Of course in true Anna style I vlogged the event...
On arrival at Paperchase we were greeted by their friendly team who showed us to an exclusive area of the store where their new collections were displayed for us to fest our eyes on and even touch which sounds a little, errrm, pervy but I am sure most stationery lovers will agree that you can only truly appreciate paper products when you touch them!
We had a presentation from the design team who talked us through each range, the concept behind it and how they come up with the design etc. I am particularly fascinated by this element and how companies follow trends or create them!
There was one collection in particular that really stood out for me and that was the 'get organised' range which has a sophisticated feel to it. A geometric wooden effect with rose gold or copper accents. I am pleased to report that this collection also features a ring bound planner in a wood effect with features similar to a Filofax Domino.
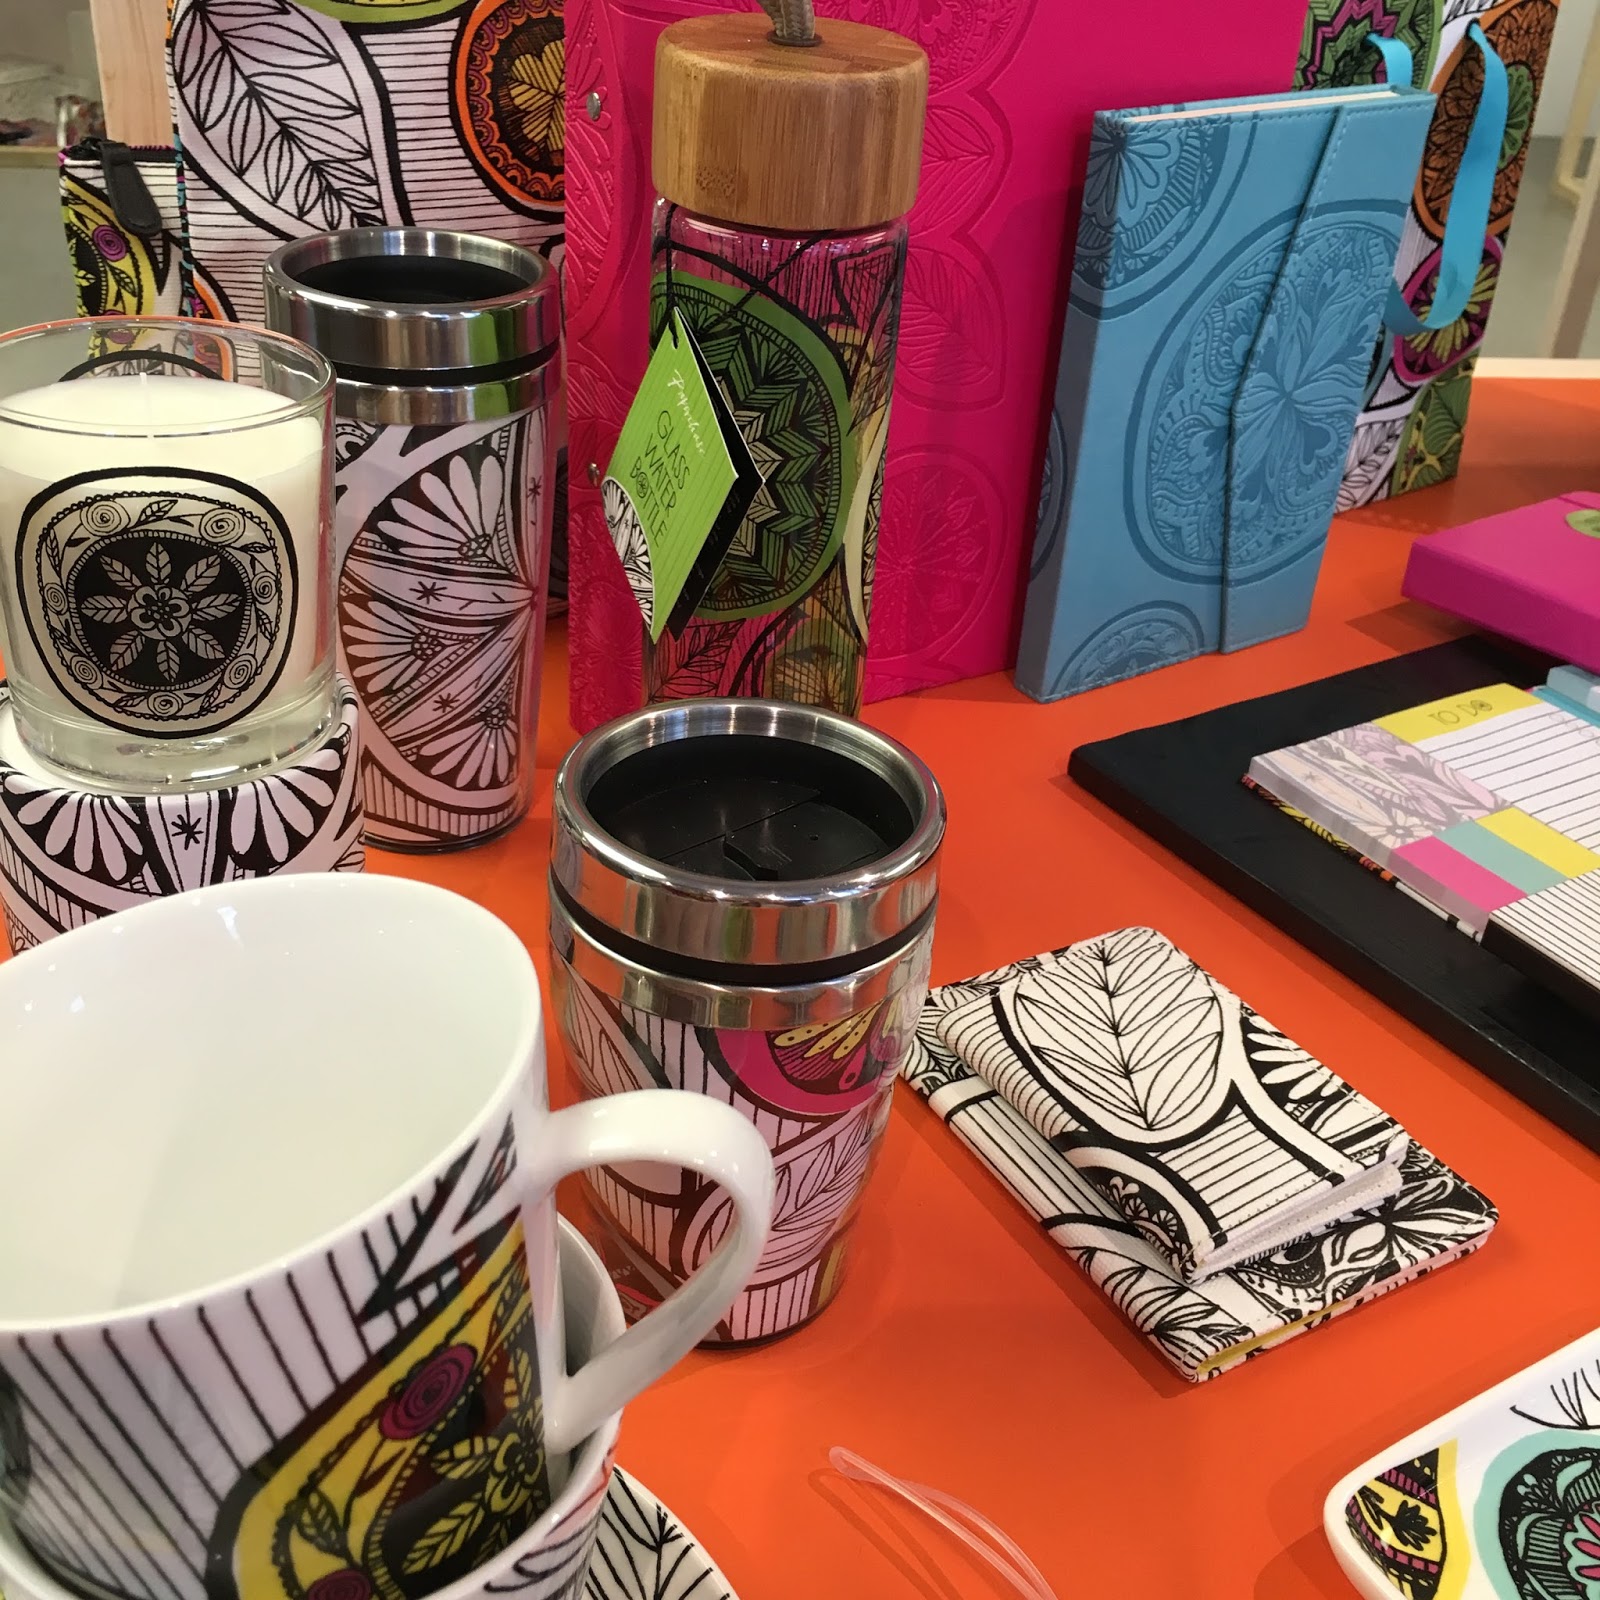
I also really liked the 'Parkano' collection with it's classic and clean black and white detailing punctuated with bold colours. To me this reminded me of the 'zentangles' or adult colouring books that have taken the World by storm in 2015. I know that first and foremost I am a stationery blogger but I do love a mug or two and thought that the travel mugs / cups and bottles in this collection were particularly beautiful.
I am not normally one for animal prints but I did find myself drawn to the 'Serengeti' collection, in particular to the stapler with a Zebra on the top which is so much fun! For me I think it is the black and white and the chevron look which really appealed.
And my last favourite from the collections we saw was the 'Mother's Day' collection encompassing beautiful contemporary flower designs. For me it was the right mix of chintzy-ness with a more classic feel. Really hard to describe but very pretty.
There were other collections available for us to view but they didn't take my fancy as much as these ones I have show you did but then not everything has to appeal to everyone! Don't forget to check out Paperchase on their social media accounts as they will share more of their collections on there for sure.
I have never been to a blogger event before so I wasn't really sure what to expect but one thing for sure is that Paperchase were really friendly to us and made us feel very welcome. It wasn't just a case of come on in and look at our stuff but they made it into a really fun event.
We were taken into the craft area of the store and on the table were various colours of Christmas trees on display. We were allowed to choose a colour of tree that appealed to us and we were then given a £25 voucher to spend on whatever we wanted to in the store to decorate our trees with. Whaaaaaat! Initially I did think about making it a stationery themed tree and I thought about hanging pens and paper clips on it but then I thought maybe I should be more 'Christmassy'! I had such a hard time committing to what to use. Everything was fabulous and it took me ages to decide on what to use. I didn't think I had commitment issues until this challenge lol! I settled in the end because I came accross a jumbo glittery carrot! I just had to have it on my tree and thought it would make a fab tree topper. I decided to go for a contrasty neon reindeer theme. It sounds 'interesting' doesn't it. I actually really liked how it turned out. I used ribbons that I found in their gift wrap section and craft section, reindeer ornaments from the Christmas section and also paper chains which I found in the pary wares section. Yes I went all round the store with my blue basket. I told you, I struggled to commit. It was a super fun challenege and it was really interesting to see everyones trees and the ideas and concepts that they came up with.
After the Christmas tree challenge we had a really fun craft workshop on how to make pin wheel decorations. At their Tottenham Court Road store they run craft workshops so it was really interesting for us to see how this may work. We made pinwheels which was really fun if a little tricky to begin with!
All in all I had a fantastic three hours which went by so fast. Paperchase were so lovely and it was truly fantastic and they made us feel very welcome indeed. If they asked me to attend again next year I would be there in a shot.
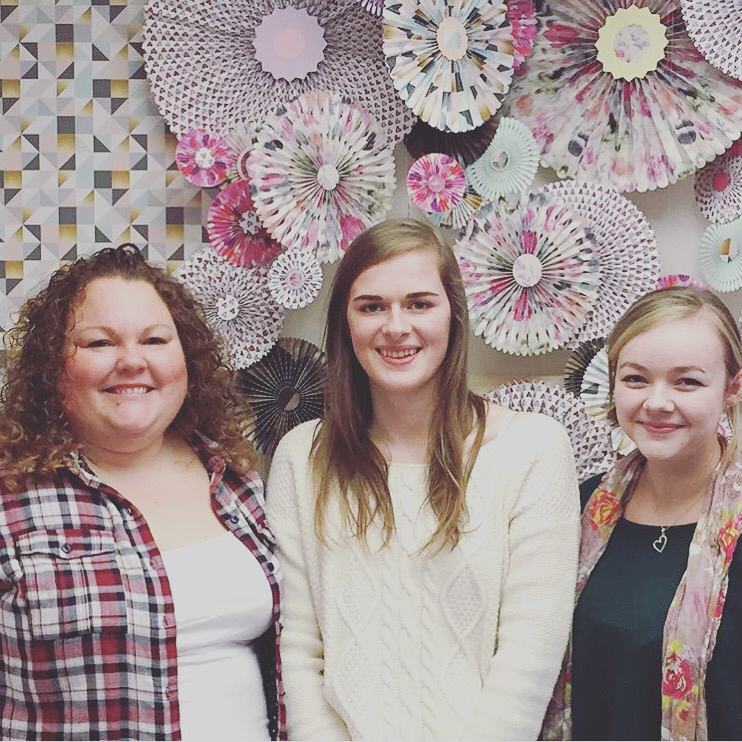
Oh did I mention that another highlight for me was getting to meet Daisy (MyGreenCow) and Chloe Murray. Both of these ladies I have chatted to for a while now on various social media platforms and it was lovely to finally meet them in the flesh:
I hope you enjoyed hearing about my day and seeing the new collections. Which is your favourite? I will be back with another post / video to share my haul from the day. I was very lucky to be given a goodie bag to take away with me plus I may have made a couple of purchases whilst I was there. I mean, seriously, did you expect me not to!
PLEASE NOTE: I was given this / these product(s) in exchange for my
honest review and opinion, the fact that I was given these does not
alter my opinion in anyway. This review is my own personal opionion on
the product / company, given in good faith and has not be sponsored or
endorsed. None of the links are affiliate links. Unless otherwise
stated, all photography is my own.
For October I received the Happy Mail Brimbles box. The happy mail box is described as being "solely aimed at providing you with the goodies to write / send to someone else. Some of the items that you could receive are: Post cards, note cards, greetings cards, paper, envelopes, letter writing sets, tags, ribbon, gift wrap, stickers, washi tape, pens, paper clips, anything that you would use in writing to someone or sending them a gift." As you can see from the image above it had both autumnal and Halloween themes. At the moment I am getting back into snail mail. I have kept my penpal list intentionally short as I'm building my collection of stationery and ephemera especially for it. I really want to go all out as I used to years ago.
What I wanted to show in today's post, however, is what can be achieved when you don't have an endless supply of stickers, washi etc. If you have never received a happy mail box and are new to snail mail then you can start from your very first box and get creative in your own unique way, putting your individual stamp on each item. This gives your mail the personal touch.
I use my sewing machine for a lot of projects, so it seemed fitting to integrate this into my mail. If you don't have one then you can always sew by hand. I stuck down one of the fabric sticky labels onto the brown envelope, both of which are included in the box and, picking a complementary colour thread, I sewed a couple of lines of straight stitches.
I then used some washi I had bought from Mrs Brimbles shop to decorate the rest of the envelope. The matching letter paper had beautiful narrow lines for me to write. In fact, one thing about this months box is that Anna included paper with both narrow and wide lines.
Now, if you subscribe to this box on a regular basis you will find you have a nice little collection of items to use together for your snail mail. On this occasion, as I had received a happy mail box previously, I had left over a couple of bits I could use. Namely a sticky address label. The quote found on this particular envelope didn't apply to my penpal I'm writing to, and it also blocked the space for an address. So the sticky label came in handy. Again, I used a little washi from Anna's shop.
Next, I had another penpal to write to so I decided to use the other gorgeous paper with an autumnal theme. This was the paper with the wide lines. It didn't have complementary envelopes, which was good as I could use a plain white one and jazz it up with the little supplies I had. Just a couple of stickers which, admit it we all have, and some washi transforms a plain old envelope!
Recognise the stamp from the last box?
As you can see with this last letter I completely veered away from autumnal colours! I don't know, I just struggled with the whole autumnal colour scheme this year. But that's the beauty of creativity. There are no rules! You are free to explore and that's what I have done and will do with each box I get.
I really hope you enjoy this post and that it encourages you to get creative with what you have in your own personal style.
Items I used, other than from this months box were:
"With love" stamp: Hobbycraft
Bunny sticker: The Idea Owl
"Hello There" Sticker: T K Maxx Stationery Section.
And the "For You" stamp was given to me by a penpal.
As you may well know, last year I did a Christmas organisation series whereby I took a different subject each week in October and went through how I planned and also shared some free printable inserts with you. I have had numerous requests for a planning series for 2015 and I really had no idea how I could add to this. I kind of felt that I had imparted everything that I do with you because my planning hasn't really changed so I kind of said no. Then the other day some inspiration hit me. I will be doing a different take on my videos this year. They will be much more informal, more day in the life stuff so you can follow along as I plan for our Christmas.
So here we are with the first installment for 2015.
If you would like to check out my video from 2013 just click here.
Debbie here from Craftin' Chaos I hope this post finds you all ready to gear up for the holidays. Holidays are pretty stressful to me and I am sure they are for most people. So planning ahead for all of the tasks and shopping that needs to be done can help eliminate alot of that stress. I am going to share some planning items that help me make it a much less stressful time for me. I will also share a few of my favorite products that I use and how these items can help you in everyday life not just to plan for an upcoming holiday.
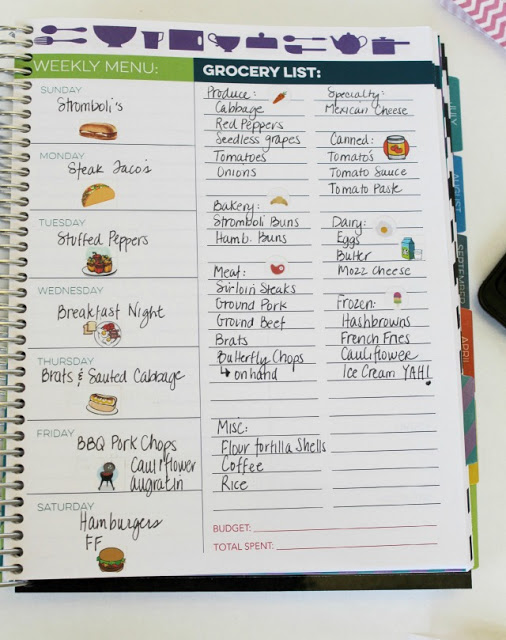
First off since Thanksgiving is coming up I want to share menu planning with you. This is something I do all the time not just for holidays and it makes my life my easier and my husband loves to see what is on the menu so I work on about two weeks minimum at a time. I first plan what I am having for the two weeks and then looking day to day at the items on the menu plan my shopping list. This makes it less overwhelming if you just concentrate on each day as a whole.
I typically make a penciled in categories of how my items are in the store. Such as "Dairy" "Produce" "Meat" etc. then each day I look at what I plan to have and start penciling in what items I need to make that meal. We are simple folk and we like simple foods so it is pretty easy for me. Plus I am one of those cooks that throws this and that in and it works! I am magical in the kitchen ha ha! I am an odd bird probably cause I do love to cook and brace yourself but I do love to grocery shop. I even menu plan and shop for my grown daughter to help since her life is so busy.
I think the key to a good cook is loving to cook and I do so it just seems to go pretty easy. Although I seem to have trouble with the simplest things such as making macaroni and cheese. I have boiled it over 3 times! I blame it on my new stove. I have not grown to love it still.
So here is a look at my Limelife planner that I had a "menu planning" section added on.
Another view from a past menu planning session
Once I have planned my 2 weeks of meals I transfer the info to a dry erase white board I keep in the kitchen and so hubs can see what yummies he has coming up! He loves this! (This is an old pic as you can see its NOT April! :)
So you can see this can be a handy tool even if you would like to keep track of what you spend you can mark it at the bottom of the page each week.
Then I also have a Task Pad and it has M-F on it and for the holidays I used it a bit differently which you can see but it worked for the tasks I had to do because i was using it for a span of more than a week. But you can see how this pad can be a handy dandy tool for each week to write down your tasks to do and what day you will accomplish it or if you did.
Here is a start to my holiday decorating for the week of Christmas. It is not finished but you can see the cuteness starting. I printed off some bucket list stickers to put on for each day and I also utilized the stickers from Dec Brimbles box as well as that beautiful planner charm and sticky notes.
Now again I wanted to share my planner layout. This is just one of the planners I use it is a Limelife planner. I love this layout especially for me cause I have 6 items I can mark along the left side to designate for specific task, like my shop, home, to do and more. This would work wonders for a family because unless you have more than 6 in your family each person can have their name in the box and you can have a whole week that you can write across for things to do or specifically for that one person. For a busy mother that is a great asset. If I had children at home this would be a handy tool. I have the inserts for my A5 and I also have the spiral bound in the same layout. They offer several layouts but this one I think is the best for someone that either has family to plan throughout the week for or a shop and a busy life like mine.
So basically this is a post about how not only is planning fun for decorating and getting your creativity in but you can also use it to your advantage and help to keep your meal planning, holiday purchasing so much easier. If you are handy you can create a holiday shopping page, black friday pages etc. I hope you found this information somewhat helpful
Next week is looking very bright. Rainbow Brite he he he he!! You know I love her because she appears so much in my planner and I also still have my doll and sprite from when I was a kid in the 80s. I love that they are bringing her back too!
Products Used
Planner:Websters Pages Color Crush Planner in Yellow with matching folio Planner Inserts: Websters Pages week on two pages Washi Tape: Blue with white clouds from Doodlebug Designs. Yellow with stars is from Cath Kidston and the red is unknown. Pen: Target $1 spot Paperclips: Made by Craftin Chaos on Etsy. Stickers: made for me by a friend. Little strip stickers are from Handcrafted by Sheree on Etsy.